
Screen guide · Web app
Manage Siblings
Group the children of one family. EDII proposes sibling groups from parent names and phone numbers, you confirm or reject them or add a group by hand, and you set each child's sibling position.
यह पेज अंग्रेज़ी में है। कुछ समझ न आए तो ।
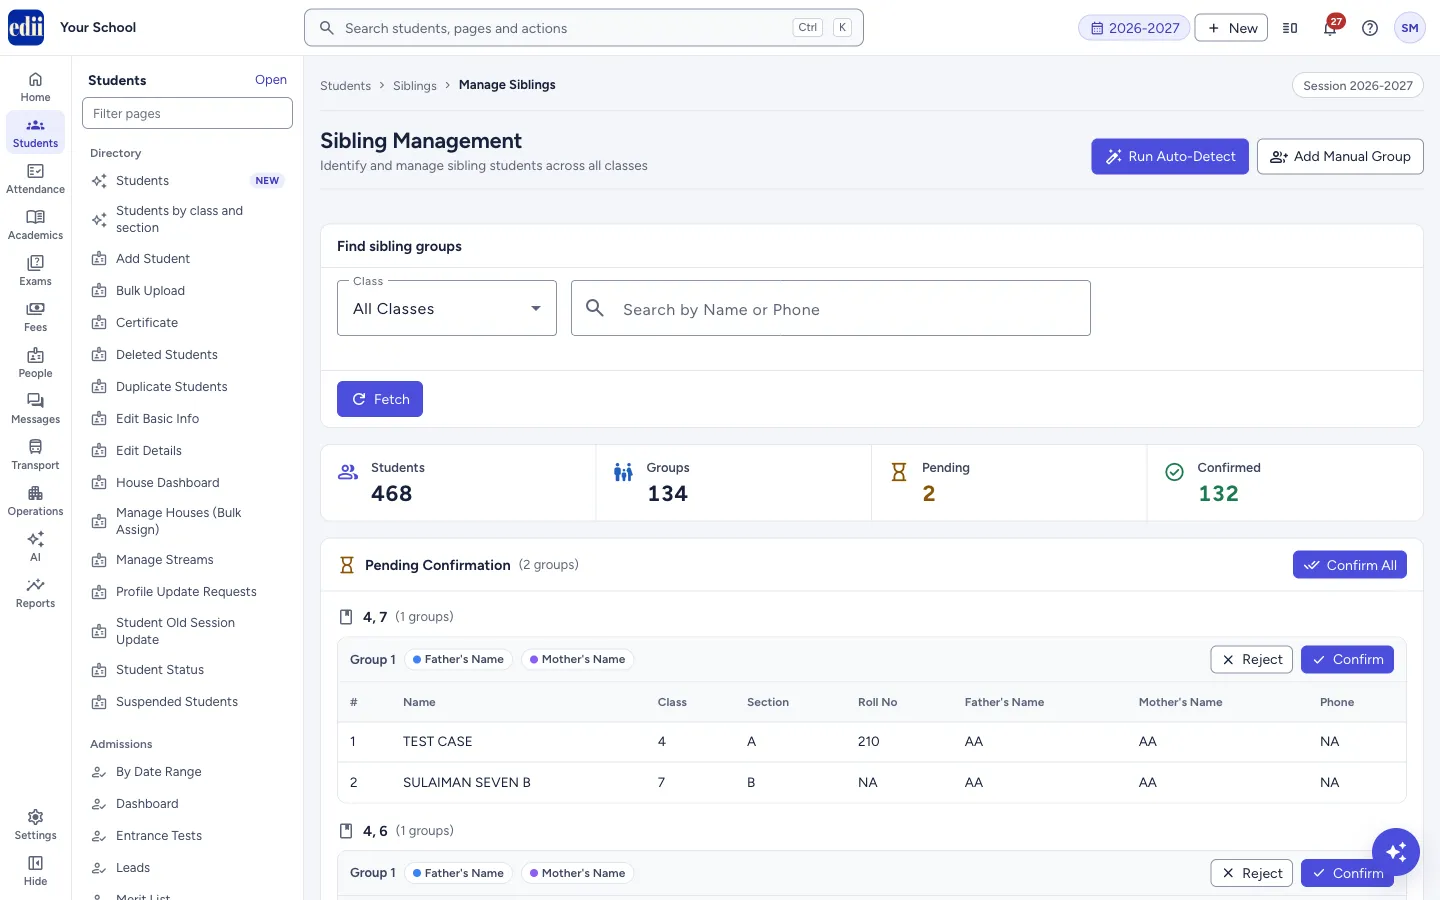
The screen is headed Sibling Management. It shows the sibling groups of your school, in two parts: Pending Confirmation (groups EDII proposed that need your decision) and Confirmed Siblings (groups you have accepted or added yourself). The boxes at the top count the Students in groups, the Groups, and how many are Pending and Confirmed.
The groups load when you open the page. Run Auto-Detect looks for new groups, and Add Manual Group lets you make one yourself. Only a confirmed group has Sibling Position choices.
Save Positions changes the student records: each child gets the category Sibling 1, Sibling 2 and so on, in place of any earlier sibling category. This is what sibling fee concessions can be based on.
Who uses it and when
Section titled “Who uses it and when”The office, after admissions, and before sibling fee concessions are applied.
Before you start
Section titled “Before you start”- Parent names and phone numbers should be correct in the student records, because auto-detect compares them.
Where to find it
Section titled “Where to find it”- In school.edii.in: Students › Siblings › Manage Siblings
- Or press Ctrl K (⌘ K on a Mac) and type Manage Siblings.
- Address:
school.edii.in/view/sibling-management - Who can see it: Staff whose role includes Students or Attendance access. Shown only when your school uses Student in EDII. If it is missing from your menu, ask your school admin.
 Open a bigger pictureतस्वीर बड़ी करें
Step by step
Section titled “Step by step”1. See the groups
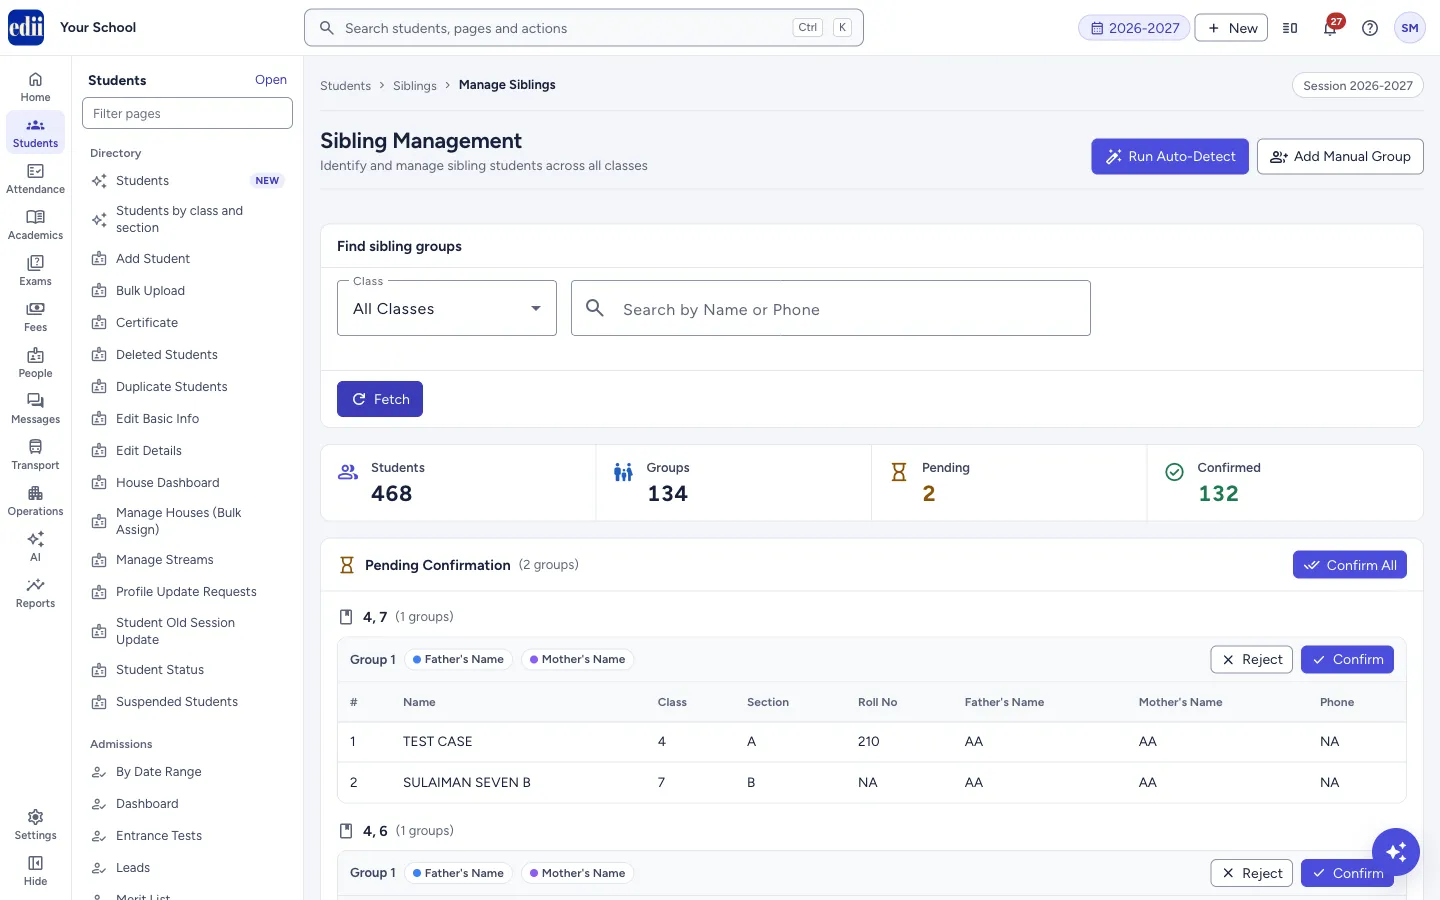
Section titled “1. See the groups”The groups load when you open the page. In Class, choose one class to show only the groups that have a student of that class, or leave All Classes. Type in Search by Name or Phone to keep only groups where a child’s name, father’s name, mother’s name or phone matches. Select Fetch to load the groups from the school records again.
 Open a bigger pictureतस्वीर बड़ी करें
2. Find new groups
Section titled “2. Find new groups”Select Run Auto-Detect. EDII compares father’s name, mother’s name and phone numbers. It shows “N new sibling group(s) identified”, or “No new sibling groups found”. New groups are listed under Pending Confirmation, each with the reason it was proposed, such as Father’s Name, Mother’s Name or Phone Number.
3. Confirm or reject a proposed group
Section titled “3. Confirm or reject a proposed group”Read each pending group. Families with similar names can be different families. Select Confirm if the children are siblings, or Reject if they are not. The messages “Sibling group confirmed” and “Sibling group rejected” show.
Confirm All confirms every pending group that is in the list on the screen, after you agree in the box “Confirm all N pending groups?”. Use the class filter or search first if you want to confirm only some.
4. Add a group by hand
Section titled “4. Add a group by hand”Select Add Manual Group. In the window Add Sibling Group Manually, type at least two letters of a name in Search Student and select students from the results. Tick at least two students. The window lists them under Selected Students. Select Create Group.
The message “Sibling group created” shows and the groups are loaded again.
5. Set the positions and save
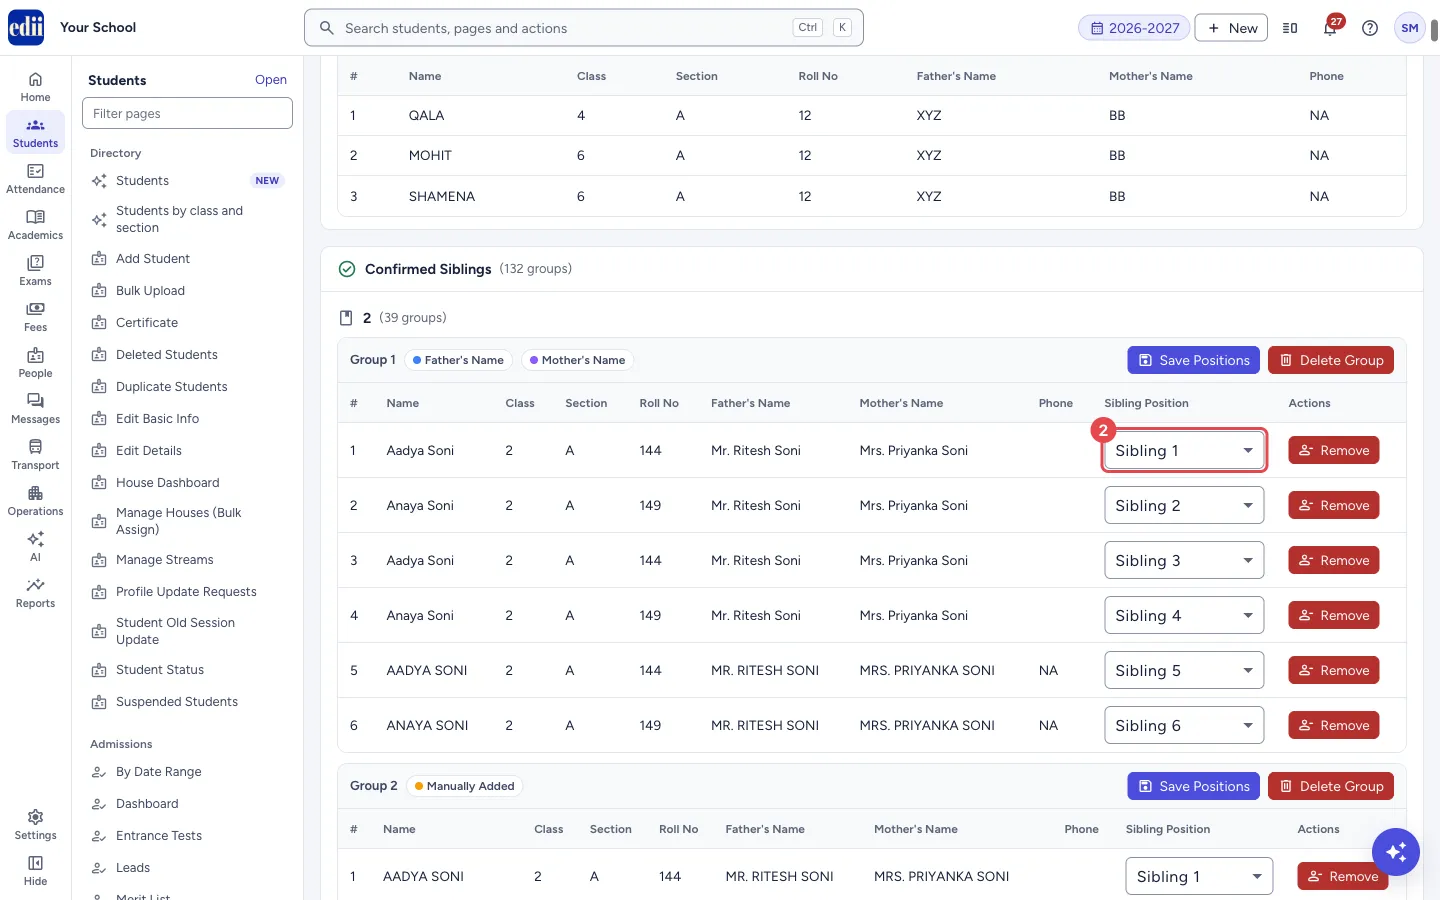
Section titled “5. Set the positions and save”In Confirmed Siblings, each child has a Sibling Position from Sibling 1 to Sibling 20. When no positions are saved yet, EDII fills them in as Sibling 1, 2, 3 and so on, from the highest class to the lowest. Change them if the children are in a different order.
Select Save Positions on the group. The message “Sibling positions saved successfully” shows and the group is marked Positions Saved. If a child has no position, the message “Please assign a position to all members” shows and nothing is saved.
 Open a bigger pictureतस्वीर बड़ी करें
6. Remove a child or delete a group
Section titled “6. Remove a child or delete a group”Remove on a child’s row asks “Remove {name} from this sibling group?” in a box titled Remove Sibling. Delete Group asks “Delete this sibling group permanently?” in a box titled Delete Sibling Group. Select Remove or Delete to go on, or Cancel to stop.
Fields and filters
Section titled “Fields and filters”| Field | What it is | Notes |
|---|---|---|
| Class | Shows only groups that have a student of that class. | Default: All Classes. |
| Search by Name or Phone | Shows only groups where a child’s name, father’s name, mother’s name or phone matches. | Filters at once. Clear empties it. |
| Sibling Position | The order of the child in the family. | Sibling 1 to Sibling 20. Needed for every child before you save. |
| Search Student (manual group) | Finds students by name for a manual group. | Type at least two letters. Shows up to 20 results. |
Buttons
Section titled “Buttons”| Button | What it does | What happens next |
|---|---|---|
| Run Auto-Detect | Looks for new sibling groups from parent names and phone numbers. | New groups appear under Pending Confirmation. The button reads Identifying… while it works. |
| Add Manual Group | Opens the window to make a group by choosing students. | The group is added. Select Fetch if you do not see it. |
| Fetch | Loads the sibling groups again. | The counts and groups refresh. |
| Confirm All | Confirms all the pending groups in the list. | A box asks first. Then “All groups confirmed” shows. |
| Reject | Rejects a proposed group. | The group leaves the list. |
| Confirm | Accepts a proposed group. | The group moves to Confirmed Siblings. |
| Save Positions | Saves each child’s position and sets the matching sibling category on the student. | The group shows Positions Saved. |
| Delete Group | Deletes the whole sibling group. | A box asks first. The group is deleted permanently. |
| Remove | Takes one child out of the group. | A box asks first. |
Columns
Section titled “Columns”| Column | Meaning |
|---|---|
| # | Row number in the group. |
| Name | The student’s name. |
| Class / Section / Roll No | Where the student studies. |
| Father’s Name / Mother’s Name | The parents’ names. |
| Phone | The phone number kept for the student. |
| Sibling Position | Confirmed groups only. The order of the child. |
| Actions | Confirmed groups only. Remove takes the child out of the group. |
After you save
Section titled “After you save”- A confirmed group links the children as siblings. After Save Positions, each child’s sibling category in the student record is the position you chose, in place of any earlier sibling category.
- A rejected group is removed from the pending list.
Good to know
Section titled “Good to know”- Every child needs a position before Save Positions works.
- Positions are only saved when you select Save Positions. The positions filled in for you at the start are not saved until then.
- A manual group needs at least two students.
- Delete Group is permanent. Check the group before you delete it.
- The counts at the top are for the whole school. The filters change only the groups shown.
Messages you may see
Section titled “Messages you may see”| Message | What it means | What to do |
|---|---|---|
| {N} new sibling group(s) identified | Auto-detect found new groups. | Review them under Pending Confirmation. |
| No new sibling groups found | Auto-detect found nothing new. | Add a group by hand if you know of siblings. |
| Sibling group confirmed | The group was accepted. | Set the positions. |
| Sibling group rejected | The group was rejected. | Nothing to do. |
| Sibling group created | A manual group was added. | Set the positions. |
| Please assign a position to all members | A child in the group has no position. | Choose a position for every child, then save. |
| Sibling positions saved successfully | The positions were saved. | Nothing to do. |
| Student removed from group | The child was taken out of the group. | Nothing to do. |
| Sibling group deleted | The group was deleted. | Nothing to do. |
| No sibling groups found. Click “Run Auto-Detect” to identify siblings based on parent names and phone numbers. | The school has no sibling groups yet. | Select Run Auto-Detect. |
| Network error | A request failed. | Check the internet and try again. |
- Run Auto-Detect once after admissions close.
- Check the phone numbers and parent names of a pending group before you confirm it, so unrelated families are not joined.
Stuck? Try this
Section titled “Stuck? Try this”| Problem | Likely cause | What to do |
|---|---|---|
| Two real siblings are not found | Their parent names or phone numbers differ in the records. | Use Add Manual Group, or correct the records and run Auto-Detect again. |
| Two unrelated students are grouped | They share parent names or a phone number. | Reject the pending group, or use Remove on the child in a confirmed group. |
Did this page help?क्या इस पेज से मदद मिली?
Thanks! Glad it helped.धन्यवाद! अच्छा लगा कि काम बन गया।
Sorry about that. Ask in your own words, or write to us.माफ़ कीजिए। अपने शब्दों में पूछें, या हमें लिखें।