
Screen guide · Web app
View Admit Cards
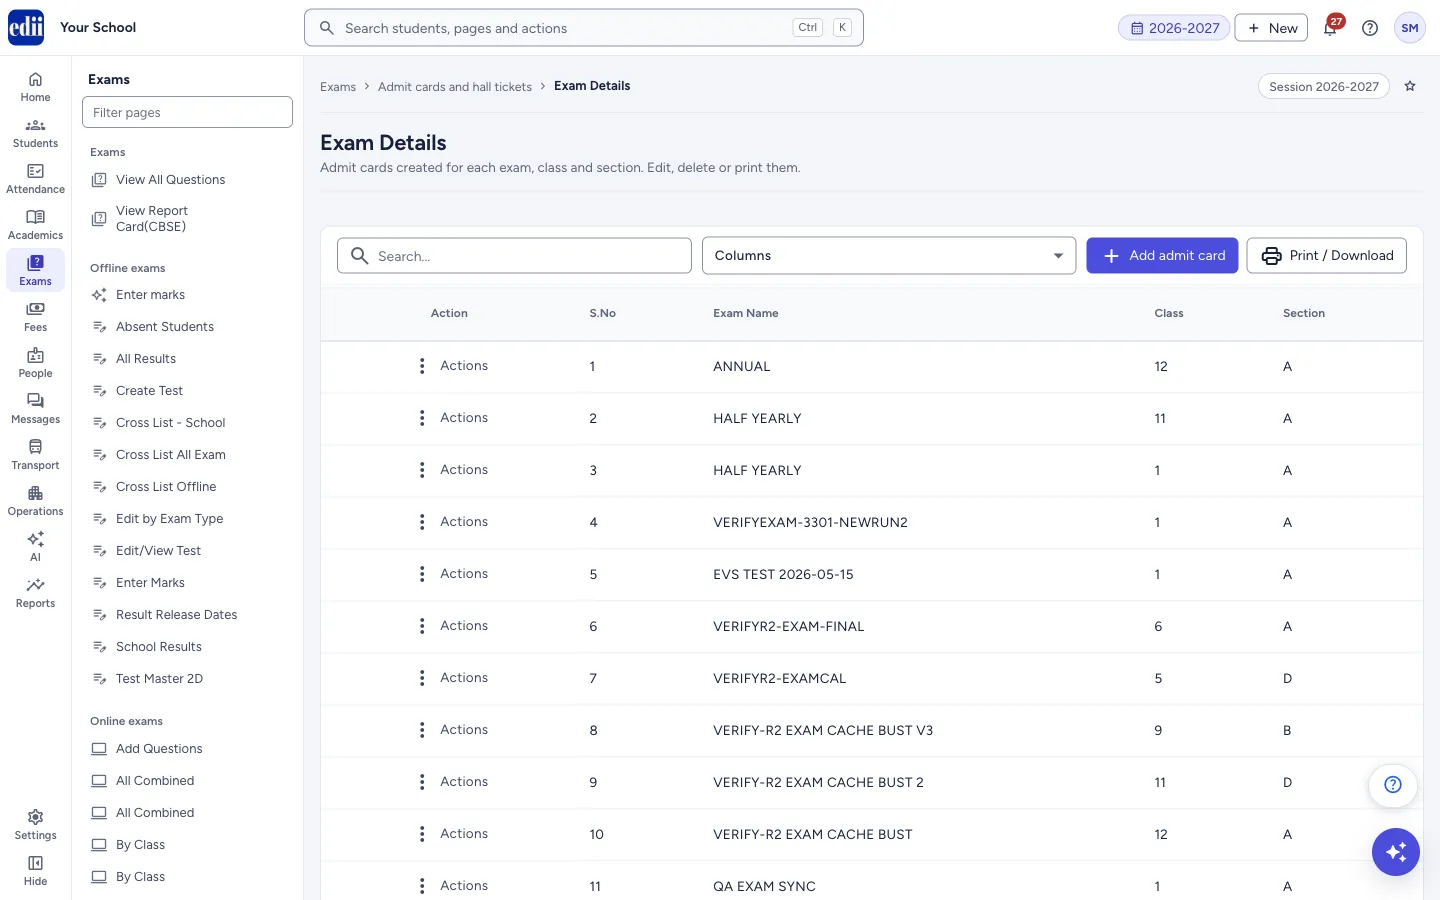
The list of all exam schedules saved for admit cards, one row for each exam, class and section, with Edit, Delete and Print for each.
यह पेज अंग्रेज़ी में है। कुछ समझ न आए तो ।
The screen is headed Exam Details. Each row is one admit card schedule made in Add Admit Card: the Exam Name, the Class and the Section. The list opens by itself; there is nothing to search first.
Use the Actions menu at the start of a row to Edit the schedule, Delete it, or Print the admit cards of that class and section. Use Add admit card to make a new schedule.
Who uses it and when
Section titled “Who uses it and when”The exam in-charge, to check, correct or remove the exam schedules before cards are printed.
Before you start
Section titled “Before you start”- Schedules appear here only after they are saved in Add Admit Card. When there are none, the screen says No admit cards to show and offers the Add admit card button.
Where to find it
Section titled “Where to find it”- In school.edii.in: Exams › Admit cards and hall tickets › View Admit Cards
- Or press Ctrl K (⌘ K on a Mac) and type View Admit Cards.
- Address:
school.edii.in/view/all-admit-cards - Who can see it: Staff whose role includes Exams access. Shown only when your school uses Exam in EDII. If it is missing from your menu, ask your school admin.
 Open a bigger pictureतस्वीर बड़ी करें
Step by step
Section titled “Step by step”1. Find the schedule
Section titled “1. Find the schedule”Type in Search… to filter the rows by any word on the screen. Click a column heading to sort by it.
2. Choose the columns
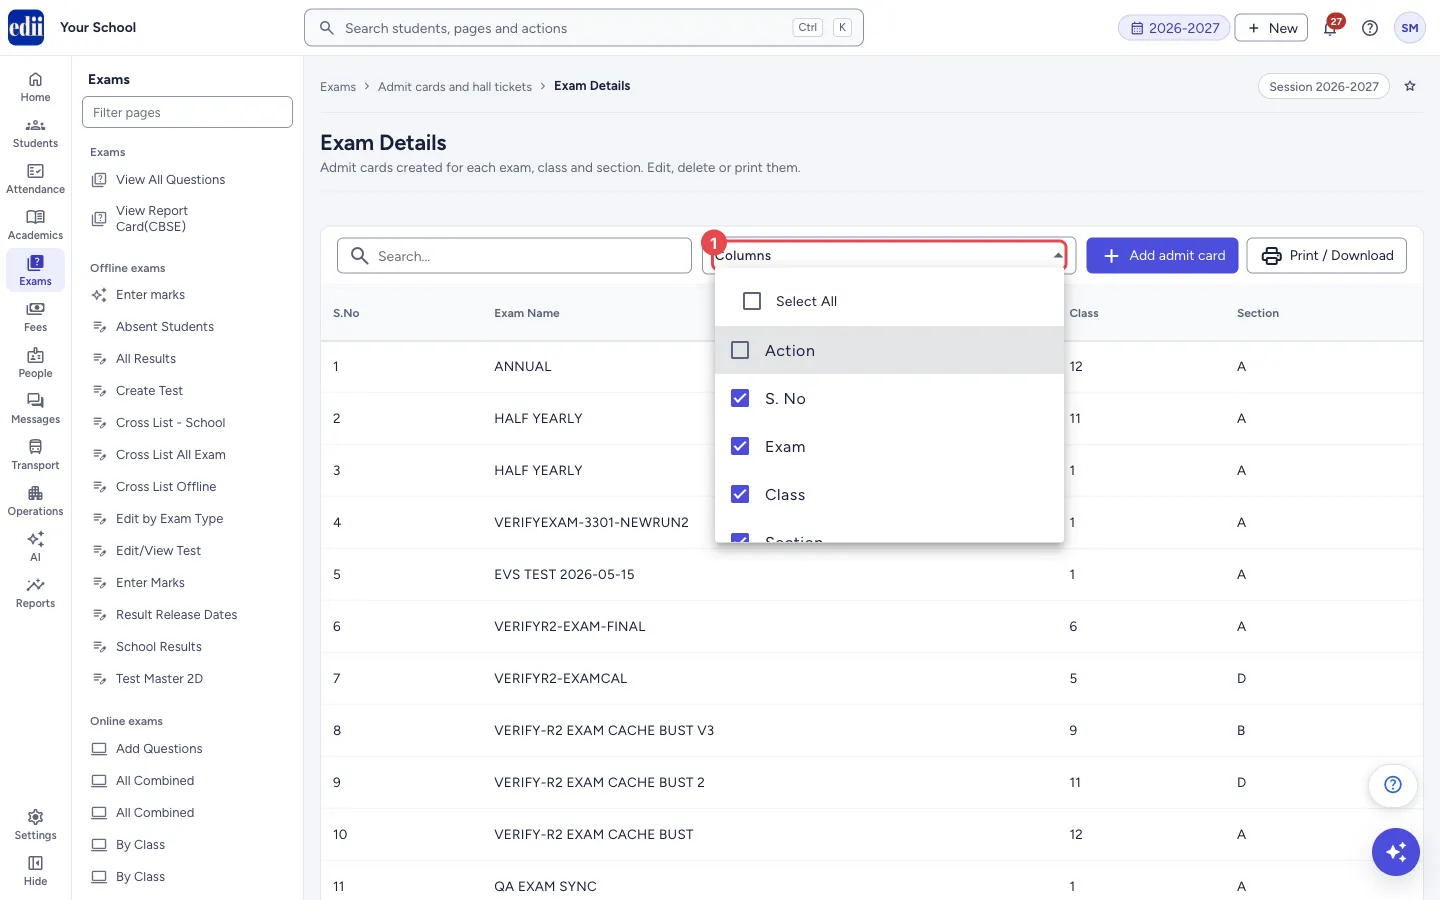
Section titled “2. Choose the columns”Open Columns to tick or untick Action, S. No, Exam, Class and Section, or tick Select All. If you untick Action, the Actions menu disappears from the rows; tick it again to bring it back.
 Open a bigger pictureतस्वीर बड़ी करें
3. Edit, delete or print a schedule
Section titled “3. Edit, delete or print a schedule”Select Actions in the row, then:
Edit opens the schedule so you can change it. Delete asks Delete admit card? and says The exam schedule for “…” will be permanently deleted. This action cannot be undone. Select Delete to confirm; EDII then shows Exam Deleted! and reloads the list. Print opens the Print Admit Cards screen for the class and section of that row, where you choose which cards and which parts of the card to print.
4. Add a new schedule
Section titled “4. Add a new schedule”Select Add admit card to open Add Admit Card.
Fields and filters
Section titled “Fields and filters”| Field | What it is | Notes |
|---|---|---|
| Search… | Filters the rows on the screen. | Does not change the schedules. |
| Columns | Chooses which columns are shown and printed. | Action, S. No, Exam, Class, Section. Select All shows every column. |
| Items per page | How many rows show on a page. | 100, 200, 300, 400, 500 or 1000. |
Buttons
Section titled “Buttons”| Button | What it does | What happens next |
|---|---|---|
| Add admit card | Opens Add Admit Card to make a new schedule. | The Add Admit Card screen opens. |
| Print / Download | Prints this list of schedules, or downloads it as an Excel, text or CSV file. | The printout carries the school logo, the school name and Report Generated On with the date. |
| Actions › Edit | Opens the schedule of that row for changes. | The edit screen for the schedule opens. |
| Actions › Delete | Deletes the schedule of that row, after you confirm. | Schedule: <exam name> Successfully Deleted, then the list reloads. |
| Actions › Print | Opens Print Admit Cards for the class and section of that row. | Choose the cards and the parts of the card to include, then select Print Selected. |
Columns
Section titled “Columns”| Column | Meaning |
|---|---|
| Action | The Actions menu with Edit, Delete and Print. |
| S.No | Row number. |
| Exam Name | The exam type the schedule was made for. |
| Class | The class of the schedule. |
| Section | The section of the schedule. |
Good to know
Section titled “Good to know”- Deleting a schedule removes the exam schedule behind the admit cards. It cannot be undone.
- Opening the list does not change anything.
Messages you may see
Section titled “Messages you may see”| Message | What it means | What to do |
|---|---|---|
| Delete admit card? | The confirmation shown before a schedule is deleted. | Select Delete to go on, or close the window to keep the schedule. |
| Network Issue, Please Try Again. | The list or the delete request could not be sent. | Check the internet and try again. |
Did this page help?क्या इस पेज से मदद मिली?
Thanks! Glad it helped.धन्यवाद! अच्छा लगा कि काम बन गया।
Sorry about that. Ask in your own words, or write to us.माफ़ कीजिए। अपने शब्दों में पूछें, या हमें लिखें।