
Screen guide · Web app
Bill Master
Pick a school to see its monthly subscription bills, open one, record a payment by hand, edit it, print the invoice, or print one consolidated bill for several months.
यह पेज अंग्रेज़ी में है। कुछ समझ न आए तो ।
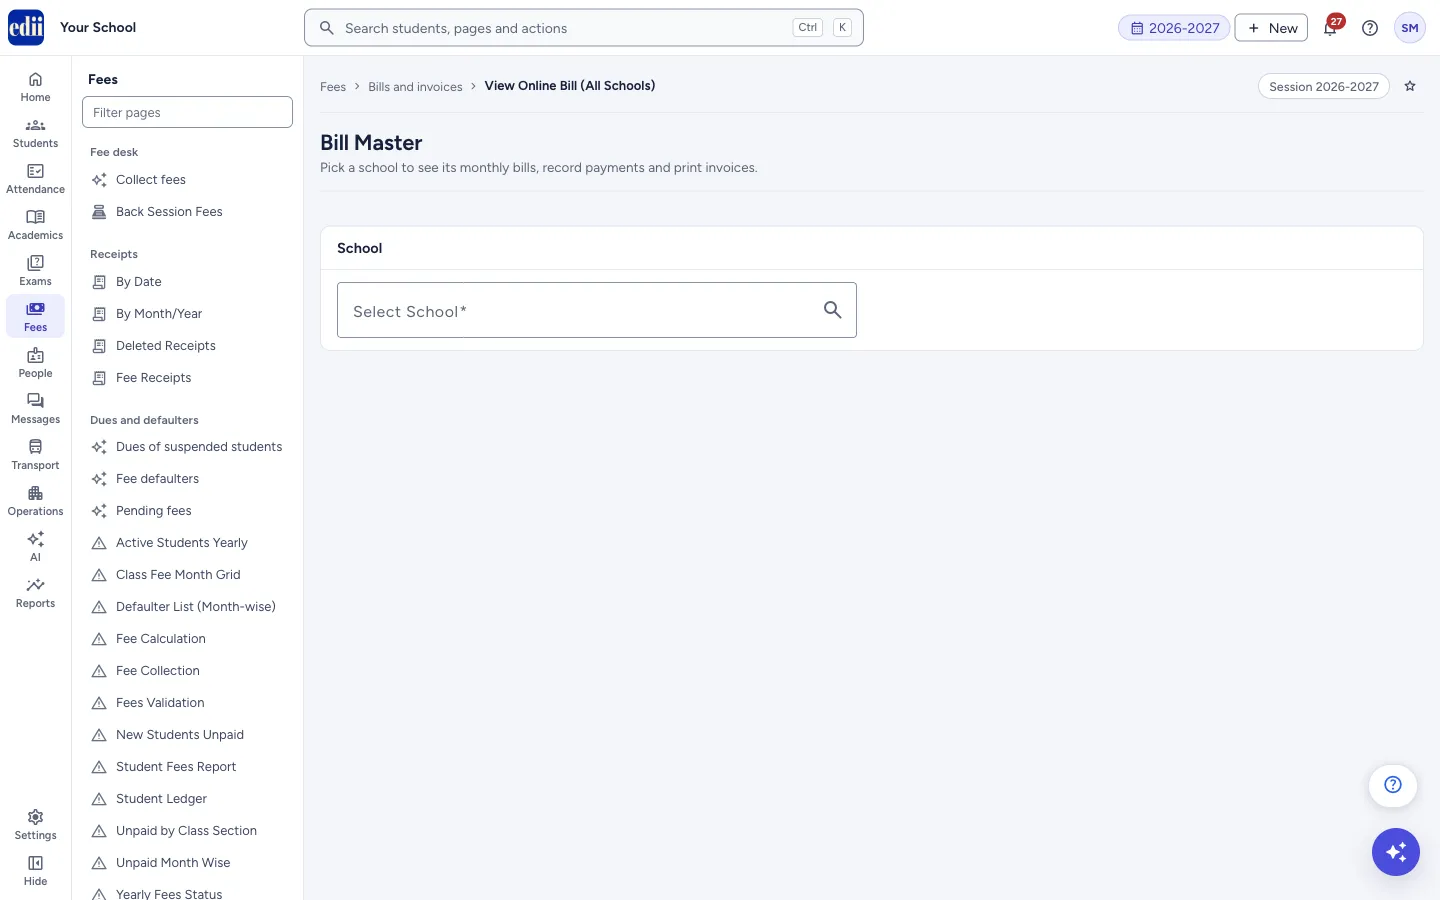
Bill Master (the page title is View Online Bill (All Schools)) lists the monthly subscription bills of any school you pick in Select School. For each month you see Bill Amount, Paid, Due and Status.
It is a different page from Invoice, where a school sees and pays its own invoices online. Here you choose the school, and you can record a payment by hand.
Recording a payment here only writes the payment against the bill. No money moves and nothing is sent to parents.
Who uses it and when
Section titled “Who uses it and when”The person who manages the subscription bills, when a bill has to be checked, a payment received outside the app has to be recorded, or an invoice has to be printed.
Where to find it
Section titled “Where to find it”- In school.edii.in: Fees › Bills and invoices › Bill Master
- Or press Ctrl K (⌘ K on a Mac) and type Bill Master.
- Address:
school.edii.in/view/bill-master - Who can see it: Staff whose role includes Fees or School master access. Shown only when your school uses Finance in EDII. If it is missing from your menu, ask your school admin.
 Open a bigger pictureतस्वीर बड़ी करें
Step by step
Section titled “Step by step”1. Pick the school
Section titled “1. Pick the school”Click Select School and type part of the school’s name. Choose the school from the list; each option shows the school’s name and its ID. The bills load at once under the heading Bills for the school’s name.
2. Read the list of bills
Section titled “2. Read the list of bills”Each row has #, Month/Year, Bill Amount, Paid, Due, Status (Paid, Unpaid or Partial-paid) and the buttons View and Print. A Due above 0 is shown in red. Select a column title to sort. The page bar changes the number of rows (5, 10, 25 or 50).
Print or export (top right, shown while the list is on screen) has Print Plain Table, Download Excel File, Download Text File and Download CSV File.
3. Print one invoice
Section titled “3. Print one invoice”Select Print on a row to open that month’s invoice for printing.
4. Open a bill
Section titled “4. Open a bill”Select View on a row. The page shows Bill Details for that month: cards with Bill Amount, Paid, Due and Status, and a table of Bill Items (Service Description, Quantity, Rate, Amount). Select Back to list to return, Edit Bill to change the bill, or Print Invoice.
5. Record a payment
Section titled “5. Record a payment”In Payment Details, check Amount (it starts as the amount due), choose the Payment Mode (Bank Account, Online Wallet, Cash or Other), the Payment Date, and the Payment Status (Paid, Unpaid or Partial Paid). Select Process Payment.
EDII shows Bill Payment Successful, closes the details and refreshes the list.
6. Print a consolidated bill
Section titled “6. Print a consolidated bill”Tick the bills you want in the first column of the list, or the box in the heading to tick them all. A bar shows how many are selected, with Generate Consolidated Bill and Clear Selection. Select Generate Consolidated Bill. A window shows one bill for the selected months, from the earliest to the latest month, with the total amount, the total paid and the total due. If you select the button with nothing ticked, you see Please select at least one bill.
Fields and filters
Section titled “Fields and filters”| Field | What it is | Notes |
|---|---|---|
| Select School | The school whose bills you want. | Required. Type to search; choose from the list. |
| Amount | The amount being recorded as paid. | Required. Starts as the amount due on the bill. |
| Payment Mode | How the money came. | Required. Bank Account, Online Wallet, Cash or Other. |
| Payment Date | The date of the payment. | Required. |
| Payment Status | What status the bill takes. | Required. Paid, Unpaid or Partial Paid. |
Buttons
Section titled “Buttons”| Button | What it does | What happens next |
|---|---|---|
| View | Opens the details of one bill. | Bill Details, the items and the payment form show. |
| Opens the invoice of that month for printing. | Nothing is changed. | |
| Edit Bill | Opens a window to change the bill. | Changes are made in that window. |
| Process Payment | Records the payment you entered against the bill. | Bill Payment Successful. The list refreshes with the new Paid and Due. |
| Generate Consolidated Bill | Makes one printable bill for the ticked months. | A window with the consolidated bill opens. |
| Print or export | Menu to print the list as a plain table or download it. | Print opens the print window; the others save a file. |
Columns
Section titled “Columns”| Column | Meaning |
|---|---|
| # | Row number. |
| Month/Year | The month of the bill. |
| Bill Amount | The amount of the bill. |
| Paid | What has been paid on it. |
| Due | What is still to pay. Red when above 0. |
| Status | Paid, Unpaid or Partial-paid. |
| Actions | View and Print. |
After you save
Section titled “After you save”- Process Payment changes the bill’s Paid, Due and Status for that school. Nothing is sent to parents, and no student fee receipt is made.
- Viewing, printing and consolidating change nothing.
Good to know
Section titled “Good to know”- The payment status you choose is what is stored; check Amount and Payment Status together before you select Process Payment.
- The consolidated bill covers only the bills you ticked.
Messages you may see
Section titled “Messages you may see”| Message | What it means | What to do |
|---|---|---|
| Please select a school first | No school was chosen. | Choose a school in Select School. |
| Bill Payment Successful | The payment was recorded. | Nothing to do. |
| Please select at least one bill | Generate Consolidated Bill was used with nothing ticked. | Tick the bills first. |
| Bad/Slow Internet Connection, Please check your internet connection | The request did not go through. | Check the internet and try again. Look at the bill before recording the payment again. |
- Before you select Process Payment, look at the date and the mode; they are printed on the invoice.
Stuck? Try this
Section titled “Stuck? Try this”| Problem | Likely cause | What to do |
|---|---|---|
| The page has no Print or export button | It shows only while the list of bills is on screen and no bill is open. | Pick a school, or select Back to list. |
Did this page help?क्या इस पेज से मदद मिली?
Thanks! Glad it helped.धन्यवाद! अच्छा लगा कि काम बन गया।
Sorry about that. Ask in your own words, or write to us.माफ़ कीजिए। अपने शब्दों में पूछें, या हमें लिखें।