
Screen guide · Web app
Issuer & Signatures
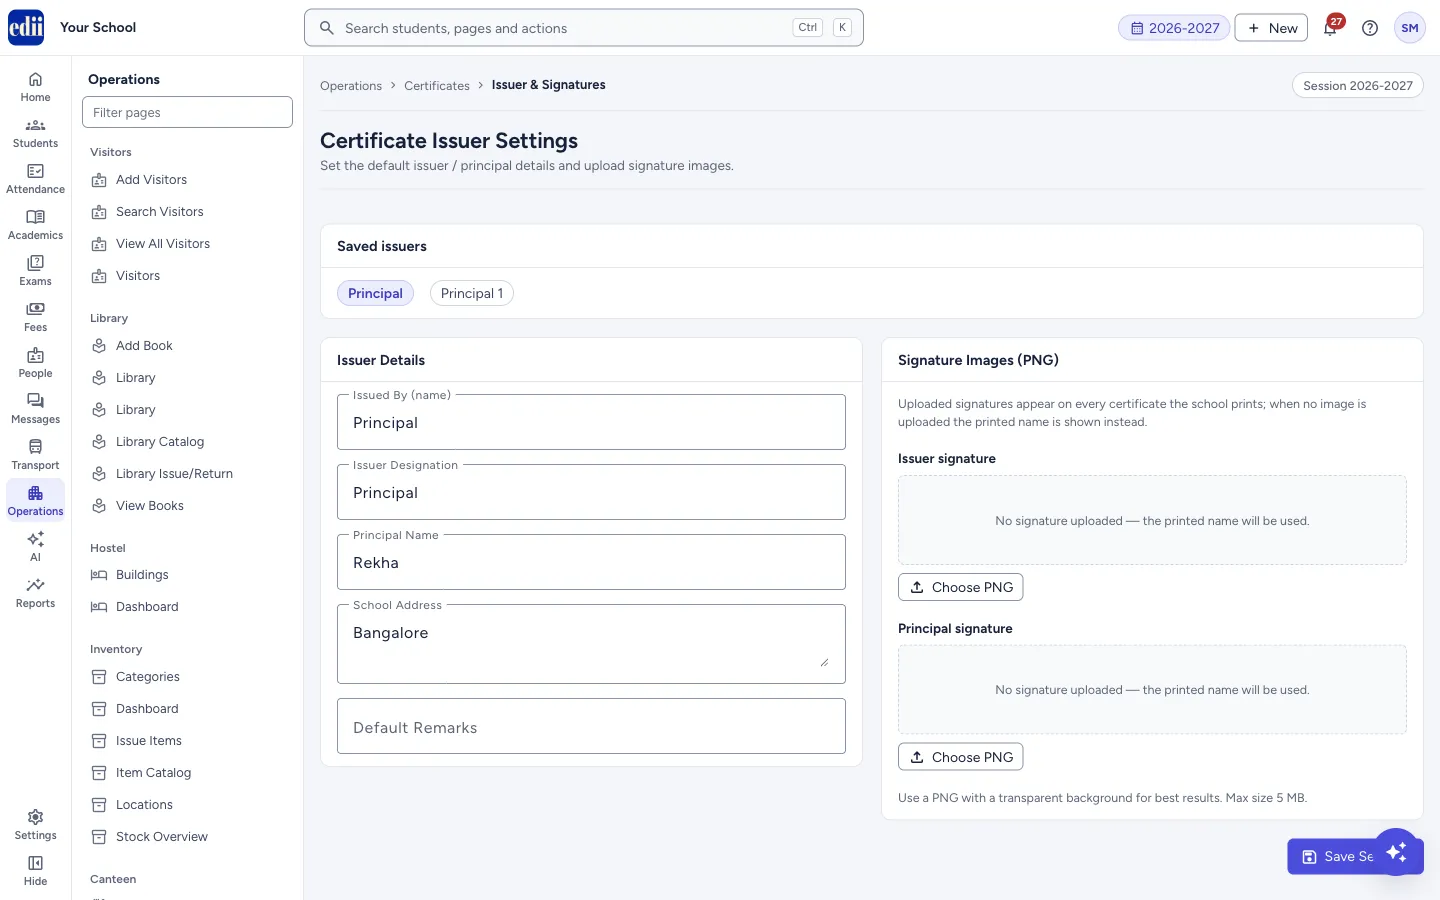
Set who issues the school's certificates (name, designation, principal, address, default remarks) and upload the signature images that are printed on them.
यह पेज अंग्रेज़ी में है। कुछ समझ न आए तो ।
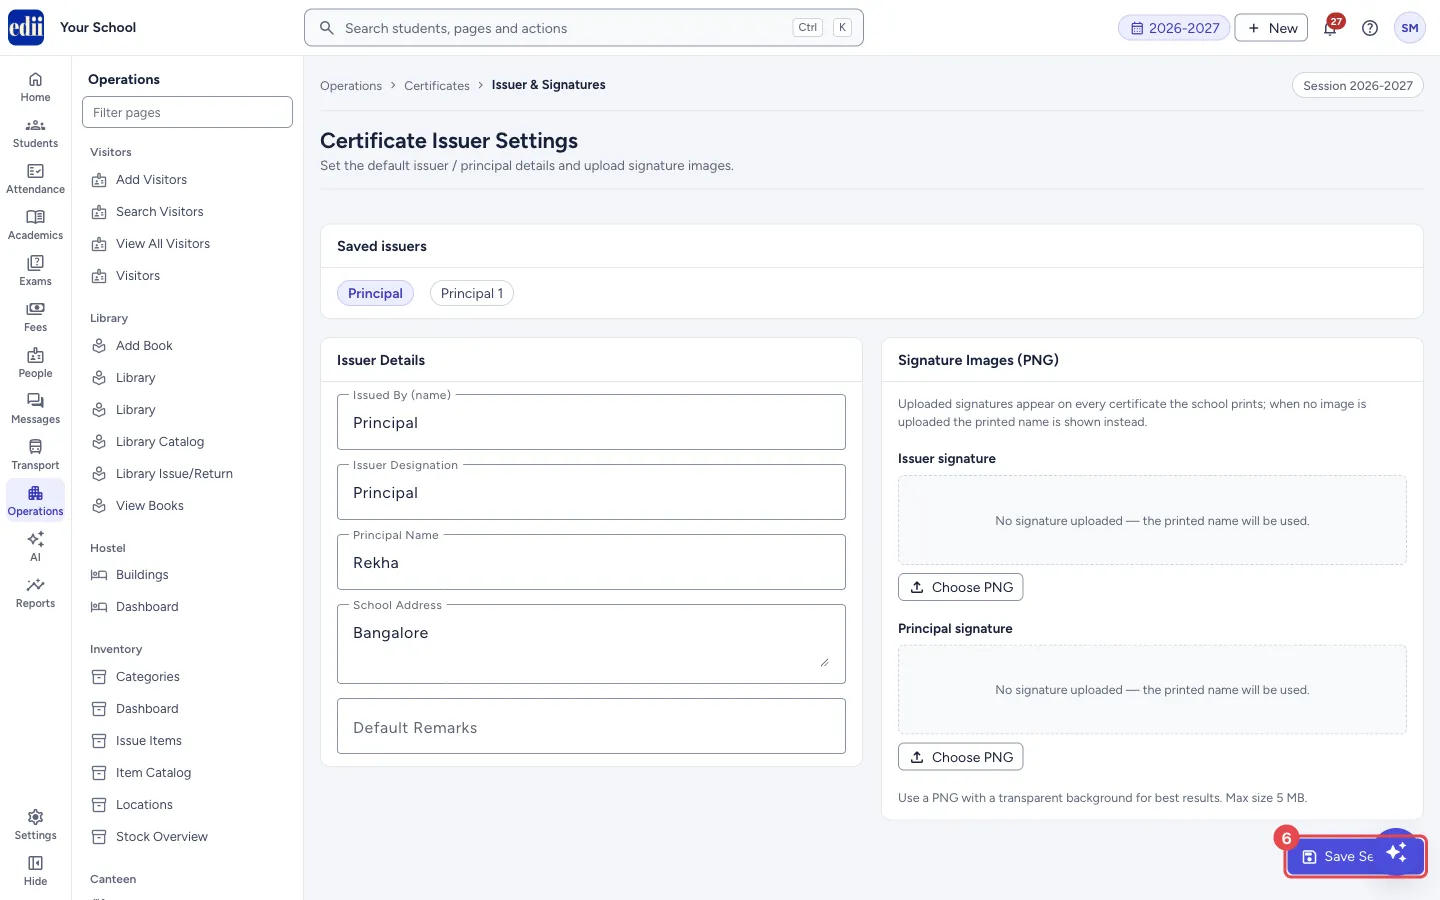
Issuer & Signatures (the page heading is Certificate Issuer Settings) holds the details that appear on every certificate: the name and designation of the issuing person, the principal’s name, the school address and a default remark. You can also upload a PNG picture of the issuer’s signature and of the principal’s signature.
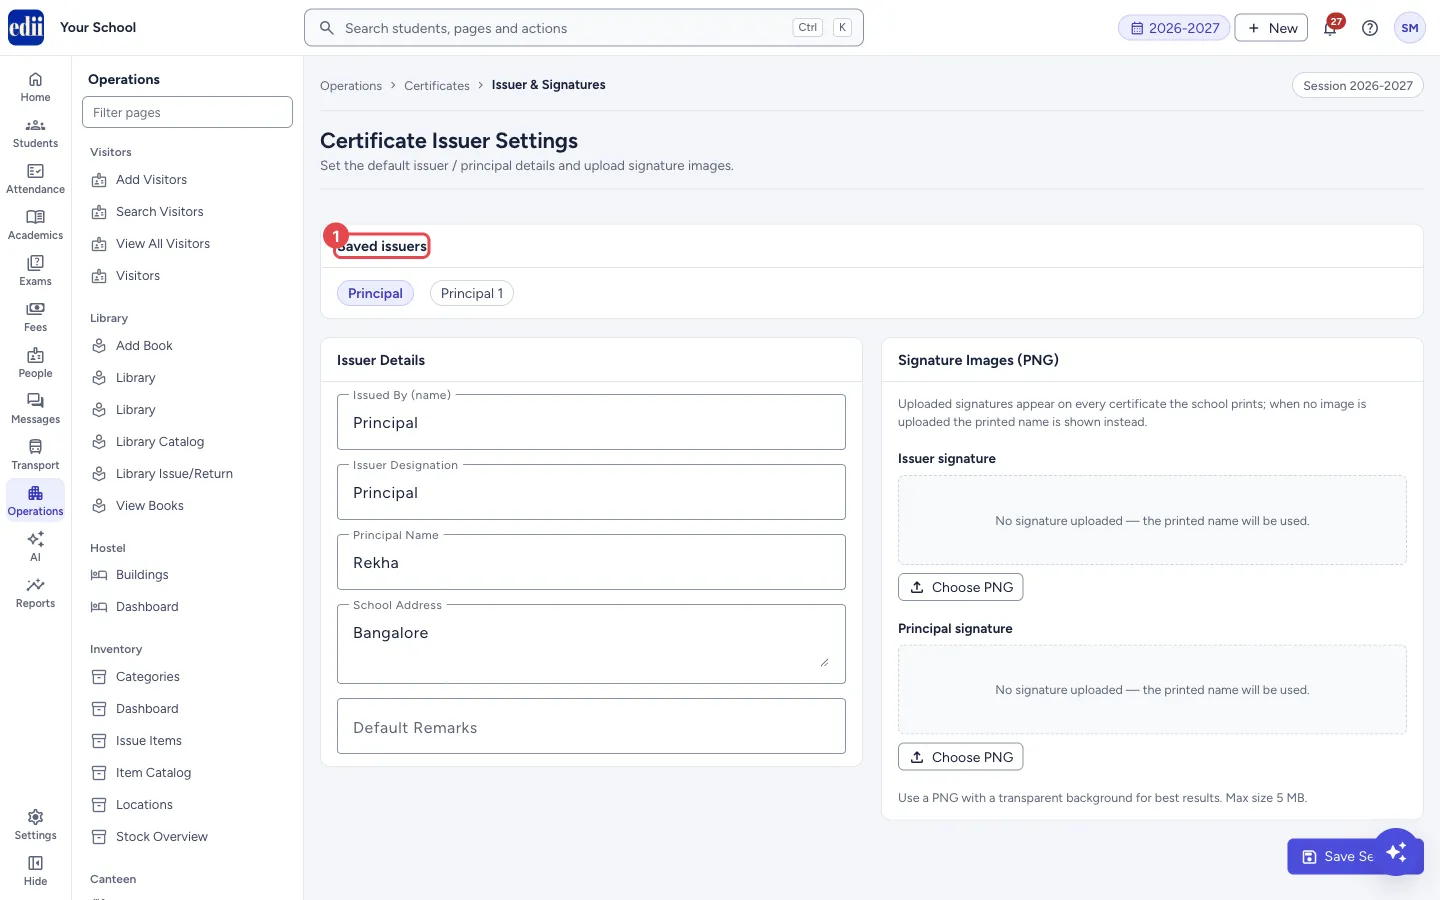
When no signature picture is uploaded, the printed name is used instead. If the school keeps more than one issuer, a row Saved issuers shows each as a button; select one to edit its details.
The page is shown only when the school has the Certificates module switched on.
Who uses it and when
Section titled “Who uses it and when”The principal’s office, once when certificates are first used, and again when the principal or the signing person changes.
Before you start
Section titled “Before you start”- Keep the signature as a PNG picture, ideally with a transparent background, up to 5 MB.
Where to find it
Section titled “Where to find it”- In school.edii.in: Operations › Certificates › Issuer & Signatures
- Or press Ctrl K (⌘ K on a Mac) and type Issuer & Signatures.
- Address:
school.edii.in/certificate/issuer-settings - Who can see it: Shown only when your school uses Certificates in EDII. If it is missing from your menu, ask your school admin.
 Open a bigger pictureतस्वीर बड़ी करें
Step by step
Section titled “Step by step”1. Pick a saved issuer (if there is more than one)
Section titled “1. Pick a saved issuer (if there is more than one)”Under Saved issuers, select the name you want to work on. The details and signatures of that issuer are shown. This row is hidden when the school has only one issuer.
 Open a bigger pictureतस्वीर बड़ी करें
2. Fill the Issuer Details
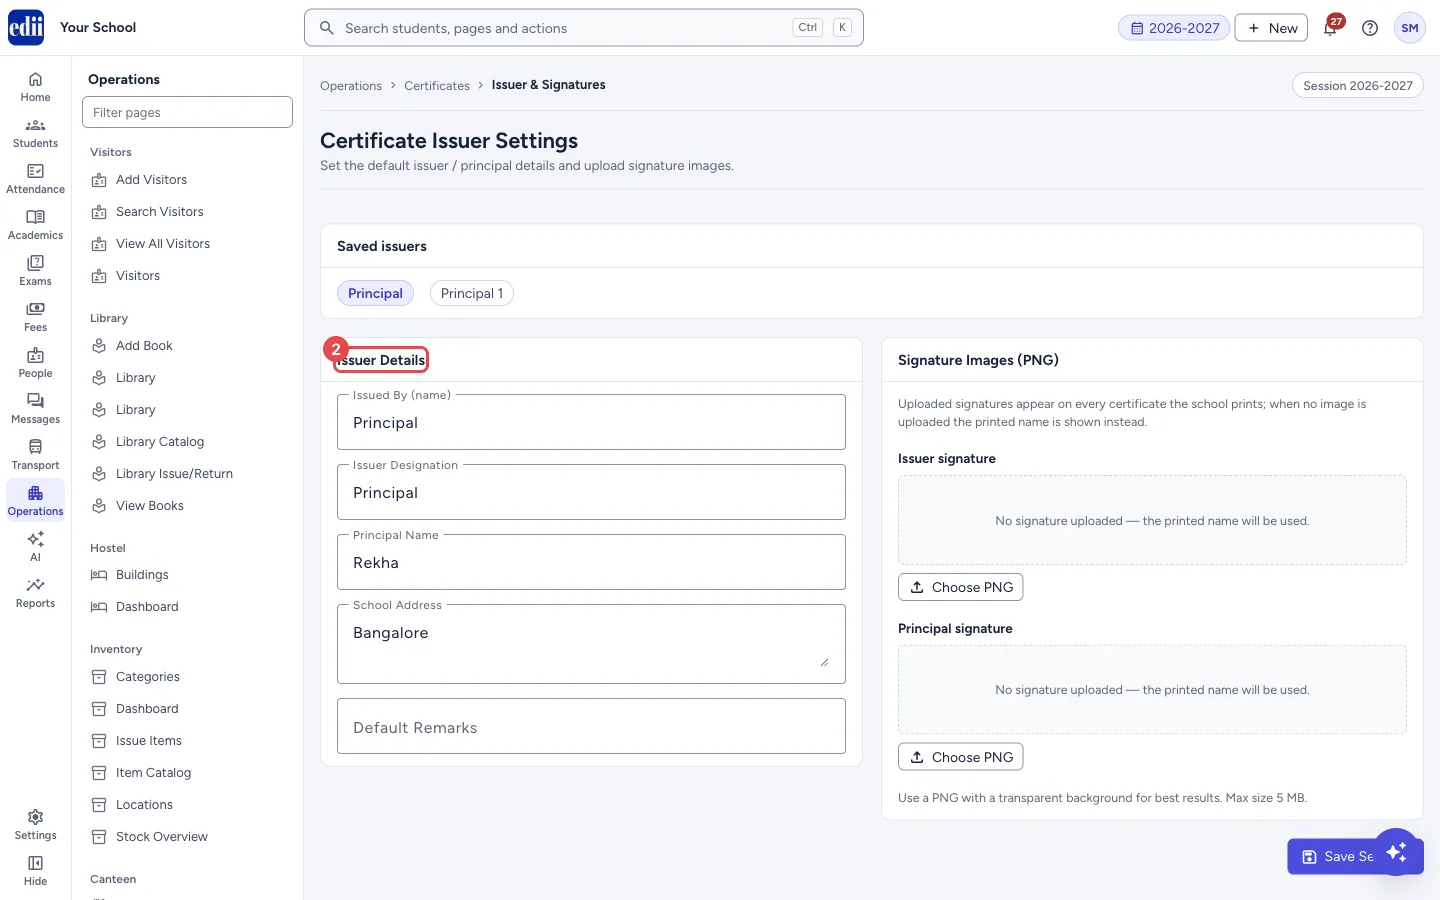
Section titled “2. Fill the Issuer Details”Fill Issued By (name) (the name of the issuing authority), Issuer Designation (for example Class Teacher or Examination Incharge), Principal Name, School Address and Default Remarks.
 Open a bigger pictureतस्वीर बड़ी करें
3. Upload the signatures
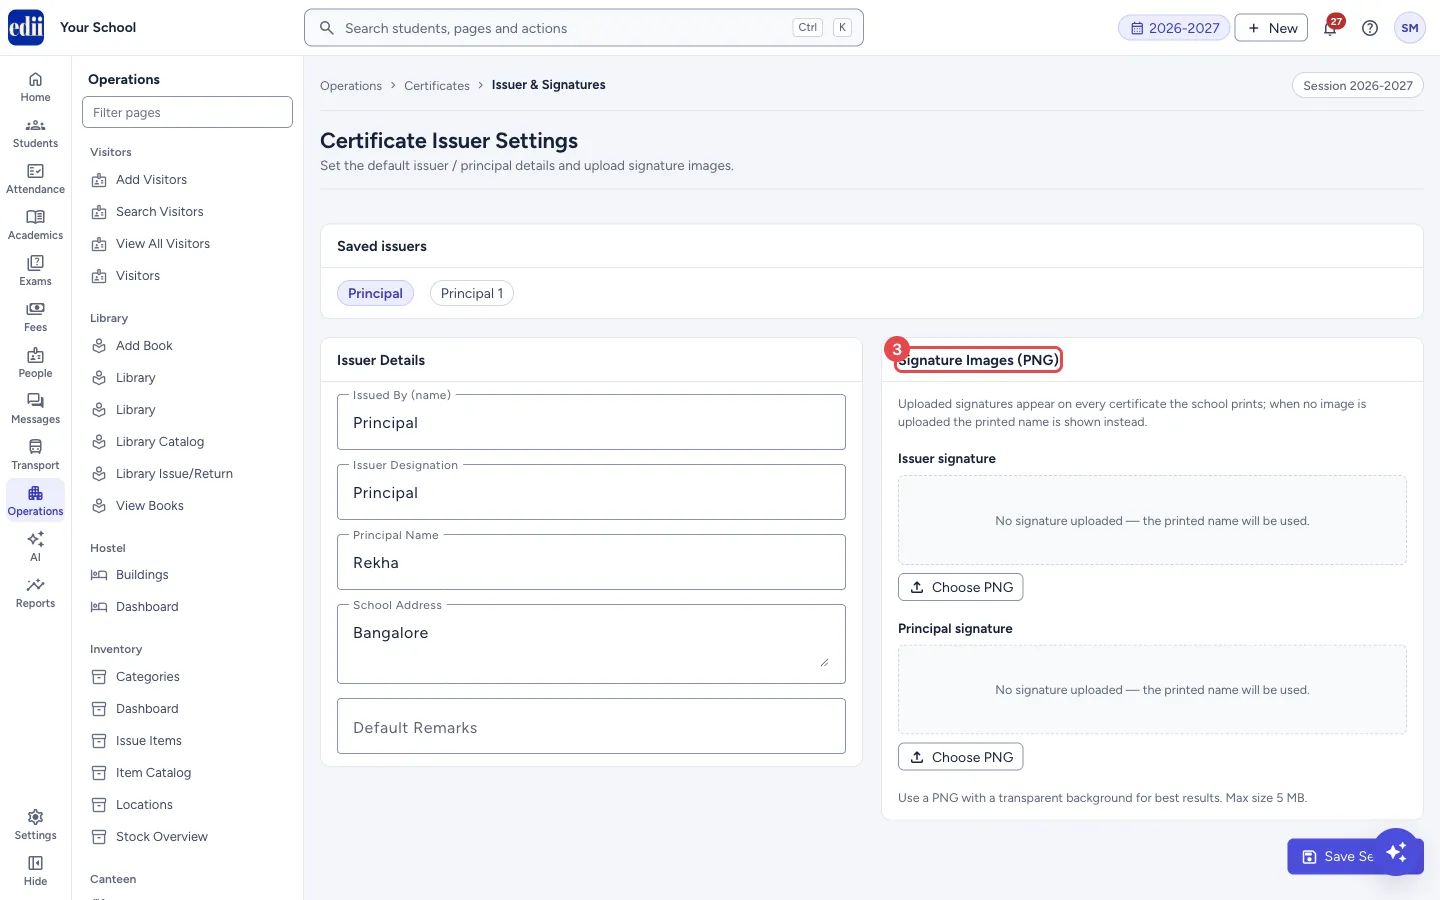
Section titled “3. Upload the signatures”In Signature Images (PNG) there is one block for the Issuer signature and one for the Principal signature. Select Choose PNG in a block and pick the picture. A preview shows the new picture and the file name, with will be uploaded on Save. Discard selected drops the picture you just chose. Remove takes the saved signature away.
 Open a bigger pictureतस्वीर बड़ी करें
4. Save
Section titled “4. Save”Select Save Settings. EDII shows Certificate signatures saved. The picture or the name is then used on every certificate the school prints.
 Open a bigger pictureतस्वीर बड़ी करें
Fields and filters
Section titled “Fields and filters”| Field | What it is | Notes |
|---|---|---|
| Issued By (name) | The name of the person or authority issuing certificates. | Optional. |
| Issuer Designation | That person’s designation, for example Class Teacher or Examination Incharge. | Optional. |
| Principal Name | The name of the principal. | Optional. |
| School Address | The address printed on the certificate. | Optional. |
| Default Remarks | A remark filled in by default when you issue a certificate. | Optional. |
| Issuer signature, Principal signature | A PNG picture of each signature. | PNG only, up to 5 MB. |
Buttons
Section titled “Buttons”| Button | What it does | What happens next |
|---|---|---|
| Saved issuers (names) | Switches to another saved issuer. | The details and signatures of that issuer are shown. |
| Choose PNG | Opens a file chooser for the signature picture. | A preview of the picture is shown. It is uploaded when you save. |
| Discard selected | Drops the picture you just chose. | The earlier signature or the empty box shows again. |
| Remove | Removes the signature. | The signature is cleared when you save. |
| Save Settings | Saves the details and the signatures. | Certificate signatures saved. |
Good to know
Section titled “Good to know”- Only PNG pictures are accepted, and each must be 5 MB or smaller.
- A new picture is uploaded only when you select Save Settings.
Messages you may see
Section titled “Messages you may see”| Message | What it means | What to do |
|---|---|---|
| Please select a PNG image | The file is not a PNG. | Choose a PNG file. |
| Image must be 5 MB or smaller | The picture is too big. | Choose a smaller picture. |
| Signature image upload failed. Please try again. | The picture could not be sent. | Check the internet and save again. |
| Certificate signatures saved | The settings were saved. | Nothing to do. |
| Could not save settings. Please try again. | The settings were not saved. | Check the internet and try again. |
- Use a PNG with a transparent background so the signature does not hide the lines of the certificate.
Stuck? Try this
Section titled “Stuck? Try this”| Problem | Likely cause | What to do |
|---|---|---|
| My signature is not on the certificate | The picture was chosen but Save Settings was not selected. | Select Save Settings and look for Certificate signatures saved. |
| I cannot see Save Settings clearly at the bottom right | The round help button of the app covers part of it. | Scroll the page a little. |
Did this page help?क्या इस पेज से मदद मिली?
Thanks! Glad it helped.धन्यवाद! अच्छा लगा कि काम बन गया।
Sorry about that. Ask in your own words, or write to us.माफ़ कीजिए। अपने शब्दों में पूछें, या हमें लिखें।