
Screen guide · Web app
Add Discount Master
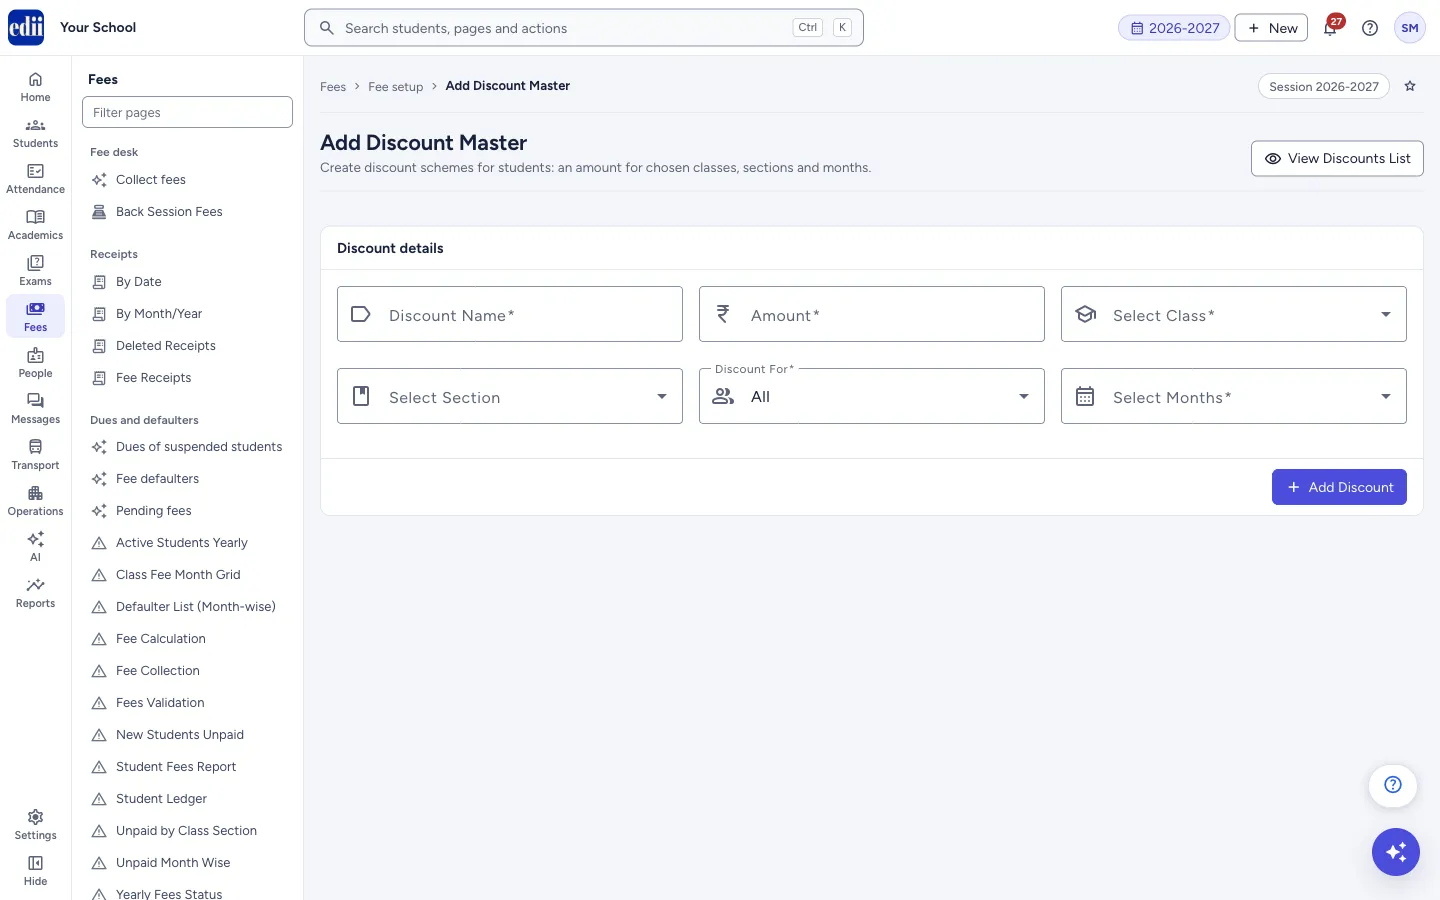
Create a named discount of a fixed rupee amount for chosen classes, sections and months, either for every student there or only for students you pick.
यह पेज अंग्रेज़ी में है। कुछ समझ न आए तो ।
Add Discount Master is the form for a new discount (concession), for example a staff-child concession or a scholarship. You give the discount a name and an amount, choose the classes and the months it covers, and say whether it is for All students of those classes or for Selected students only.
The discount is saved for the session that is open in EDII (shown at the top right of the page). After it is saved, EDII opens View/Edit Discount, where you can see the new discount in the list.
Who uses it and when
Section titled “Who uses it and when”The accounts office uses it when the school announces a concession.
Before you start
Section titled “Before you start”- Decide the amount, the classes, the months and, for a Selected discount, the students who will get it.
- Check that the session at the top right of the page is the one you want. The months in the list belong to that session.
Where to find it
Section titled “Where to find it”- In school.edii.in: Fees › Fee setup › Add Discount
- Or press Ctrl K (⌘ K on a Mac) and type Add Discount.
- Address:
school.edii.in/add/add-discount-master - Who can see it: Staff whose role includes Fees access. Shown only when your school uses Finance in EDII. If it is missing from your menu, ask your school admin.
 Open a bigger pictureतस्वीर बड़ी करें
Step by step
Section titled “Step by step”1. Name the discount and type the amount
Section titled “1. Name the discount and type the amount”Type the Discount Name and the Amount. Both are required.
The name can use letters, numbers, spaces and these signs only: - @ & . , / _ # :. The amount is a whole number of 1 to 5 digits.
2. Choose the class and the section
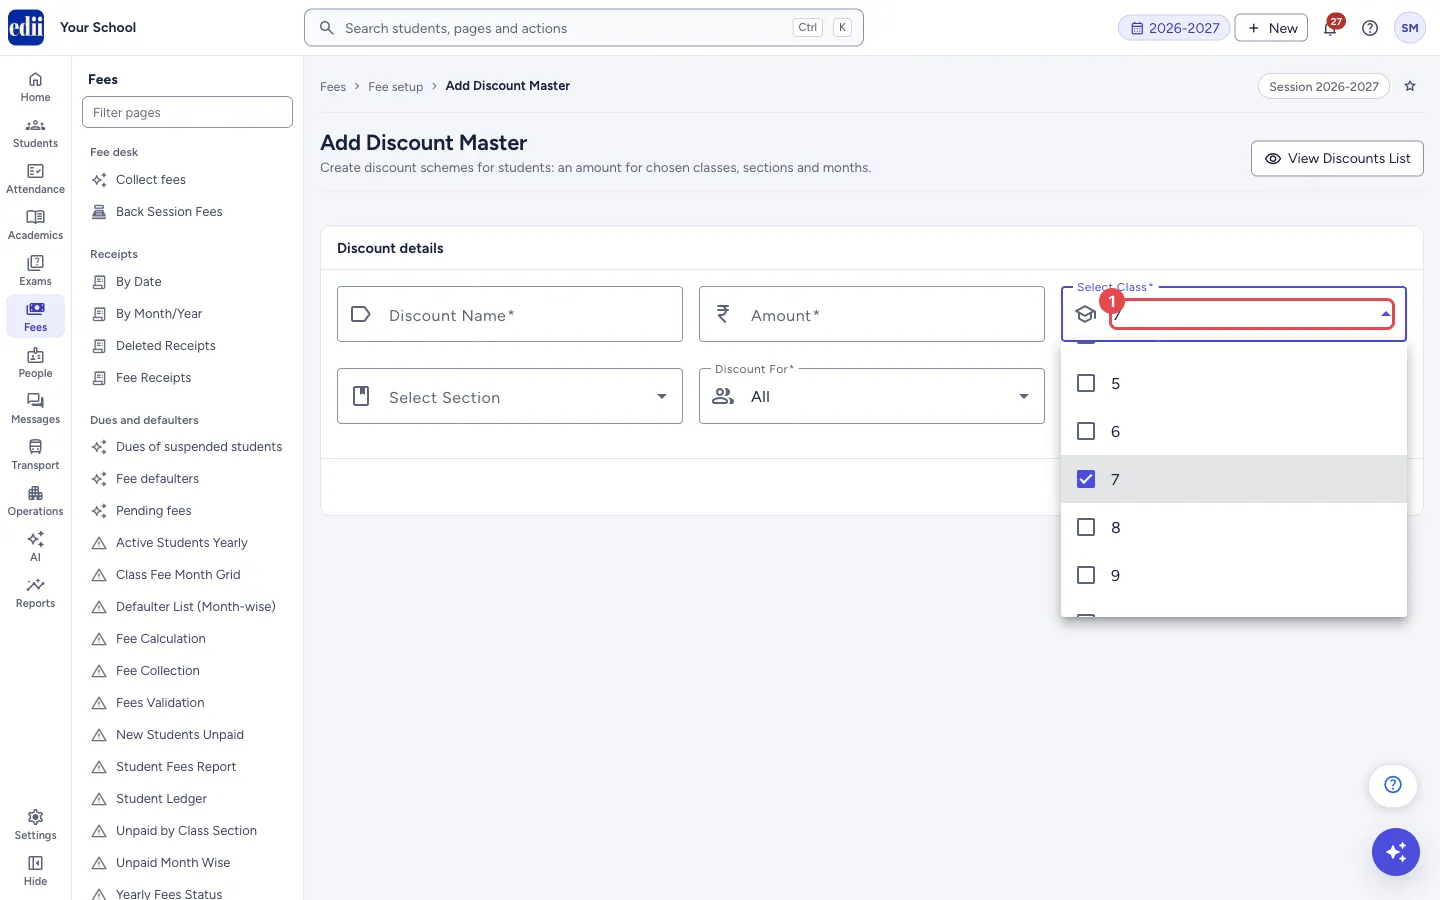
Section titled “2. Choose the class and the section”Open Select Class and tick one or more classes, or tick Select All at the top of the list to choose every class. Select Section works the same way. The class is required; the section is optional.
 Open a bigger pictureतस्वीर बड़ी करें
3. Choose who gets the discount
Section titled “3. Choose who gets the discount”Discount For starts as All: every student of the chosen classes. Choose Selected to give the discount only to students you pick. A Select Students box then appears.
Click in Add Students and type part of a name, class, enrollment number or ID. Click a student in the list to add them. Each chosen student shows as a small tag; use the cross on a tag to remove that student.
4. Choose the months
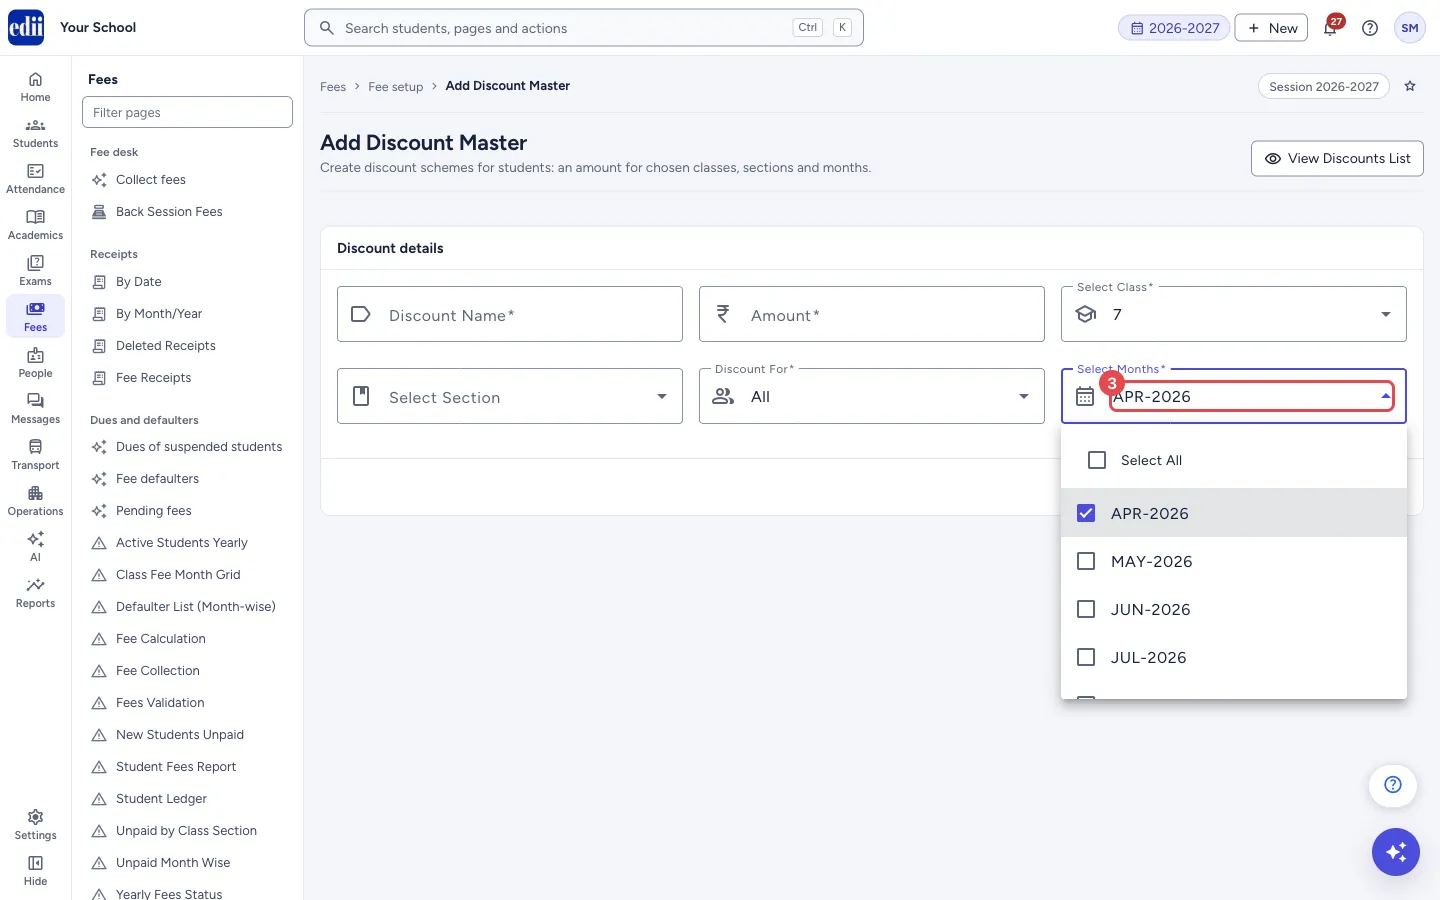
Section titled “4. Choose the months”Open Select Months and tick the months the discount covers, or tick Select All to choose every month in the list. At least one month is required.
 Open a bigger pictureतस्वीर बड़ी करें
5. Add the discount
Section titled “5. Add the discount”Select Add Discount. While it saves, the button says Adding…. When it is saved you see the message Discounts: <name> Successfully Added and the View/Edit Discount page opens.
Fields and filters
Section titled “Fields and filters”| Field | What it is | Notes |
|---|---|---|
| Discount Name | The name of the discount. | Required. Letters, numbers, spaces and - @ & . , / _ # : only. |
| Amount | The discount amount in rupees. | Required. Digits only, 1 to 5 digits. |
| Select Class | The classes the discount is for. | Required. You can choose more than one, or Select All. |
| Select Section | The sections the discount is for. | Optional. You can choose more than one, or Select All. |
| Discount For | All students of the chosen classes, or Selected students. | Required. Starts as All. |
| Select Months | The months the discount covers. | Required. You can choose more than one, or Select All. |
| Add Students | Search box for picking the students of a Selected discount. | Shown only when Discount For is Selected. The list is built from the students EDII has loaded for the school. |
Buttons
Section titled “Buttons”| Button | What it does | What happens next |
|---|---|---|
| View Discounts List | Opens the list of discounts that already exist. | View/Edit Discount opens. Whatever you typed on this form is not saved. |
| Add Discount | Saves the discount. | The message Discounts: <name> Successfully Added shows and View/Edit Discount opens. |
After you save
Section titled “After you save”- View/Edit Discount opens so you can check the new discount. See that page for changing or removing it.
Good to know
Section titled “Good to know”- The Add Discount button is locked while a save is in progress, so a double click cannot add the discount twice.
- A discount is saved for the open session. If a discount with the same name already covers the same class and section in that session, EDII refuses the new one.
- When the school has locked fees in Preferences, a new discount cannot be added.
- A discount for All covers every student of the chosen classes. A discount for Selected is for the students you added only.
- If the server refuses the discount, its message is shown as it is, with the title Error!, and the form stays as you filled it.
Messages you may see
Section titled “Messages you may see”| Message | What it means | What to do |
|---|---|---|
| Discount Name is required | The name box is empty. | Type a name. |
| Valid amount is required | The amount is empty or is not a whole number of 1 to 5 digits. | Type digits only. |
| Class is required | No class is chosen. | Choose at least one class. |
| Discount For is required | Nothing is chosen in Discount For. | Choose All or Selected. |
| Month is required | No month is chosen. | Choose at least one month. |
| Discounts: <name> Successfully Added | The discount was saved. | Check it in View/Edit Discount. |
| Fees Is Locked, Please Ask the admin to unlock by navigating to the preference section | The school has locked fees, so no new discount can be added. | Ask the school admin to unlock fees in Preferences. |
| Fees : <name> already has class <class> and Section: <section> , Please try to edit the fees | A discount with this name already exists for the same class and section in this session. | Open View/Edit Discount and change that discount, or use a different name. |
| Bad/Slow Internet Connection, Please check your internet connection | The request did not reach EDII. | Check the internet and select Add Discount again. Look in View/Edit Discount first, in case the discount was saved. |
- For a concession that should follow a student’s category or sibling position automatically, use Add Fee Rule instead of adding students one by one.
Stuck? Try this
Section titled “Stuck? Try this”| Problem | Likely cause | What to do |
|---|---|---|
| The Add Discount button does nothing | A required box is empty. The button only saves when Discount Name, Amount, Select Class, Discount For and Select Months are filled. | Click in each starred box; the red message under it tells you what is missing. |
| I cannot find a student in Add Students | The search matches the student’s name, class, section, enrollment number or ID as shown in the list. | Type a shorter part of the name, or the ID. |
Did this page help?क्या इस पेज से मदद मिली?
Thanks! Glad it helped.धन्यवाद! अच्छा लगा कि काम बन गया।
Sorry about that. Ask in your own words, or write to us.माफ़ कीजिए। अपने शब्दों में पूछें, या हमें लिखें।