
Screen guide · Web app
Add Buzz
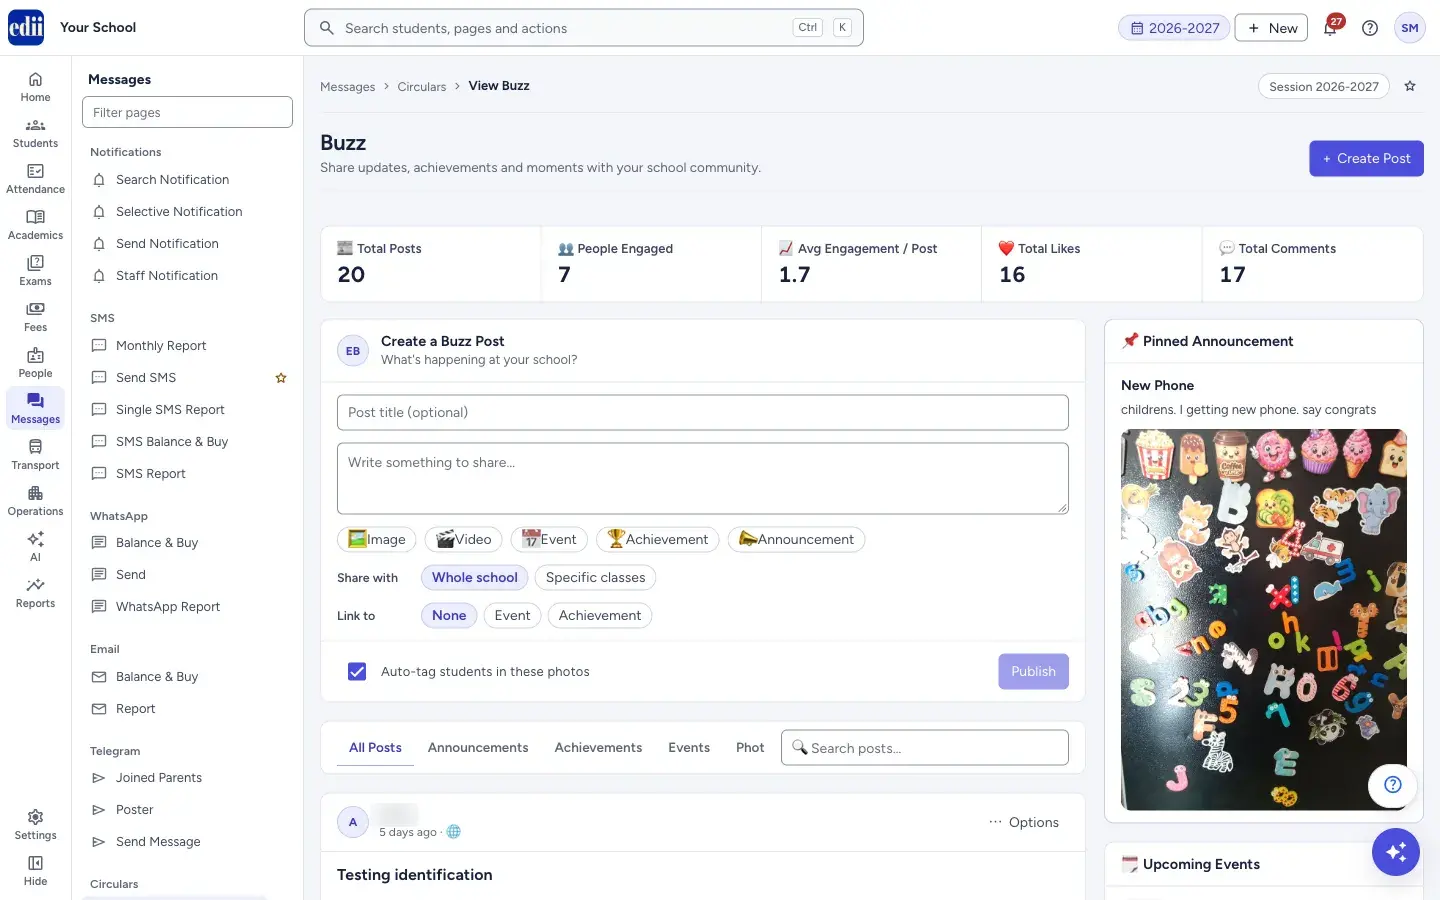
Opens the Buzz page, where you write a new post with photos or videos, choose who it is shared with and publish it.
यह पेज अंग्रेज़ी में है। कुछ समझ न आए तो ।
Add Buzz does not have a page of its own. When you choose it, EDII opens the Buzz page, and the box at the top, Create a Buzz Post, is where you make a new post. The Create Post button at the top right of the page also takes you to that box.
A post can have a title, some text, photos or videos, a type (Event, Achievement or Announcement), and a choice of who it is shared with. Nothing is posted until you select Publish.
The rest of the Buzz page (the feed, reactions, comments, pinning, editing and student tags) is explained on the Buzz page of this help.
Who uses it and when
Section titled “Who uses it and when”Teachers and the office use it to share school news, events, results and photos with the school community.
Before you start
Section titled “Before you start”- Post only what parents may see.
- To link a post to an event, the event must already exist in the school’s events. To link it to an achievement, a certificate for the student must already exist.
- Photos in which students are to be tagged should show clear faces, and the students should have a profile photo.
Where to find it
Section titled “Where to find it”- In school.edii.in: Messages › Social media › Add Buzz
- Or press Ctrl K (⌘ K on a Mac) and type Add Buzz.
- Address:
school.edii.in/add/add-buzz - Who can see it: The same staff who see the other Social media pages. If it is missing from your menu, ask your school admin.
 Open a bigger pictureतस्वीर बड़ी करें
Step by step
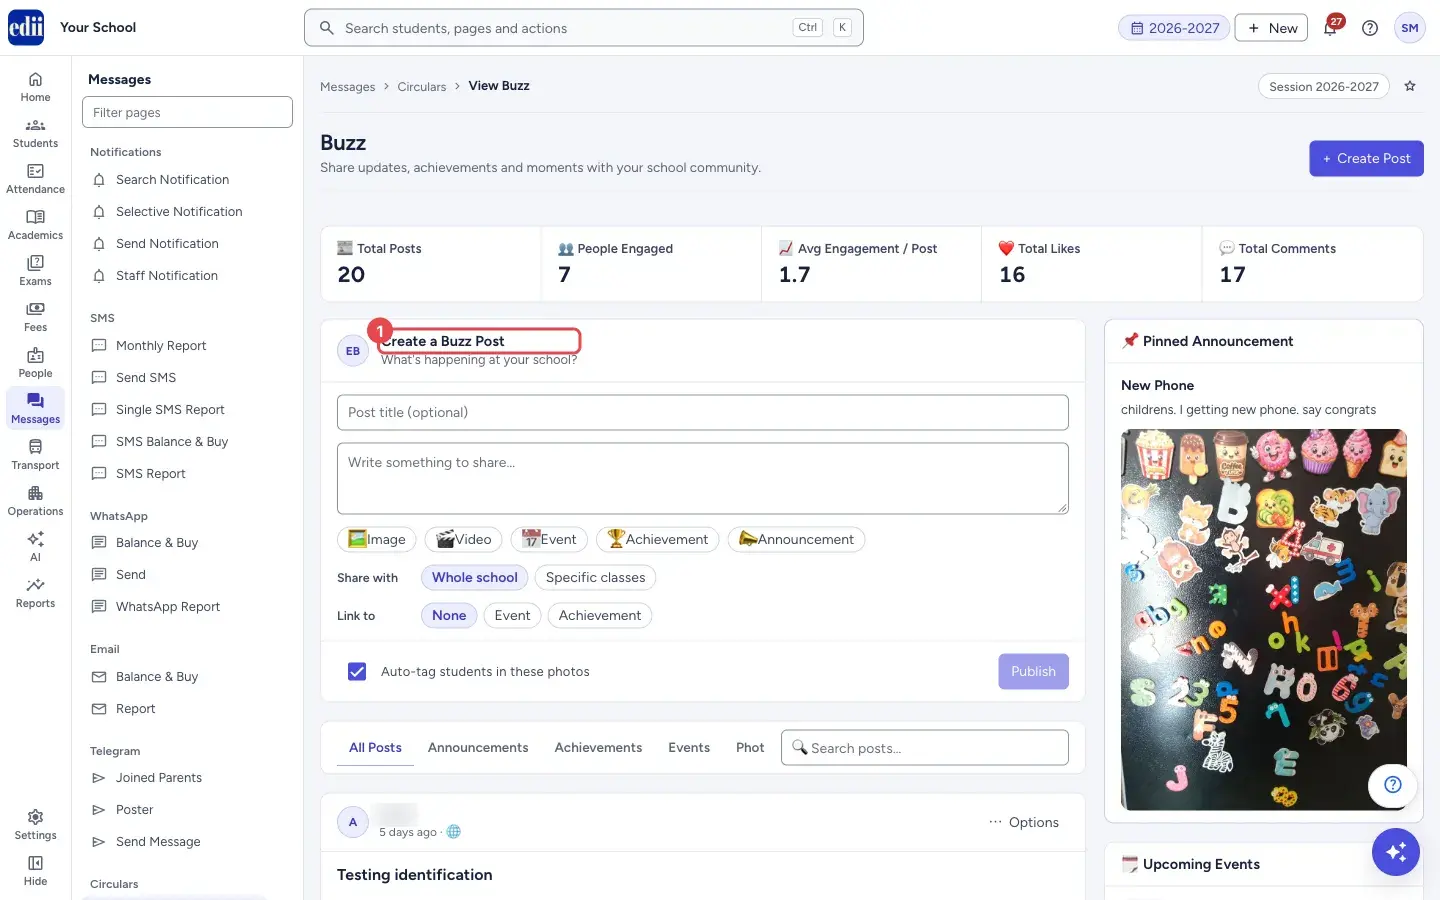
Section titled “Step by step”1. Open the Create a Buzz Post box
Section titled “1. Open the Create a Buzz Post box”Choose Add Buzz in the menu, or select Create Post on the Buzz page. The Create a Buzz Post box asks What’s happening at your school?.
 Open a bigger pictureतस्वीर बड़ी करें
2. Write the post
Section titled “2. Write the post”Type a Post title (optional) and the text in Write something to share…. You need at least a title, some text or one photo or video before Publish can be used.
3. Add photos or videos
Section titled “3. Add photos or videos”Select Image or Video. Your computer’s file picker opens, and you can choose more than one file. The files are uploaded straight away and small previews show under the text; select Remove under a preview to take it out.
EDII shows Images added. when the files are uploaded, or Upload failed, please retry. if one failed.
4. Choose the type of post
Section titled “4. Choose the type of post”Select Event, Achievement or Announcement to mark the post. Select the same button again to clear it. The type is saved with the post as a tag, so the post shows under the matching tab of the feed.
5. Choose who it is shared with
Section titled “5. Choose who it is shared with”Under Share with, Whole school is chosen to begin with. Select Specific classes to open the Classes and Sections lists and pick one or more of each.
If you pick no class, the post goes to the whole school. If you pick classes but no section, the post goes to all sections of those classes.
6. Link to an event or achievement (optional)
Section titled “6. Link to an event or achievement (optional)”Under Link to, choose Event or Achievement. A search box opens: type to find an upcoming event, or a certificate (shown by student name and certificate type), and click it. Clear removes the choice. None keeps the post unlinked.
If there is nothing to pick, the screen says No upcoming events to link. or No certificates available to link..
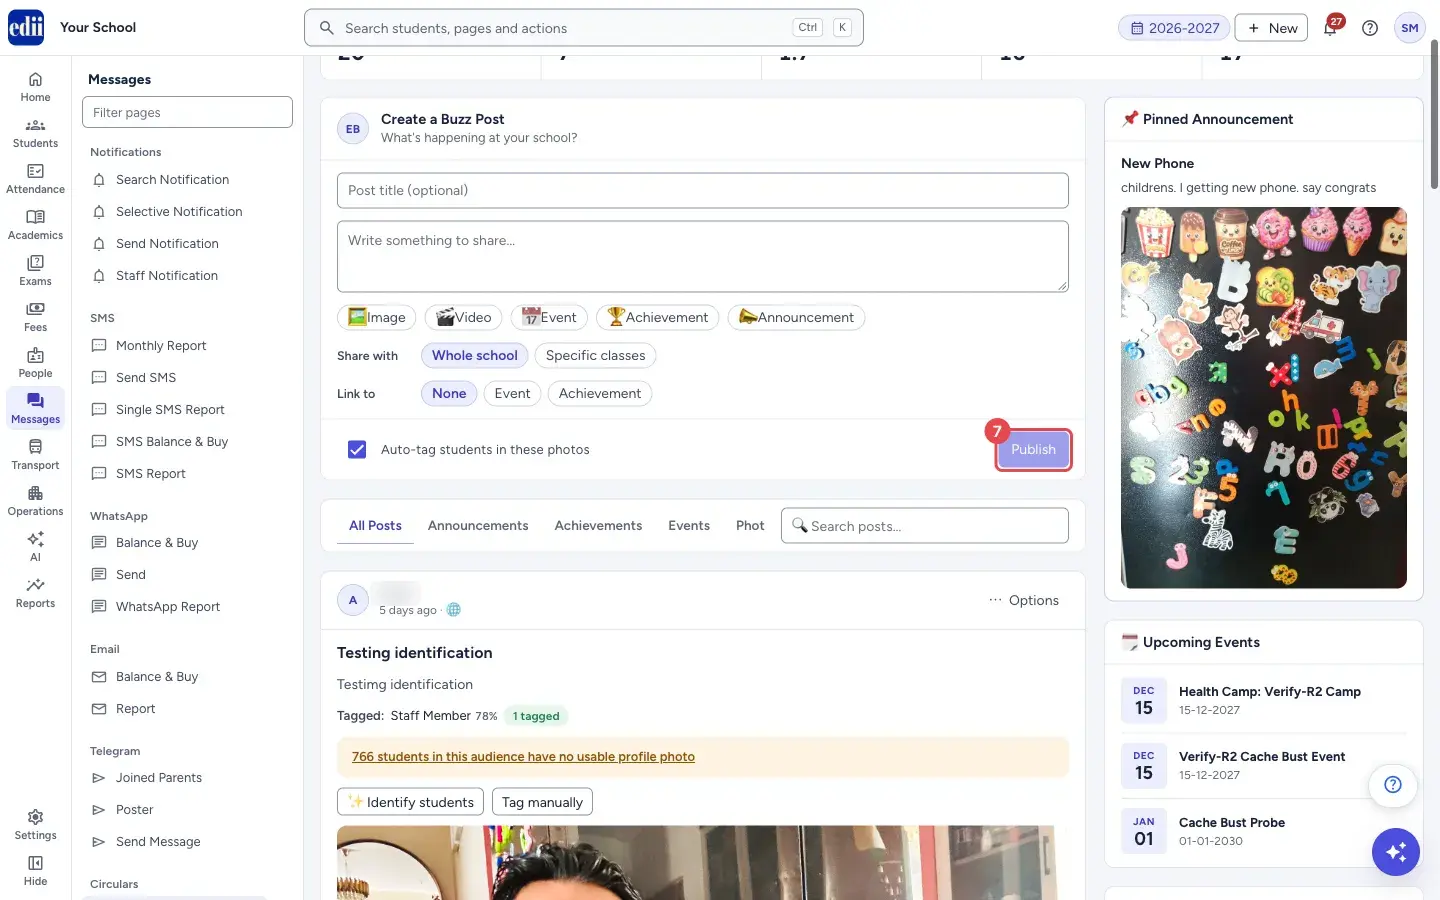
7. Publish
Section titled “7. Publish”If the school has automatic student tagging switched on, a tick box Auto-tag students in these photos shows next to Publish. It is ticked to begin with. Untick it if this post should not be tagged.
Select Publish. EDII shows Posted to Buzz!, clears the box and the new post appears in the feed.
 Open a bigger pictureतस्वीर बड़ी करें
Fields and filters
Section titled “Fields and filters”| Field | What it is | Notes |
|---|---|---|
| Post title (optional) | A heading for the post. | Optional. |
| Write something to share… | The text of the post. | Optional if the post has a title or a photo or video. |
| Image, Video | Choose photos or videos from your computer. | More than one file can be chosen. |
| Event, Achievement, Announcement | The type of post. | Optional. Selecting the same button again clears it. |
| Share with | Whole school or Specific classes. | Starts as Whole school. For specific classes, pick Classes and Sections. No class means the whole school. |
| Link to | None, Event or Achievement. | Optional. Links the post to an upcoming event or a certificate. |
| Auto-tag students in these photos | Matches faces in the photos with student profile photos after the post is published. | Shown only when the school has automatic tagging switched on. Ticked to begin with. |
Buttons
Section titled “Buttons”| Button | What it does | What happens next |
|---|---|---|
| Create Post | Takes you to the Create a Buzz Post box. | The box is ready for typing. |
| Publish | Posts to Buzz. | Posted to Buzz! shows and the post is at the top of the feed. The button stays grey until there is a title, text or a photo or video. |
After you save
Section titled “After you save”- The post is in the feed on the Buzz page, with the audience you chose.
- If auto-tagging was on, the post shows a small label (Queued, Tagging…, then the number tagged). Suggestions appear for you to confirm or remove on the Buzz page.
Good to know
Section titled “Good to know”- A post cannot be published while another one is being posted.
- Files are uploaded as soon as you choose them, before you publish. If you leave the page without publishing, the post is not made.
Messages you may see
Section titled “Messages you may see”| Message | What it means | What to do |
|---|---|---|
| Posted to Buzz! | The post was published. | Check the feed. |
| Images added. | The photos or videos were uploaded. | Write the rest of the post and publish. |
| Upload failed, please retry. | A file could not be uploaded. | Choose the file again. |
| Network issue, please retry. | The post could not be sent. | Check the internet and select Publish again. |
Stuck? Try this
Section titled “Stuck? Try this”| Problem | Likely cause | What to do |
|---|---|---|
| Publish is grey. | The post has no title, no text and no photo or video. | Add at least one of them. |
| There is no Auto-tag students in these photos box. | The school has not switched on automatic tagging of students in Buzz. | Ask your school administrator to switch it on in the school’s preferences. |
Did this page help?क्या इस पेज से मदद मिली?
Thanks! Glad it helped.धन्यवाद! अच्छा लगा कि काम बन गया।
Sorry about that. Ask in your own words, or write to us.माफ़ कीजिए। अपने शब्दों में पूछें, या हमें लिखें।