
Screen guide · Web app
Enter marks
नंबर भरें
Enter the marks of a whole class for every subject of one exam type in a single grid, by typing, pasting from Excel or uploading a CSV file.
यह पेज अंग्रेज़ी में है। कुछ समझ न आए तो ।
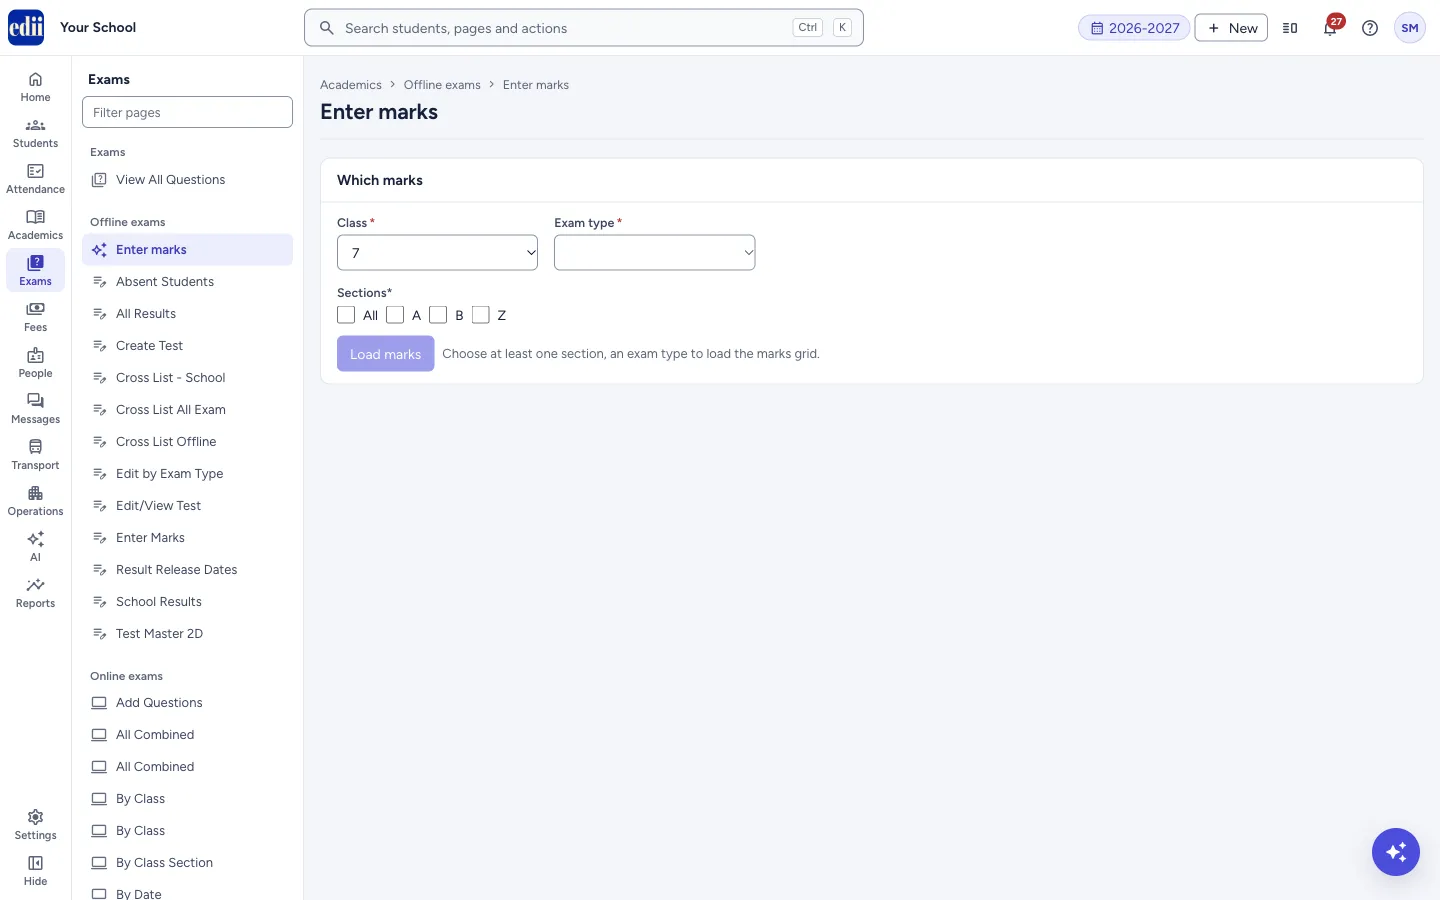
Enter marks shows one row for each student and one column for each subject of the exam you choose. You pick the Class, the Exam type and one or more Sections, select Load marks, and fill the grid. Nothing is saved until you select Save marks.
Each subject column shows its maximum marks under the heading. A mark above the maximum turns red and cannot be saved. Write A for a student who was absent. Grey boxes are subjects the student has not opted for; you cannot type in them.
At the bottom of the grid, Class average shows the average of each subject and how many marks are entered out of how many are expected. The Total column adds the marks of each student.
Who uses it and when
Section titled “Who uses it and when”Exam in-charges and teachers with exam access, after the tests of an exam type have been held and the answer sheets are checked.
Before you start
Section titled “Before you start”- The tests must already exist for the class and exam type (see Create Test). If a subject has no test, it has no column.
- Marks are shown to parents and in report cards according to the Result Release Dates you set.
Where to find it
Section titled “Where to find it”- In school.edii.in: Exams › Offline exams › Enter marks
- Or press Ctrl K (⌘ K on a Mac) and type Enter marks.
- Address:
school.edii.in/academics/marks - Who can see it: Staff whose role includes Exams access. Shown only when your school uses Exam in EDII. If it is missing from your menu, ask your school admin.
 Open a bigger pictureतस्वीर बड़ी करें
Step by step
Section titled “Step by step”1. Choose the class
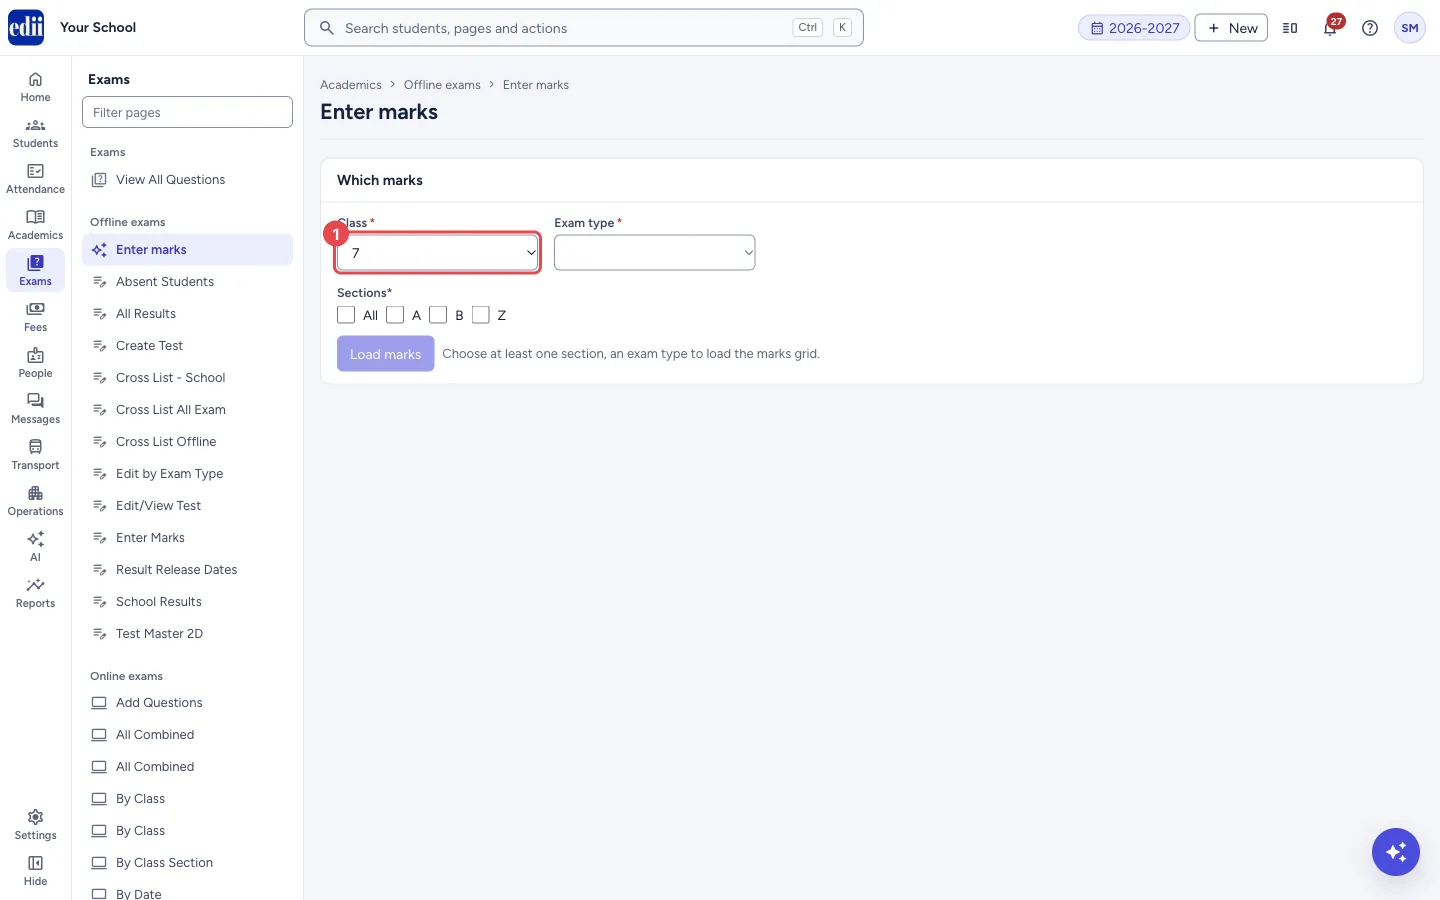
Section titled “1. Choose the class”In Class, choose the class. The list starts with Choose a class.
 Open a bigger pictureतस्वीर बड़ी करें
2. Choose the exam type
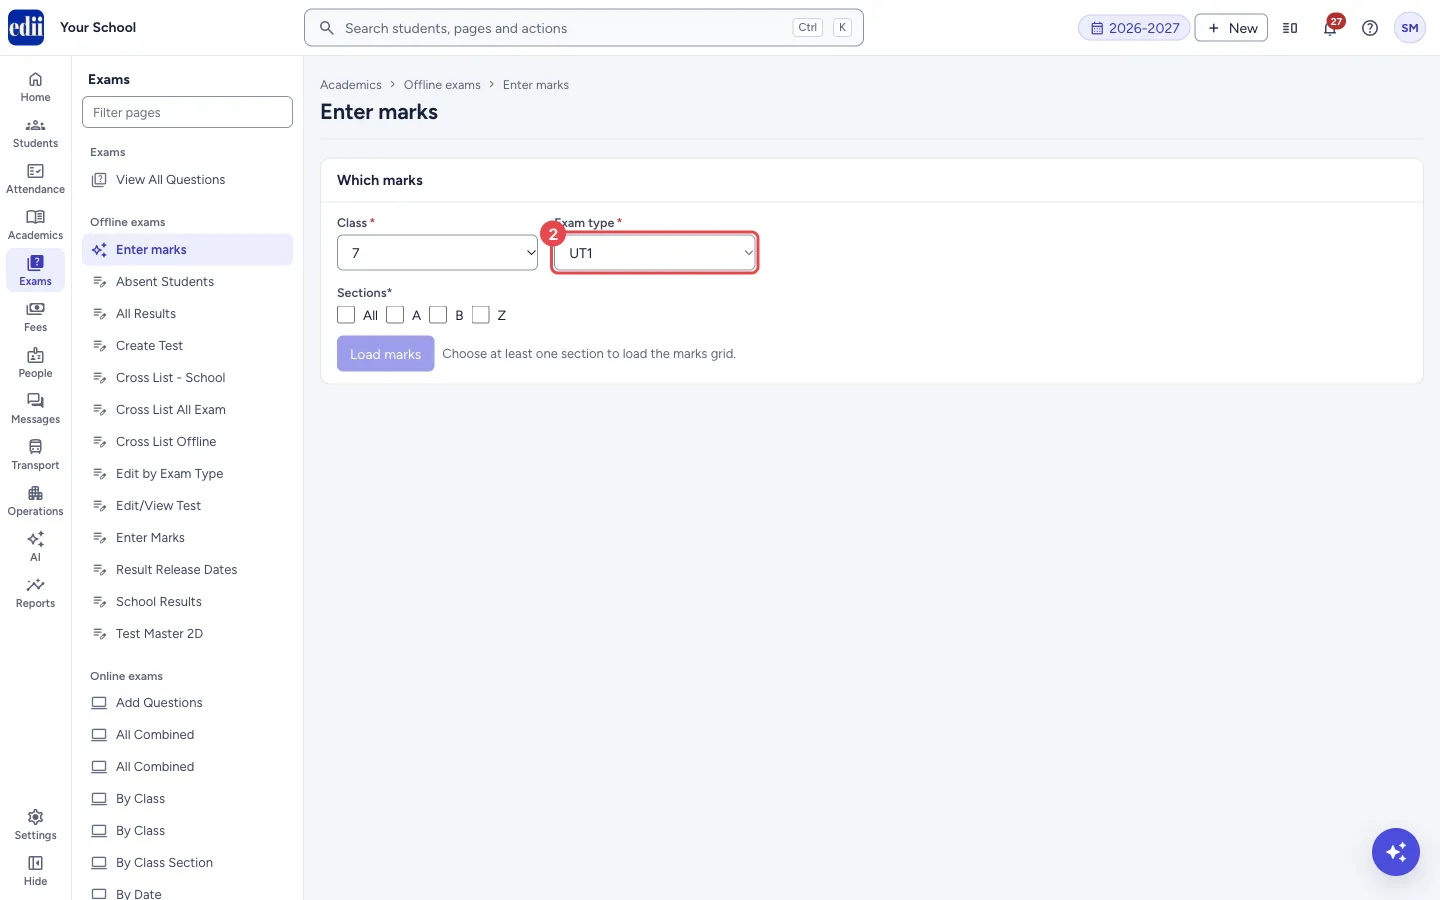
Section titled “2. Choose the exam type”In Exam type, choose the exam, for example UT1, Half Yearly or Annual. The list shows the exam types your school uses.
 Open a bigger pictureतस्वीर बड़ी करें
3. Choose the sections
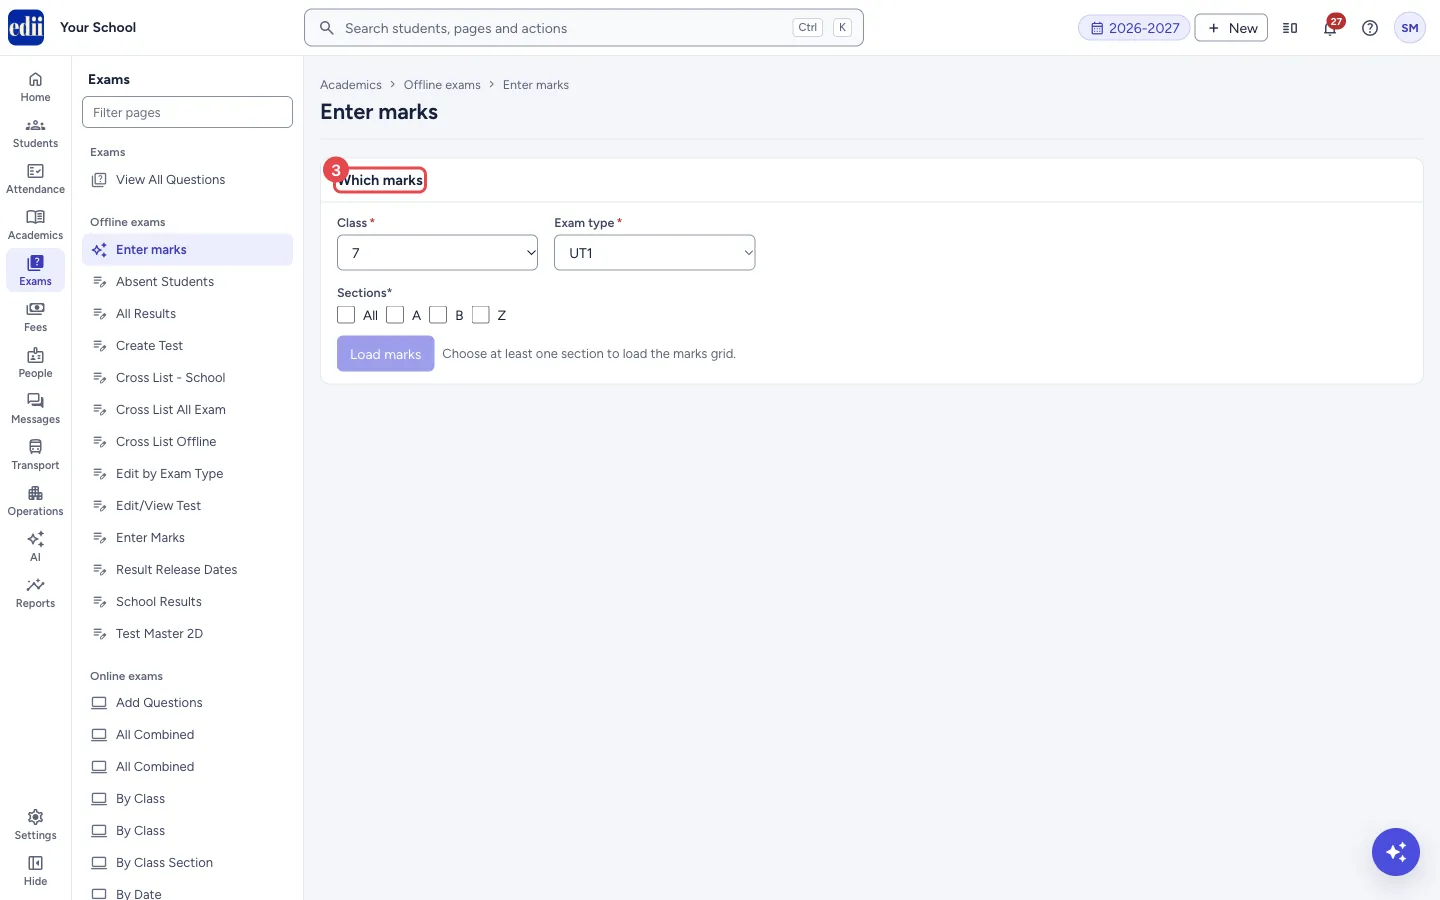
Section titled “3. Choose the sections”Under Sections, tick the section or sections you want. Tick All to choose every section of the class.
Load marks stays switched off until you have chosen a class, at least one section and an exam type. The note beside it tells you what is still missing.
 Open a bigger pictureतस्वीर बड़ी करें
4. Load the marks
Section titled “4. Load the marks”Select Load marks. The grid appears with every student of the chosen sections. Marks that were saved earlier are shown in the boxes.
A line above the grid reminds you: type marks and press Enter or the arrow keys to move; write A for absent; grey cells are subjects the student has not opted for.
5. Type, paste or upload the marks
Section titled “5. Type, paste or upload the marks”Type a mark in each box. Enter and the down arrow move to the box below; the other arrow keys move left, right and up. Click the Name, Roll or ID heading to sort the rows.
To copy from Excel, select the block there and paste it into the first box you want to fill. The note above the grid says how many marks were pasted and how many did not fit.
Or select Download CSV, fill in the marks in Excel and select Upload CSV. Keep the headings, the order of the columns and the student rows as they were downloaded; change only the marks. If the grid already has marks, EDII first asks: Marks for this Exam type has been already filled. Would you like to make the changes by uploading the CSV file? Choose CONFIRM to go on.
6. Save the marks
Section titled “6. Save the marks”Select Save marks at the bottom. If every mark is within its maximum, EDII shows Marks Have Been Updated and a green Saved. line with Marks saved for N student(s). The grid then loads again from the saved marks.
The bar at the bottom shows how many students have marks that are not saved yet, or says Saving replaces the marks for this exam.
Fields and filters
Section titled “Fields and filters”| Field | What it is | Notes |
|---|---|---|
| Class | The class whose marks you enter. | Required. |
| Exam type | The exam the marks belong to. | Required. |
| Sections | The sections to load together. All chooses every section. | Required: at least one. |
| Marks box | The marks of one student in one subject. | Numbers, letters such as A for absent, and the characters * + and . are accepted. A number above the subject’s maximum is marked red. |
Buttons
Section titled “Buttons”| Button | What it does | What happens next |
|---|---|---|
| Load marks | Loads the grid for the chosen class, sections and exam type. | The grid appears below. Any marks you typed in the earlier grid and did not save are lost from the screen. |
| Download CSV | Downloads the grid as a CSV file to fill in Excel. It appears once the grid is loaded. | A CSV file is downloaded. Subjects a student has not opted for are written as NA. |
| Upload CSV | Reads a CSV file you downloaded and filled in, and puts its marks into the grid. | CSV loaded — N student row(s). Click SUBMIT to save. The marks are only on the screen; select Save marks to keep them. |
| Opens the markslip of the chosen class and exam type in a window. | Use the print button in that window to print it. | |
| Save marks | Saves all the marks in the grid. | Marks Have Been Updated, then the grid reloads. |
| Restore them / Discard | Shown when this browser kept marks that were typed earlier and never saved. Restore them puts those marks back in the grid; Discard throws them away. | After Restore them, check the marks and select Save marks. |
Columns
Section titled “Columns”| Column | Meaning |
|---|---|
| S.No / Name / Roll / ID | The student’s row number, name, roll number and ID. The name stays in view when you scroll sideways. |
| One column per subject | The marks for that subject, with its maximum marks shown under the heading. |
| Total | The sum of the numbers typed in that student’s row. Letters such as A and boxes left empty are not added. |
| Class average | The average of the numbers entered in that subject column, and N of M entered: how many marks are entered out of how many students should have one (greyed boxes are not counted). |
After you save
Section titled “After you save”- The saved marks appear in the exam’s results, markslips and report cards. Parents see them only after the result release date.
Good to know
Section titled “Good to know”- Saving replaces the marks of this exam for the students in the grid.
- A mark above the subject’s maximum is not saved. The screen names up to three students and subjects and says Nothing was saved and your other entries have been kept.
- A letter such as A for absent is not checked against the maximum, and is not added into the Total.
- The CSV file must be the one downloaded from the same screen: same exam, same students, same columns in the same order. Otherwise the upload is refused and nothing is loaded.
- Every 30 seconds EDII keeps a draft of unsaved marks in this browser only. If you reload the page, Restore them brings them back. The draft is deleted once you save.
- If you try to leave the page with unsaved marks, the browser asks you to confirm.
Messages you may see
Section titled “Messages you may see”| Message | What it means | What to do |
|---|---|---|
| Marks Have Been Updated | The marks were saved. | Nothing to do. |
| Marks not saved. | One or more marks are above the maximum of their subject. The red banner names the first few. | Correct the red boxes and select Save marks again. |
| No file selected | You opened Upload CSV without choosing a file. | Choose the CSV file. |
| Could not read the CSV file. Please try again. | The file could not be read. | Download a fresh file from this screen and try again. |
| CSV upload aborted — … | The file does not belong to the grid on screen (another exam, another class or section, changed columns, or a row with the wrong number of columns). Nothing was loaded. | Download the marks file from this screen again, change only the marks cells and upload it. |
| Cannot submit — N row(s) have the wrong number of columns. | A row of the grid no longer has the right number of columns, usually after a bad upload. | Load marks again and re-upload the CSV without changing its columns. |
| Network Issue, Please Try Again. | The request did not reach EDII. | Check the internet connection and try again. |
- Fill the file you downloaded; do not start a new one, or the headings will not match.
- Subjects a student has not opted for are written NA in the downloaded file. NA, N/A and - are treated as empty when you upload.
- To enter the marks of one test at a time, use Enter Marks under Offline exams.
Stuck? Try this
Section titled “Stuck? Try this”| Problem | Likely cause | What to do |
|---|---|---|
| A subject has no column | There is no test for that subject in this class and exam type. | Add it from Create Test, then load the marks again. |
| A box is grey and cannot be typed in | The student has not opted for that subject. | Nothing to do. Change the student’s subjects if this is wrong. |
| The CSV upload is refused | The file is for another exam, class or section, or its columns were changed. | Download the file again from this screen and edit only the marks. |
Did this page help?क्या इस पेज से मदद मिली?
Thanks! Glad it helped.धन्यवाद! अच्छा लगा कि काम बन गया।
Sorry about that. Ask in your own words, or write to us.माफ़ कीजिए। अपने शब्दों में पूछें, या हमें लिखें।