
Screen guide · Web app
Biometric Machine Users
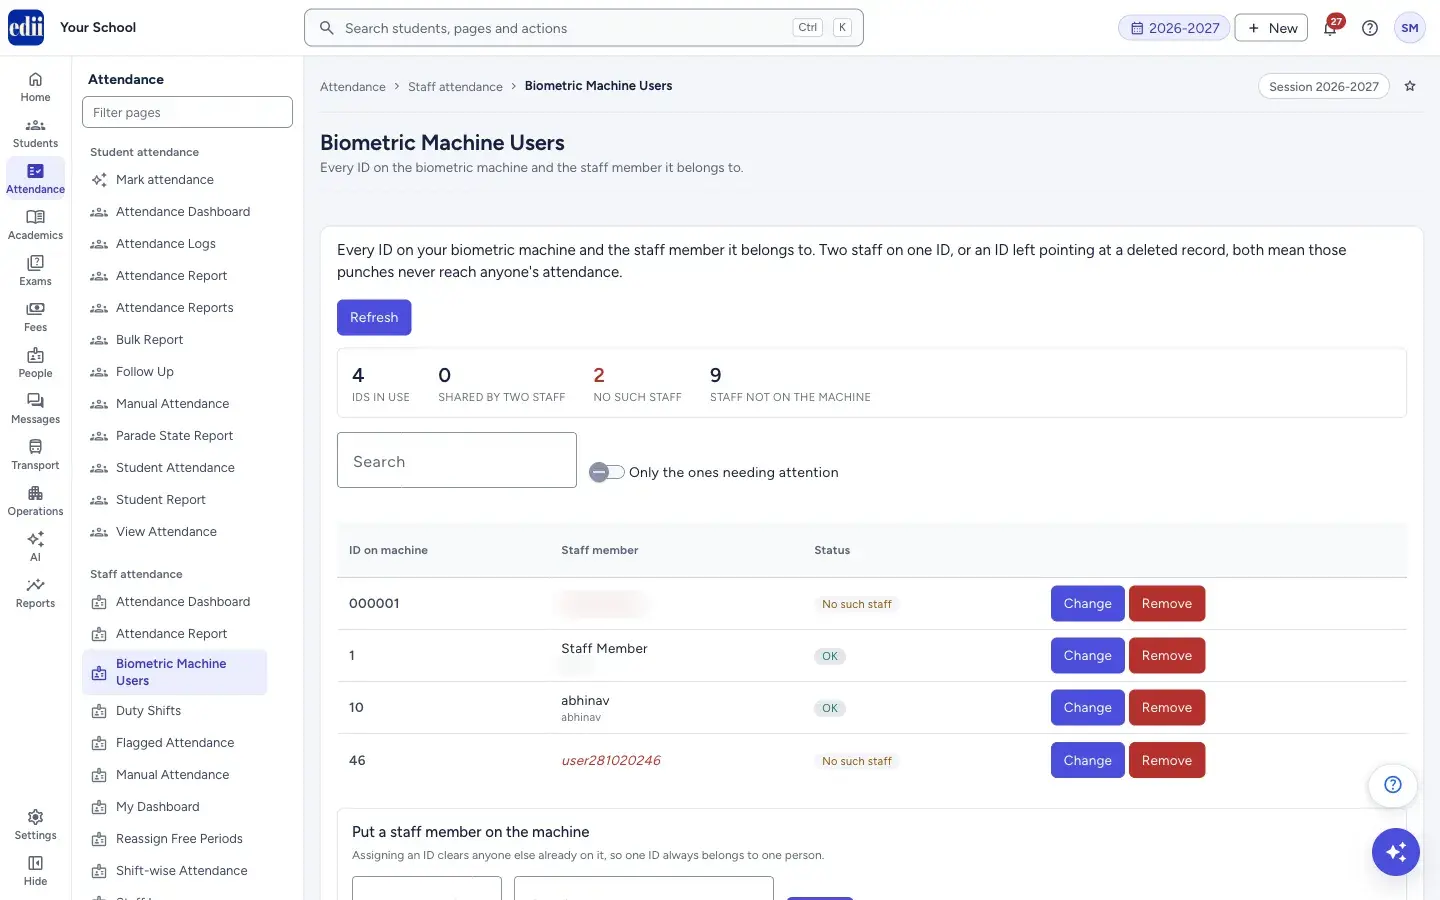
Shows every ID on the school's biometric machine and the staff member it belongs to, flags IDs that will not reach anyone's attendance, and lets you assign, change or remove an ID.
यह पेज अंग्रेज़ी में है। कुछ समझ न आए तो ।
Each staff member who punches on the biometric machine has an ID on machine. This screen lists those IDs and the Staff member each one belongs to, so the punches can be matched to the right person’s attendance.
The screen warns you of two problems: an ID that is shared by two staff members, and an ID that points at a staff record that no longer exists. In both cases the punches on that ID never reach anyone’s attendance.
Under the list, Put a staff member on the machine lets you give a staff member an ID.
Who uses it and when
Section titled “Who uses it and when”The HR in-charge or the administrator, when a new staff member joins, when a staff member leaves, or when staff say their punches are not showing in attendance.
Before you start
Section titled “Before you start”- A biometric machine must be registered for your school. If it is not, assigning an ID shows No biometric machine is registered for this school.
Where to find it
Section titled “Where to find it”- In school.edii.in: Attendance › Staff attendance › Biometric Machine Users
- Or press Ctrl K (⌘ K on a Mac) and type Biometric Machine Users.
- Address:
school.edii.in/view/biometric-users - Who can see it: Staff whose role includes Messages or Leave or Meetings or Students or Attendance access. Shown only when your school uses HR and Calendar and Student in EDII. If it is missing from your menu, ask your school admin.
 Open a bigger pictureतस्वीर बड़ी करें
Step by step
Section titled “Step by step”1. Read the four counts
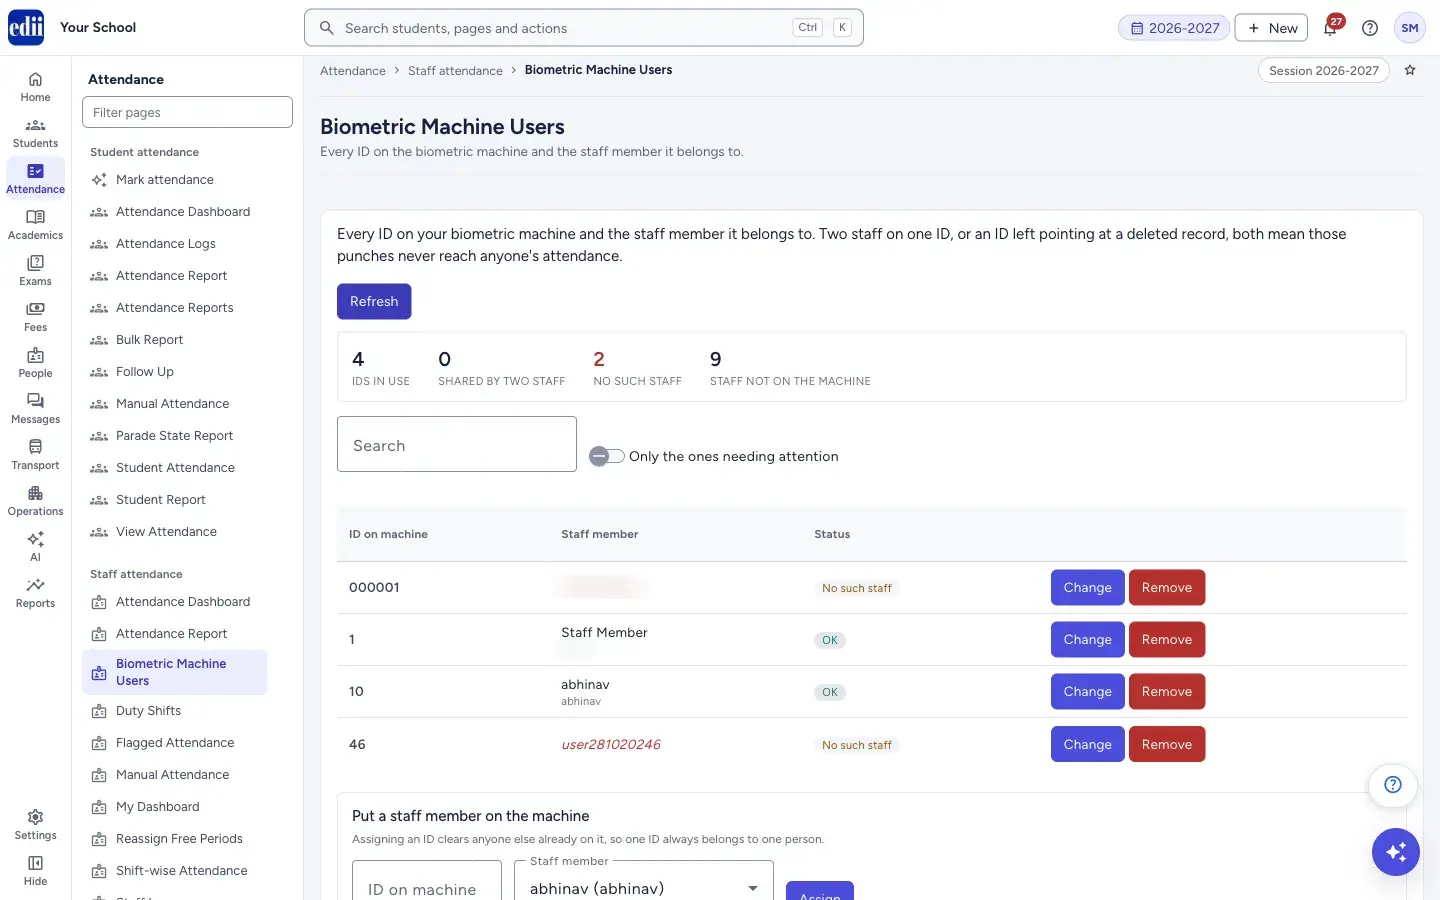
Section titled “1. Read the four counts”Under the Refresh button, four numbers: IDs in use, Shared by two staff, No such staff and Staff not on the machine. The second and third turn red when they are more than zero.
 Open a bigger pictureतस्वीर बड़ी करें
2. Check the list
Section titled “2. Check the list”Each row shows the ID on machine, the Staff member (name and staff ID, or only the staff ID in red when the record is gone) and a Status: OK, Shared ID or No such staff. Point at Shared ID or No such staff to read why it is a problem.
If your school has more than one machine, the machine is named under the ID and a Machine list appears for filtering. Use Search to find a name, staff ID or machine ID, and the switch Only the ones needing attention to show only rows with a problem.
3. Change or remove an ID
Section titled “3. Change or remove an ID”Select Change on a row, pick the right person in Staff member, and select Save (or Cancel). The message Machine ID assigned shows.
Select Remove to take the staff member off that ID. A box asks Remove from machine? and says that Machine ID will no longer be linked to that staff member, and that punches made on that ID will not be filed against anyone until it is assigned again. Select Remove to go on or Keep to stop. After you confirm, the message Removed from the machine shows.
4. Put a staff member on the machine
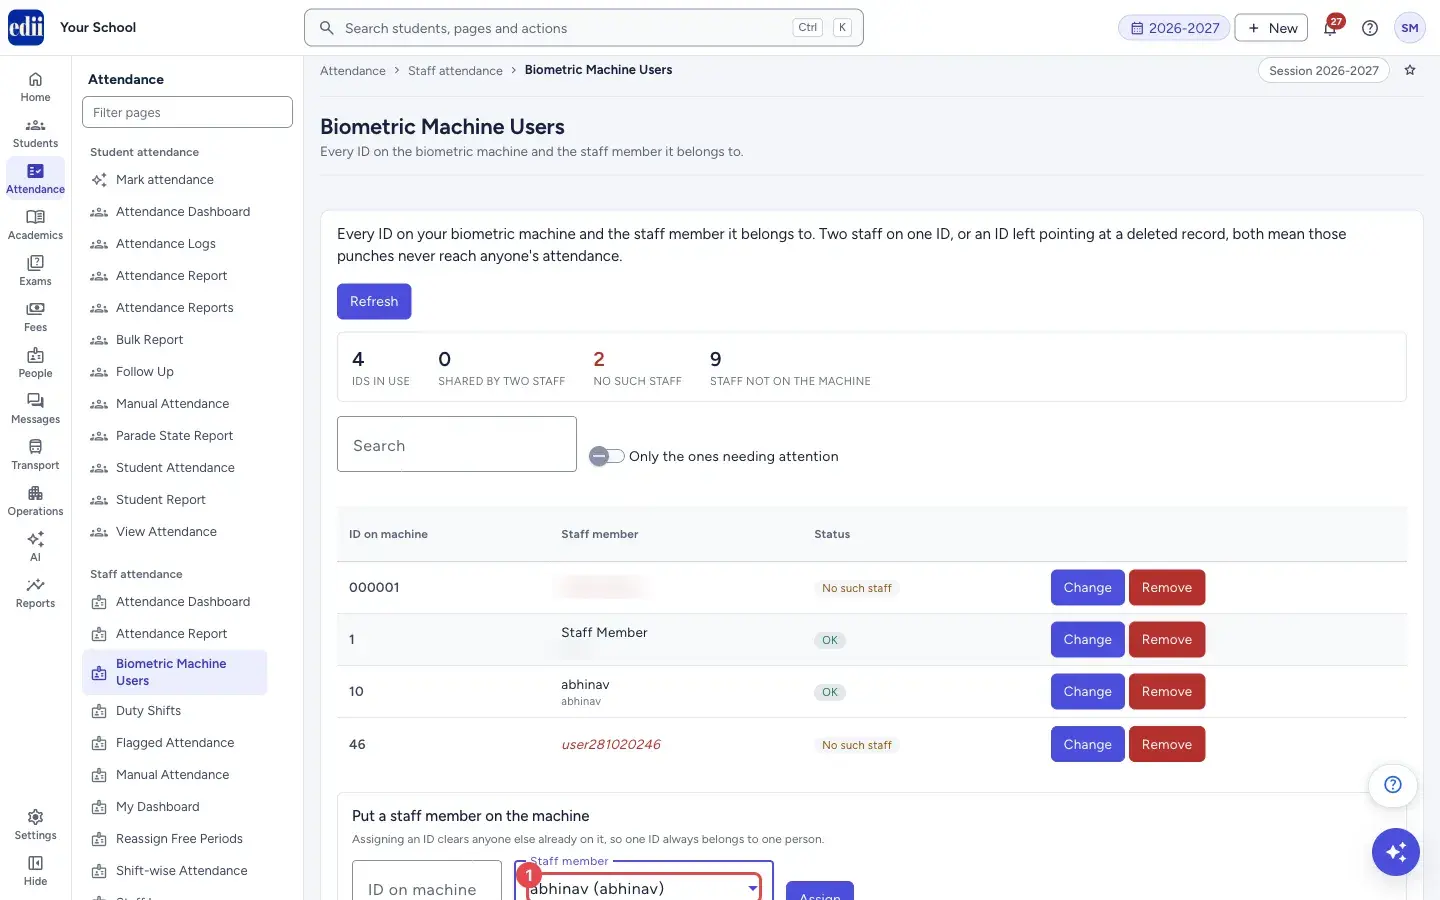
Section titled “4. Put a staff member on the machine”In the box at the bottom, type the ID on machine (for example 20, up to 20 characters), choose the Staff member (the list says — not on the machine yet for staff without an ID) and select Assign. Assigning an ID clears anyone else already on it, so one ID always belongs to one person.
Under the box, Not on the machine yet: lists the staff who have no ID.
 Open a bigger pictureतस्वीर बड़ी करें
5. Refresh
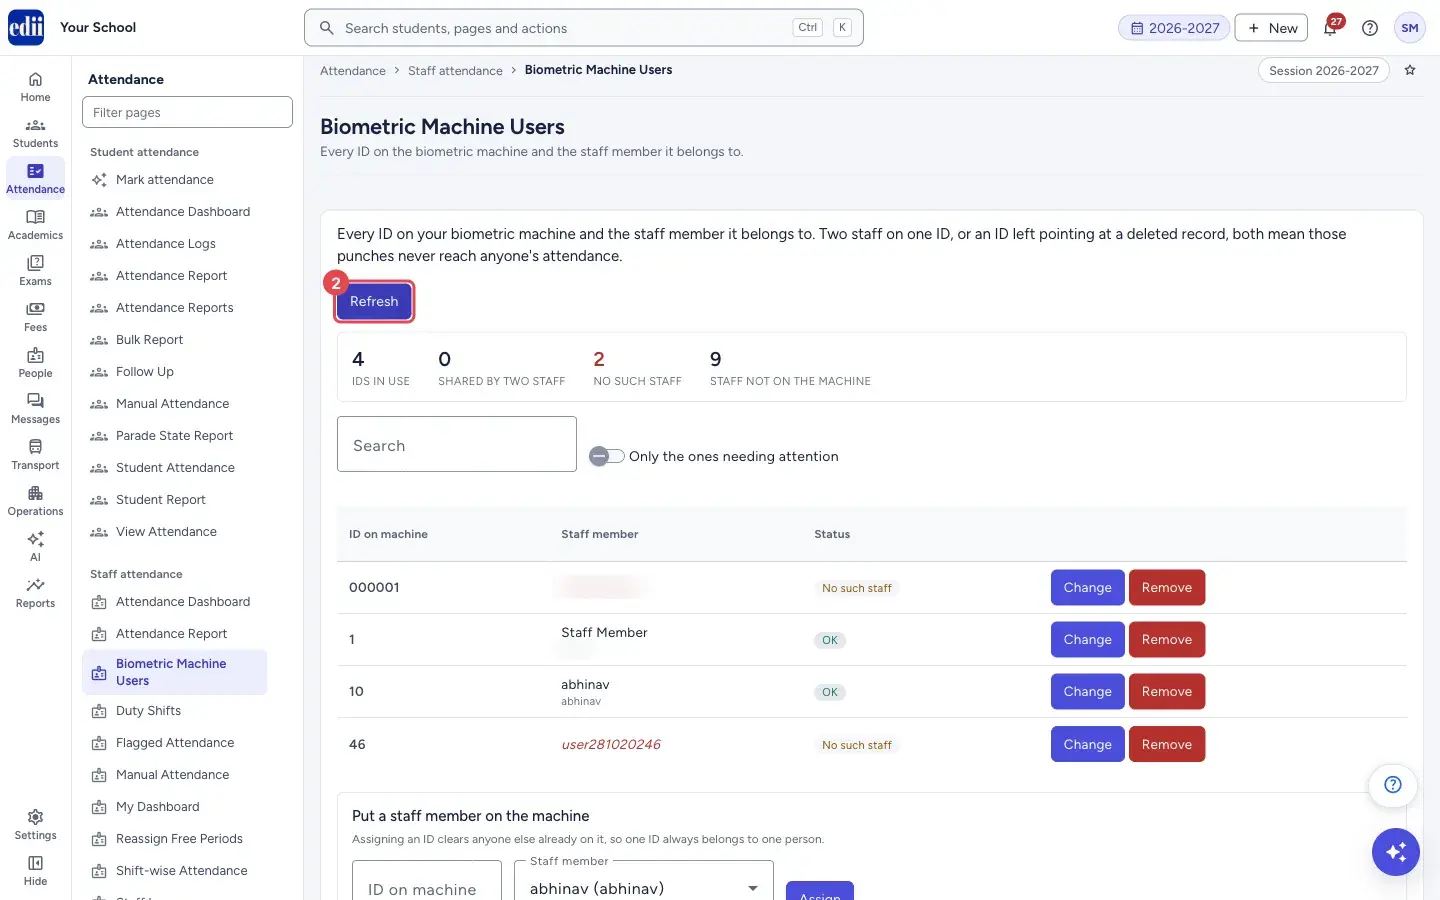
Section titled “5. Refresh”Select Refresh to load the list again.
 Open a bigger pictureतस्वीर बड़ी करें
Fields and filters
Section titled “Fields and filters”| Field | What it is | Notes |
|---|---|---|
| Machine | Filters the list to one machine. | Appears only when the school has more than one machine. |
| Search | Filters the list. | Placeholder: Name, staff ID or machine ID. |
| Only the ones needing attention | A switch that keeps only rows with a problem. | Off by default. |
| ID on machine | The number the machine uses for the person. | Required when assigning. Up to 20 characters. |
| Staff member | The staff member the ID belongs to. | Required. |
Buttons
Section titled “Buttons”| Button | What it does | What happens next |
|---|---|---|
| Refresh | Loads the IDs again. | The counts and the list update. |
| Change | Lets you pick another staff member for this ID. | Save and Cancel appear in the row. |
| Remove | Takes the staff member off this ID, after you confirm. | A confirmation box first. After you confirm: Removed from the machine. |
| Assign | Gives the chosen staff member the ID you typed. | Machine ID assigned. |
Columns
Section titled “Columns”| Column | Meaning |
|---|---|
| ID on machine | The machine’s number for the person (and the machine, when there are several). |
| Staff member | The staff member’s name with the staff ID under it. When the record no longer exists only the ID shows, in red. |
| Status | OK; Shared ID (another staff member is on the same ID, so punches cannot be matched to either); or No such staff (the ID points at a staff record that no longer exists, so its punches reach nobody). |
Messages you may see
Section titled “Messages you may see”| Message | What it means | What to do |
|---|---|---|
| Please choose the staff member for this ID | You selected Save on a row without choosing anyone. | Pick the staff member, then Save. |
| Please enter the ID on the machine and choose a staff member | One of the two boxes in Put a staff member on the machine is empty. | Fill both. |
| No biometric machine is registered for this school | EDII does not know of a machine for your school. | Ask your EDII contact to register the machine. |
| Machine ID assigned | The assignment was saved. | |
| Removed from the machine | The staff member was taken off the ID. | |
| Could not load the enrolments / Could not save the change | The request did not go through. | Select Refresh and try again. |
| Network Issue, Please Try Again. | No connection to the server. | Check the internet connection. |
- Check Shared by two staff and No such staff every time staff join or leave. Both must be 0 for every punch to count.
- The staff list in Put a staff member on the machine can also be filled from a staff member’s own profile, as the screen says when the list is empty.
Did this page help?क्या इस पेज से मदद मिली?
Thanks! Glad it helped.धन्यवाद! अच्छा लगा कि काम बन गया।
Sorry about that. Ask in your own words, or write to us.माफ़ कीजिए। अपने शब्दों में पूछें, या हमें लिखें।