
Screen guide · Web app
Add Meeting
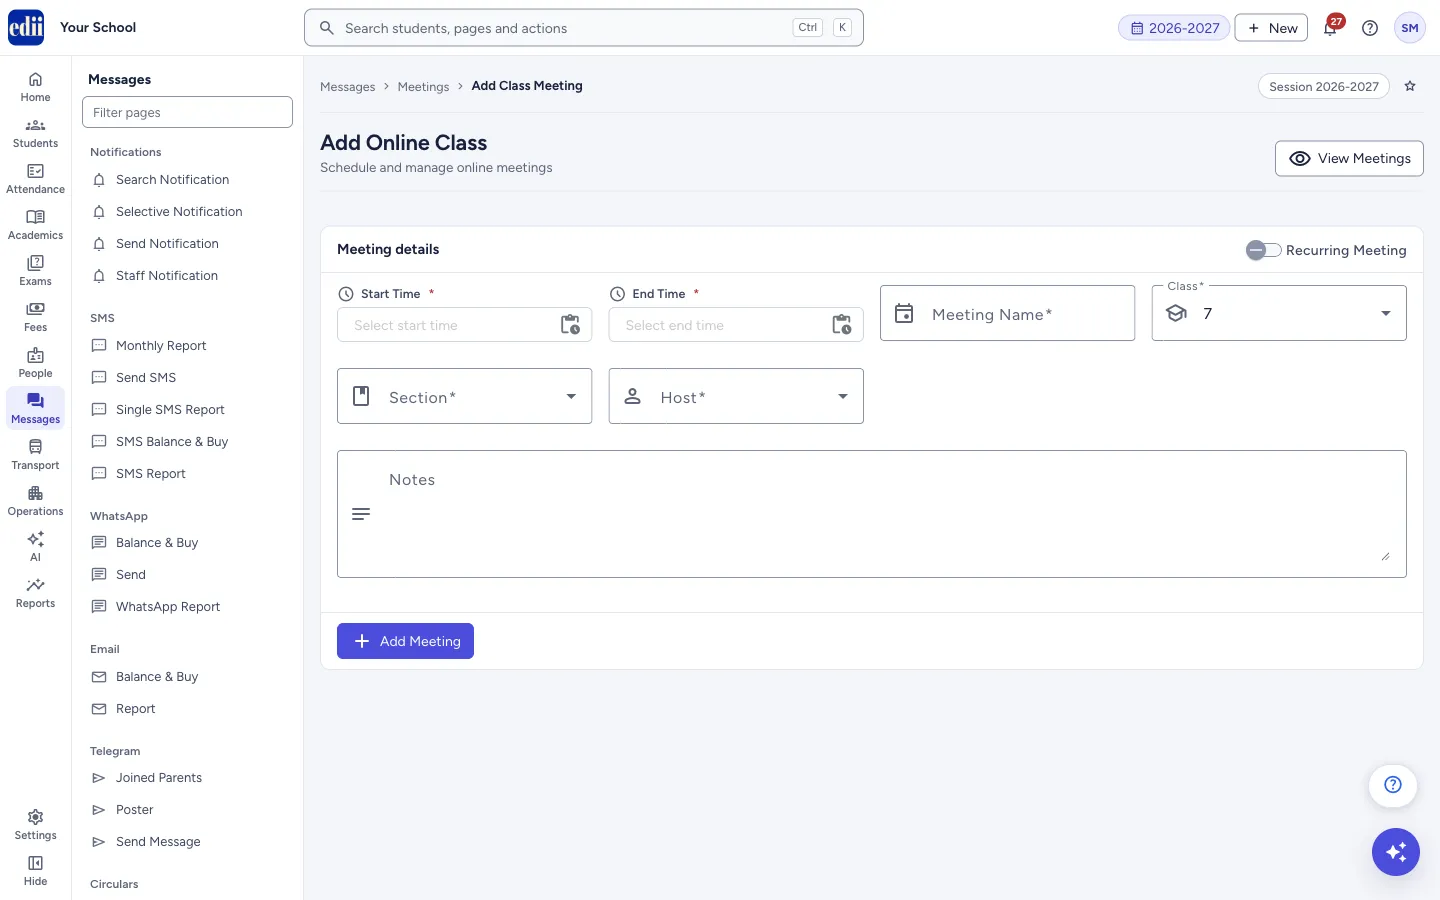
Schedule an online class for a class and one or more sections with a host, start and end time, name and notes, once or on several dates. The page is headed Add Online Class.
यह पेज अंग्रेज़ी में है। कुछ समझ न आए तो ।
Add Online Class schedules a live online class (meeting). You choose the Class, the Section or sections, the Host (the staff member who runs it), when it starts and ends, a Meeting Name and optional Notes.
For a class that repeats, switch on Recurring Meeting at the top right of the Meeting details box. The form then asks for the dates and for the hours and minutes, and creates the class for every date you add.
The View Meetings button at the top right opens the list of meetings.
Who uses it and when
Section titled “Who uses it and when”Teachers and coordinators use it to set up live online classes before the day.
Before you start
Section titled “Before you start”- Know the class, the sections, the host and the timing. For a recurring class, decide the dates.
- The host is chosen from the school’s staff list, so the person must already be added as a user.
Where to find it
Section titled “Where to find it”- In school.edii.in: Messages › Meetings › Add Meeting
- Or press Ctrl K (⌘ K on a Mac) and type Add Meeting.
- Address:
school.edii.in/add/add-meeting - Who can see it: Staff whose role includes Messages or Leave or Meetings or Students or Attendance access. Shown only when your school uses HR and Calendar and Student and ELearning in EDII. If it is missing from your menu, ask your school admin.
 Open a bigger pictureतस्वीर बड़ी करें
Step by step
Section titled “Step by step”1. Choose the class
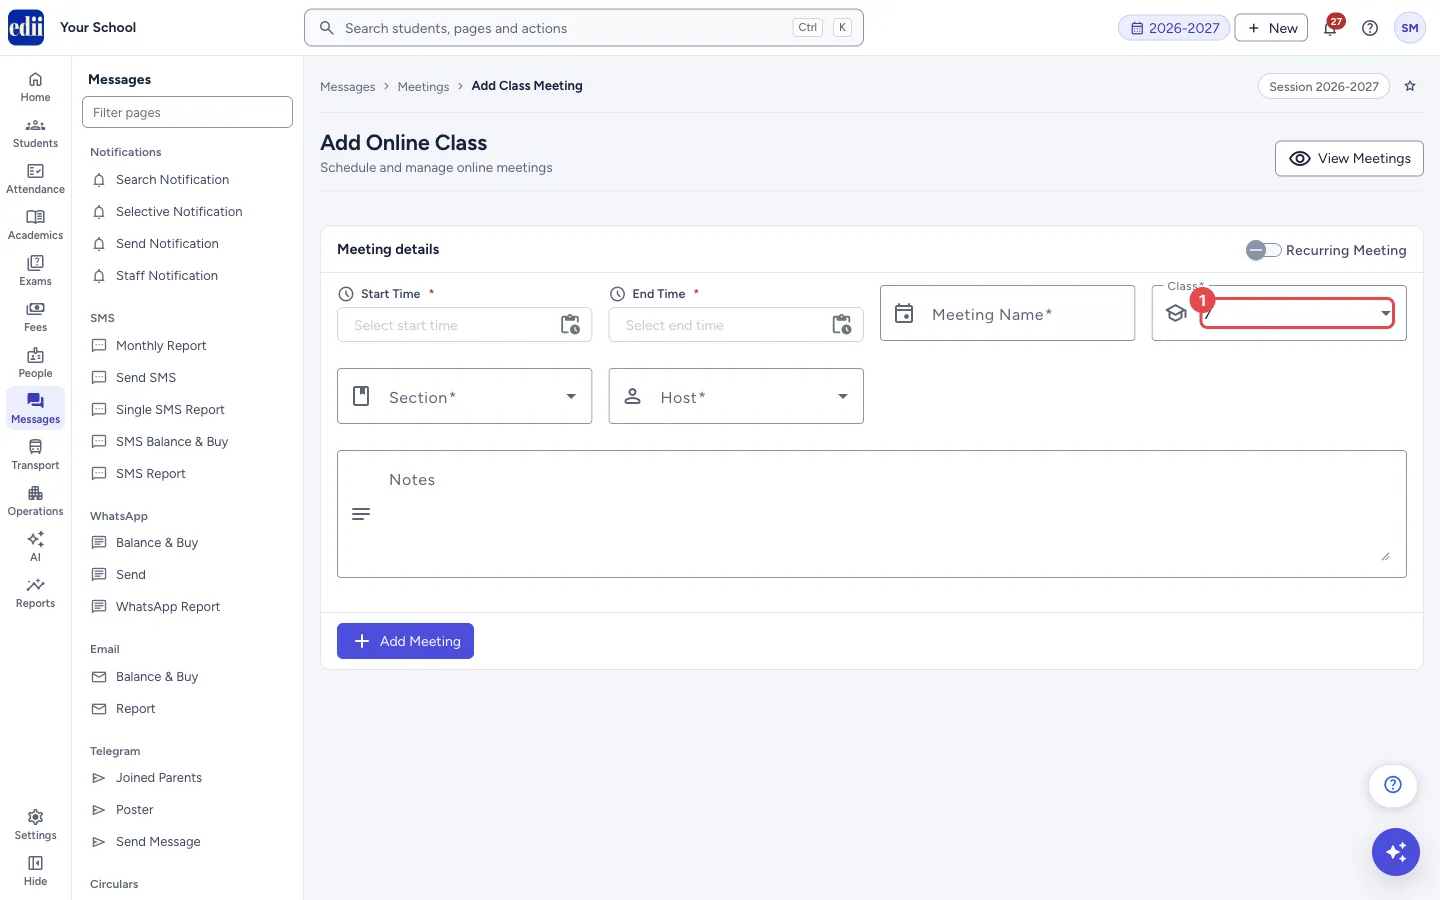
Section titled “1. Choose the class”Open Class and choose the class. If your school keeps the last class you used, it is already filled.
 Open a bigger pictureतस्वीर बड़ी करें
2. Choose the sections
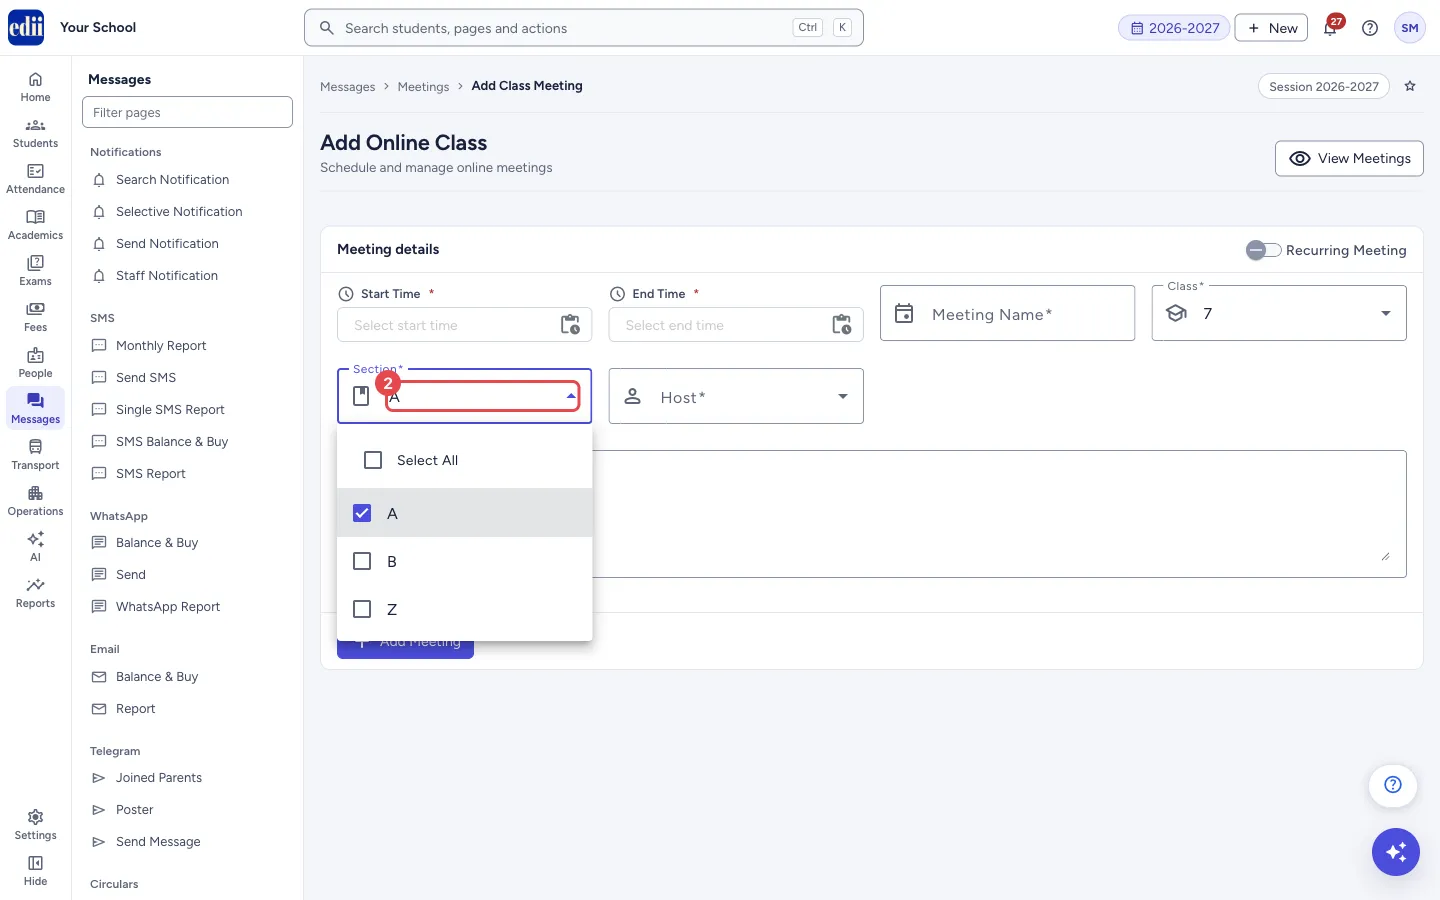
Section titled “2. Choose the sections”Open Section. You can tick more than one section, or tick Select All to take every section of the class.
 Open a bigger pictureतस्वीर बड़ी करें
3. Fill in the meeting details
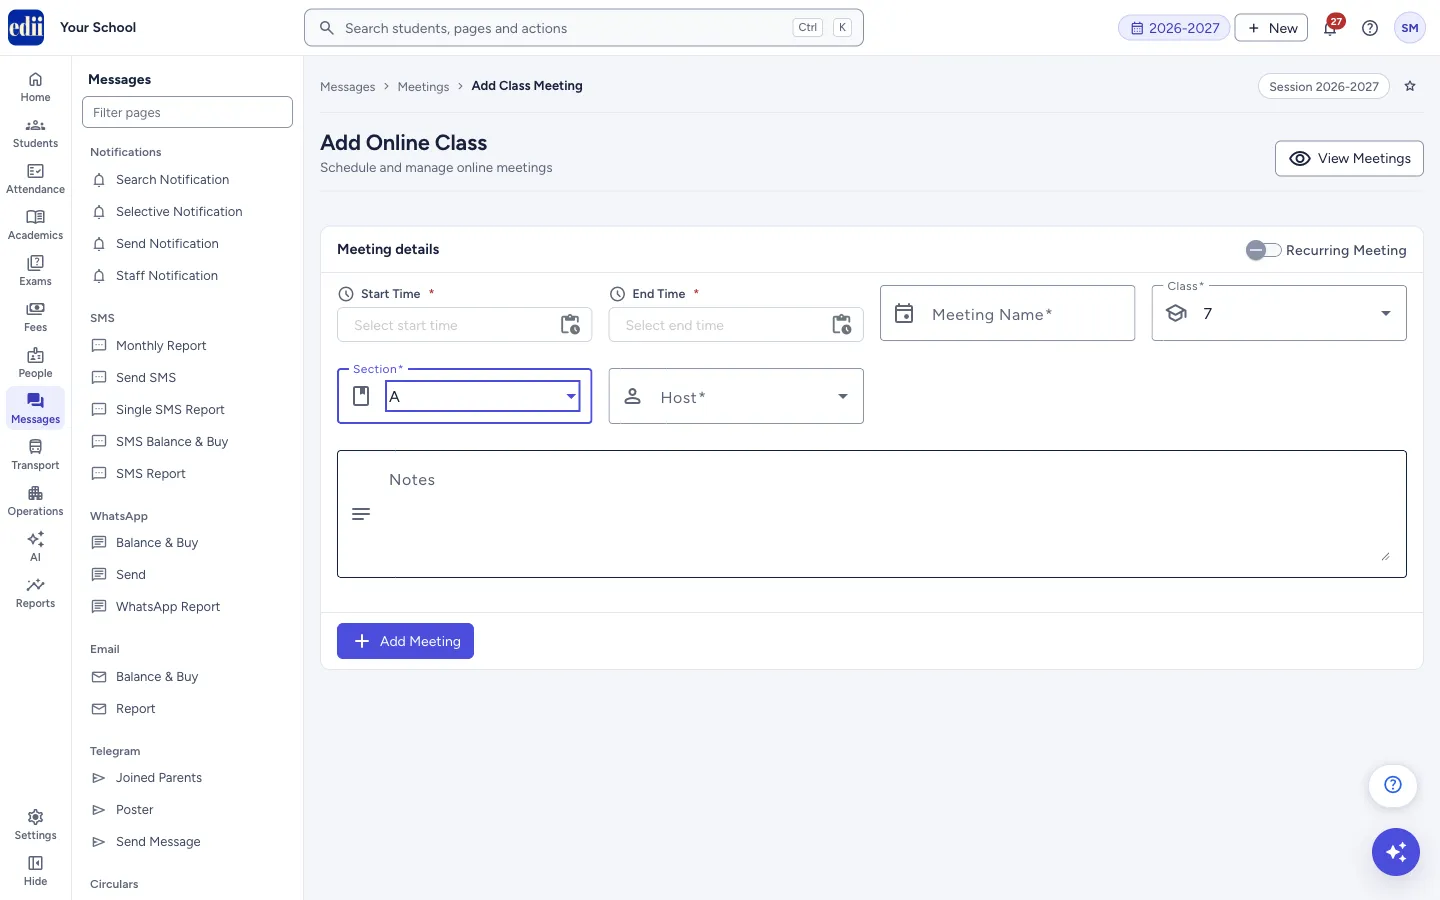
Section titled “3. Fill in the meeting details”Pick Start Time and End Time (date and time). Type the Meeting Name and choose the Host. Add Notes if you want to give students any instructions.
In the recurring form, add each date with Add Date. The dates show as chips; select the cross on a chip to remove a date. Then choose Start Hour, Start Minute, End Hour and End Minute, which are used for every date.
 Open a bigger pictureतस्वीर बड़ी करें
4. Add the meeting
Section titled “4. Add the meeting”Select Add Meeting. If a required box is empty, EDII marks it and does not save. When it is saved, EDII shows Meeting Added and opens the View Meetings page.
Fields and filters
Section titled “Fields and filters”| Field | What it is | Notes |
|---|---|---|
| Recurring Meeting | Switches the form between one meeting and a meeting repeated on several dates. | Off to begin with. EDII warns Select Multiple Dates to start a Recurring Meeting when you switch it on. |
| Start Time, End Time | The date and time the class starts and ends. | Required for a single meeting. Errors: Start Time is required, End Time is required. |
| Add Date, Start Hour, Start Minute, End Hour, End Minute | The dates of a recurring class and the time it runs on each of them. | Required for a recurring meeting. At least one date. Error: At least one meeting date is required. |
| Meeting Name | The title of the class. | Required. Special symbols cannot be typed. |
| Class | The class that attends. | Required. |
| Section | The sections that attend. | Required. More than one can be chosen; Select All takes all of them. |
| Host | The staff member who runs the class. | Required. |
| Notes | Extra instructions. | Optional. |
Buttons
Section titled “Buttons”| Button | What it does | What happens next |
|---|---|---|
| View Meetings | Opens the list of meetings. | You leave this form; nothing is saved. |
| Add Meeting | Creates the online class (or one for each date, if recurring). | The button reads Adding… while it works. Then Meeting Added shows and View Meetings opens. |
After you save
Section titled “After you save”- The meeting shows on the View Meetings page, and in the other meeting reports, for its class and sections.
Good to know
Section titled “Good to know”- A meeting is created only when every required box is filled.
- While a meeting is being added, the button is disabled, so one click makes one meeting.
Messages you may see
Section titled “Messages you may see”| Message | What it means | What to do |
|---|---|---|
| Meeting Added | The online class was created. | Check View Meetings. |
| Select Multiple Dates to start a Recurring Meeting | A reminder that a recurring class needs dates, shown when you switch Recurring Meeting on. | Add the dates with Add Date. |
| Select at least one date for the recurring meeting | You selected Add Meeting in the recurring form with no dates. | Add at least one date. |
| Bad/Slow Internet Connection, Please check your internet connection | The meeting could not be sent. | Check the internet and try again. |
- Use Recurring Meeting for a weekly class instead of making each one by hand.
- Choose Select All under Section for a class that meets together.
Stuck? Try this
Section titled “Stuck? Try this”| Problem | Likely cause | What to do |
|---|---|---|
| The meeting is not saved and some boxes show red text. | A required box is empty. | Fill class, sections, host, times and the name. |
| The host I want is not in the list. | The person is not added as a user. | Add the person on the user pages first. |
Did this page help?क्या इस पेज से मदद मिली?
Thanks! Glad it helped.धन्यवाद! अच्छा लगा कि काम बन गया।
Sorry about that. Ask in your own words, or write to us.माफ़ कीजिए। अपने शब्दों में पूछें, या हमें लिखें।