
Screen guide · Web app
New Admission
The Entrance Form: register an applicant, record the admission form fee and print the registration form. It belongs to the Admission pages (View Applications, Dashboard, By Date Range), shown when your role has Admission access and the Admissions module is switched on; online applications use New Applicant instead.
यह पेज अंग्रेज़ी में है। कुछ समझ न आए तो ।
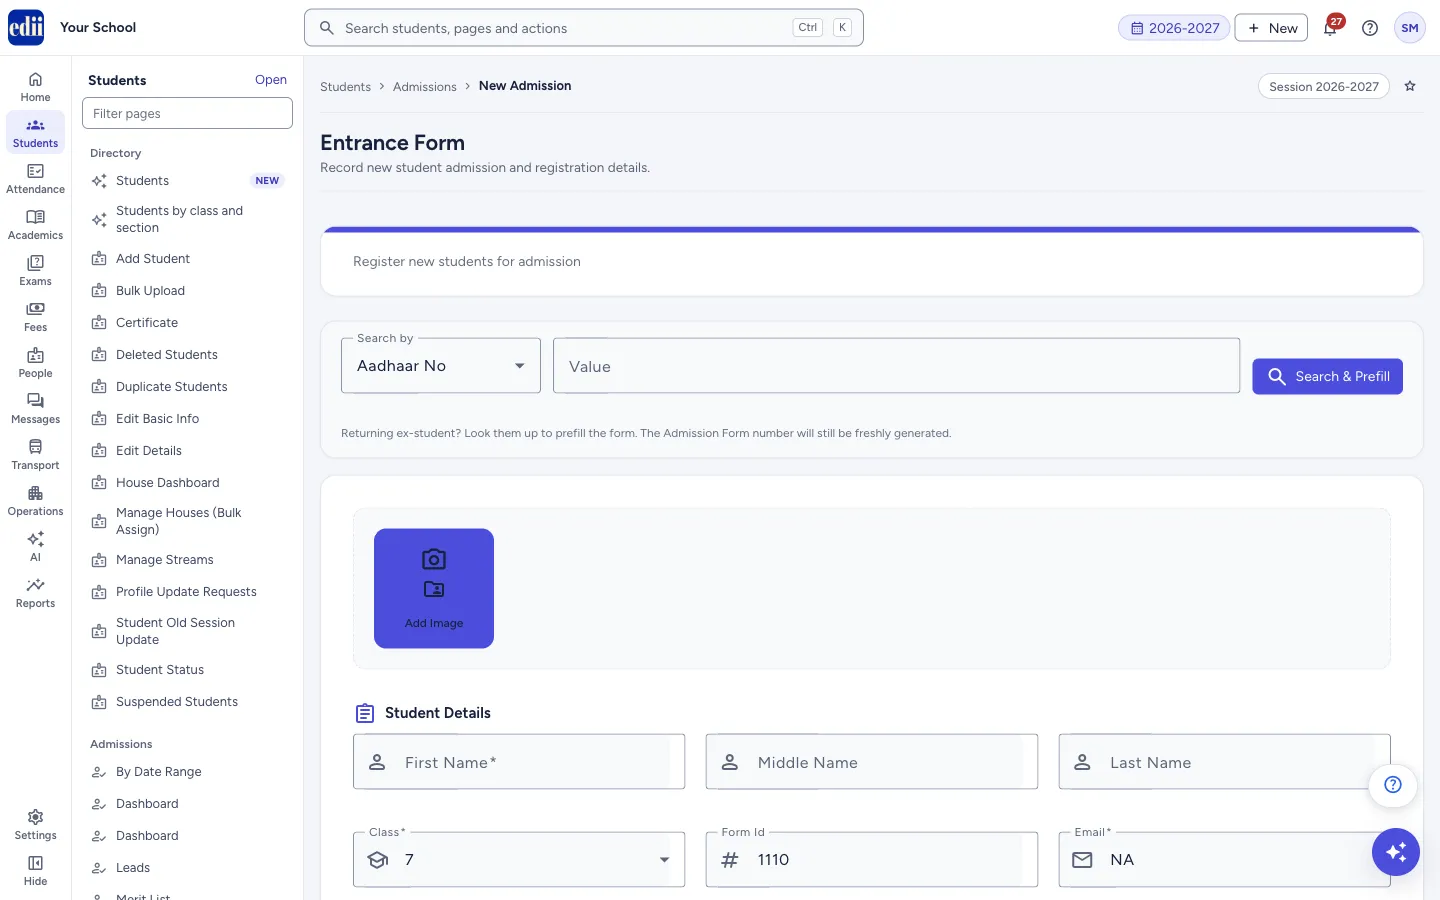
New Admission opens the Entrance Form (“Record new student admission and registration details.”). Use it when a family comes to the office and you want to register the child, take the admission form fee and give them the registration form.
At the top you can look up a returning ex-student to fill most of the form for you. Below it you add a photo, fill Student Details, open Parent Details if you want to record them, then Guardian Details, Previous School Details and Attachments, and press Register.
This page is different from New Applicant under the newer Admissions pages. New Applicant enters an enquiry or full application into the online admissions pipeline; New Admission records the entrance form and its fee.
Who uses it and when
Section titled “Who uses it and when”The admission desk uses it for every child who enquires or applies at the office.
Before you start
Section titled “Before you start”- Know the class applied for and the admission form fee. Keep the applicant’s documents and a photo ready if you want to attach them.
Where to find it
Section titled “Where to find it”- In school.edii.in: Students › Admissions › New Admission
- Or press Ctrl K (⌘ K on a Mac) and type New Admission.
- Address:
school.edii.in/add/add-admission - Who can see it: Needs Admission access for your role, and the Admissions module switched on for the school. If it is missing from your menu, ask your school admin.
 Open a bigger pictureतस्वीर बड़ी करें
Step by step
Section titled “Step by step”1. Look up an ex-student (optional)
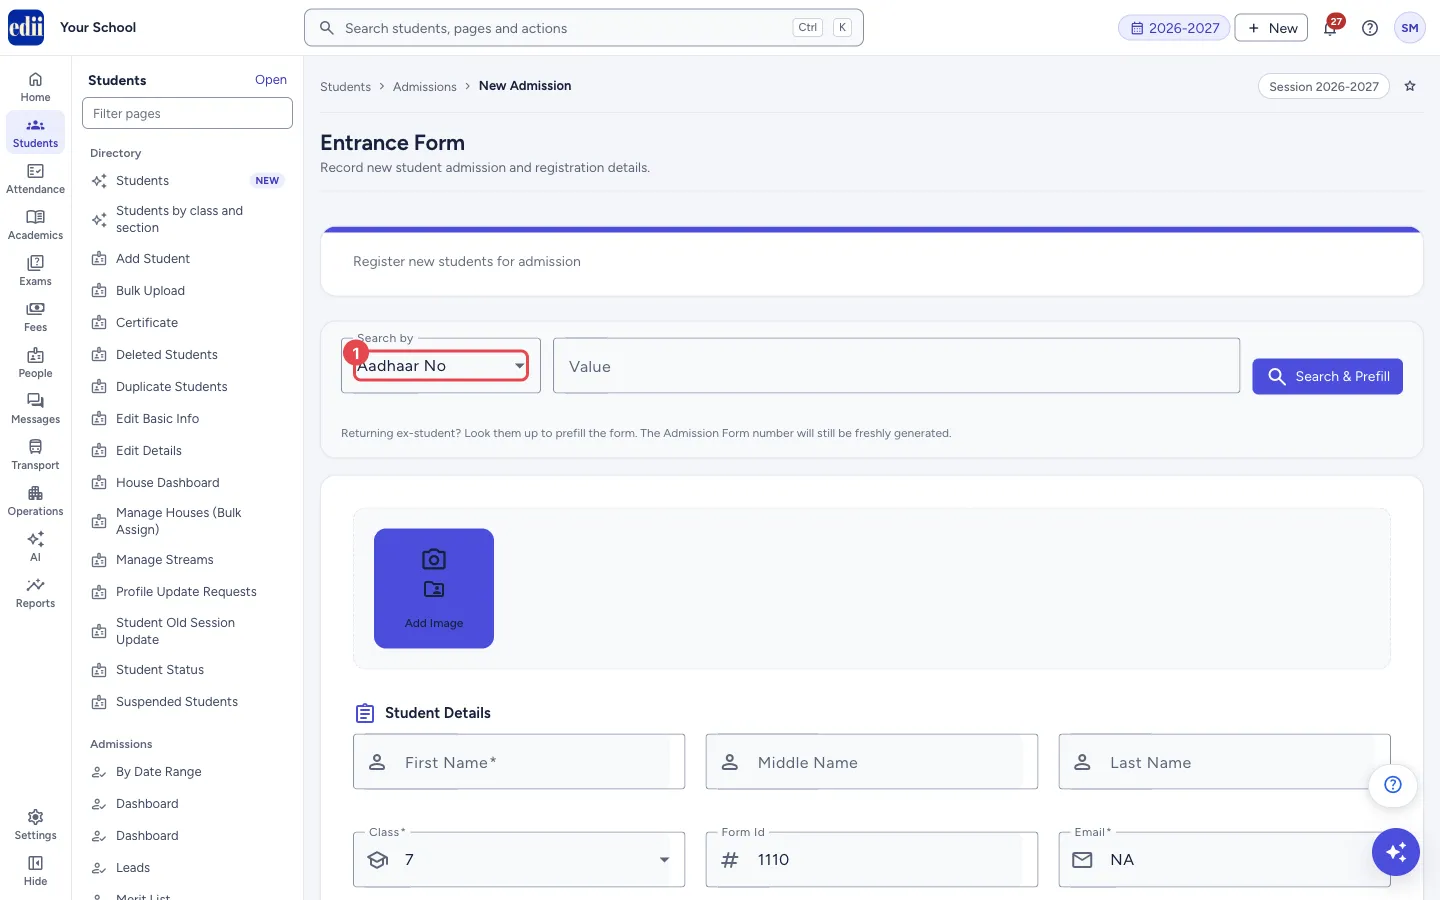
Section titled “1. Look up an ex-student (optional)”Choose what to search by: Aadhaar No, Enrollment No, ID No, Samagra ID or PEN No. Type it in Value and press Search & Prefill. A match fills the form and shows Form prefilled with ex-student details. A fresh Admission Form number will be generated.
 Open a bigger pictureतस्वीर बड़ी करें
2. Add a photo (optional)
Section titled “2. Add a photo (optional)”Press Add Image. You can choose a file or take a picture with the camera: press Capture to take it, Close to put the camera away.
3. Fill Student Details
Section titled “3. Fill Student Details”Fill the required boxes marked with a star: First Name, Class, Email, Date of Birth (DD-MM-YYYY), Phone Number, Blood Group, Session, Father’s Name and Admission Fee. Age (as on 31 March) fills in by itself from the date of birth.
Choose Gender, Category and Mode of Transport with the round buttons. Many other boxes start with a standard value such as NA, Indian, Main or Walk In; change them if you know the real value.
4. Add Parent Details (optional)
Section titled “4. Add Parent Details (optional)”Open Parent Details (Father’s & Mother’s Information) to record their nationality, occupation, office and home address, phone, email, income, qualification, Aadhaar and PAN.
5. Add Guardian and Previous School Details
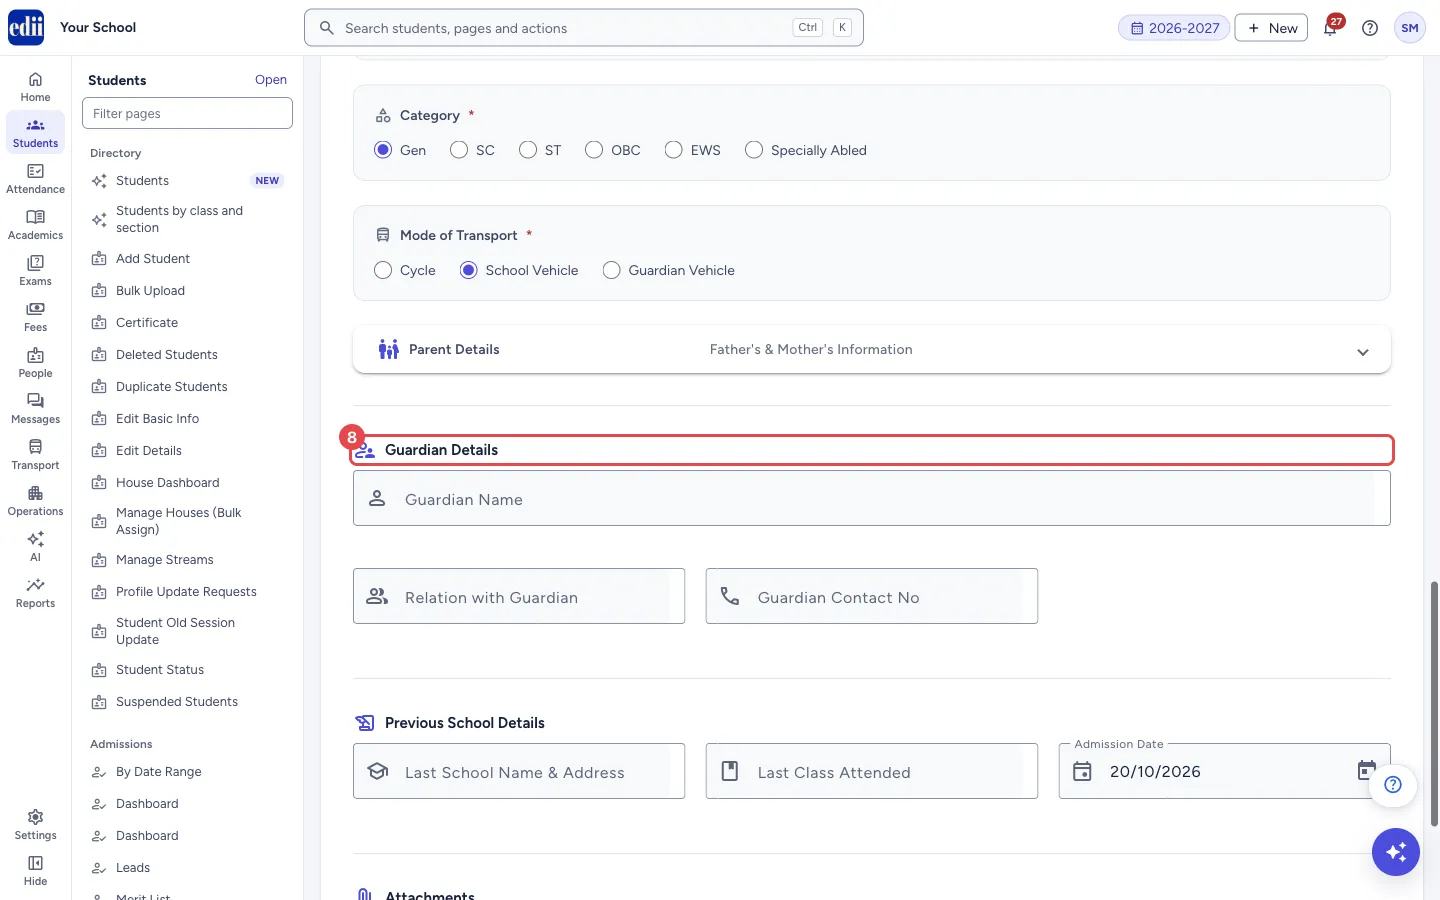
Section titled “5. Add Guardian and Previous School Details”Fill Guardian Name, Relation with Guardian and Guardian Contact No if a guardian is applying. Under Previous School Details enter Last School Name & Address and Last Class Attended. Admission Date starts as today.
 Open a bigger pictureतस्वीर बड़ी करें
6. Attach documents (optional)
Section titled “6. Attach documents (optional)”Press Add Attachment and choose one or more files. Attachment(s) uploaded means they are saved with the form; Failed to upload attachment(s) means try again. The remove button next to a file takes it off the list.
7. Register
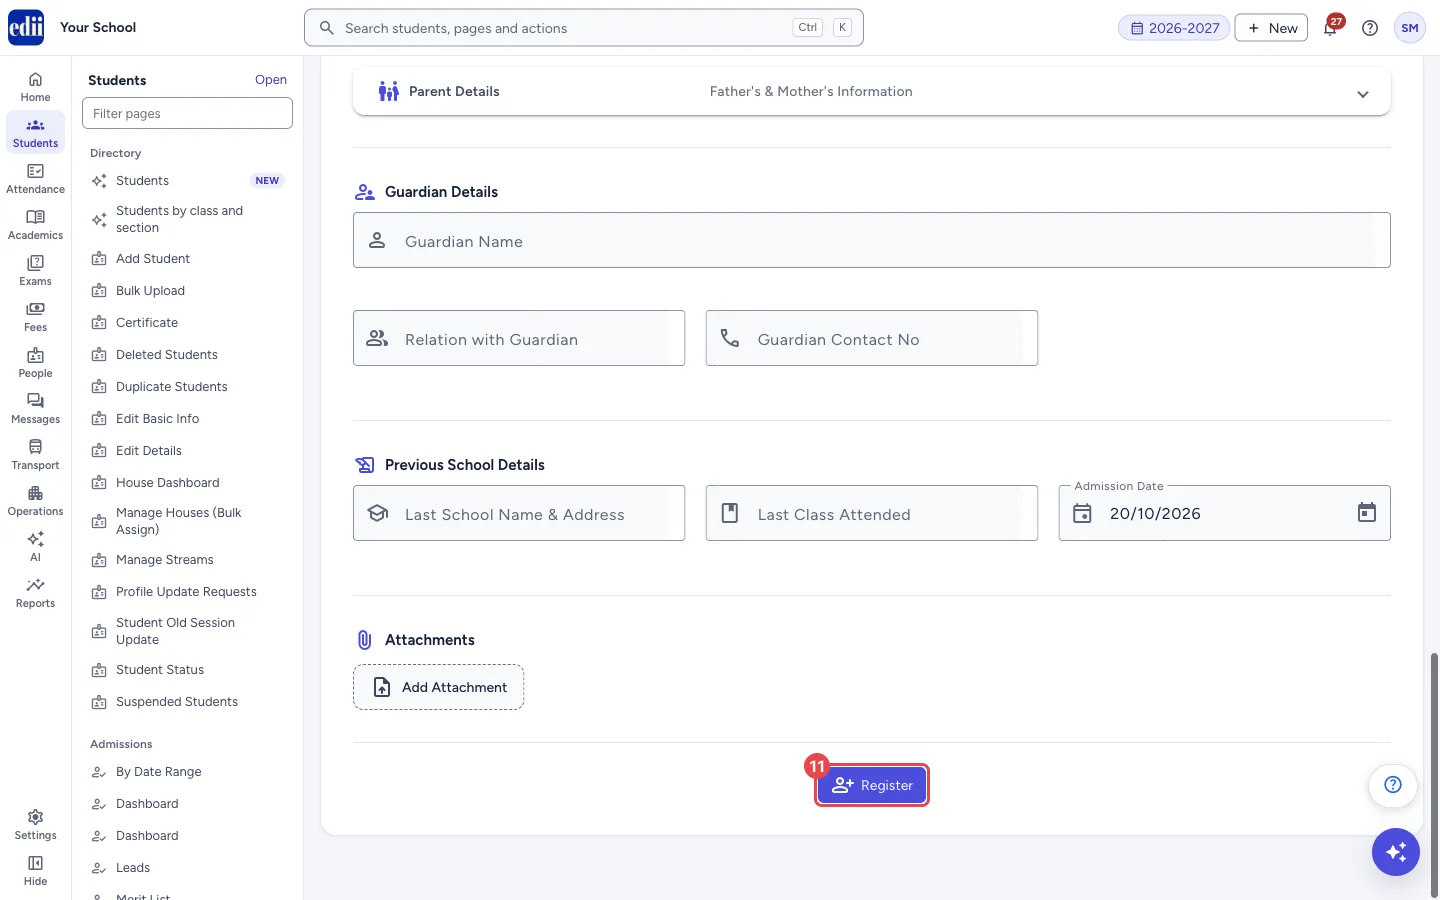
Section titled “7. Register”Press Register. A message says Admission added to school, and a Registration Form window opens with the school name, the form number and the details. Press Print to print it, or Cancel to close it. The form is then cleared for the next applicant.
 Open a bigger pictureतस्वीर बड़ी करें
Fields and filters
Section titled “Fields and filters”| Field | What it is | Notes |
|---|---|---|
| Search by / Value | Finds a returning student to prefill the form. | Aadhaar No, Enrollment No, ID No, Samagra ID or PEN No. |
| First Name, Middle Name, Last Name | The child’s name. | First Name is required. Letters only. |
| Class | Class applied for. | Required. |
| Form Id | An ID for the entrance form. | Optional. |
| Contact email. | Required; starts as NA. | |
| Date of Birth (DD-MM-YYYY) | Date of birth. | Required; write it like 05-07-2018. Age is worked out from it. |
| Age (as on 31 March) | Age worked out from the date of birth. | Read only. |
| Branch | The branch of the school. | Starts as Main. |
| Phone Number | Contact number. | Required; digits only. |
| Blood Group | Blood group. | Required; choose from the list. |
| Session | Session the child is applying for. | Required. |
| Father’s Name | Father’s name. | Required. |
| Aadhaar Number | The child’s Aadhaar. | Optional; exactly 12 digits. |
| Admission Fee | The admission form fee taken. | Required; 2 to 10 characters. |
| Address, Religion, Caste, Nationality, Stream, Optional Subject, Student PAN No | More about the child. | Optional. |
| Height, Weight, UDISE No, Pincode, GR No, Place of Birth | Further details. | Optional. |
| Disability, Nature of Disability, Distance From School | Special needs and travel distance. | Optional. |
| Point of Contact, Referred By, PEN Number, Comments | Who dealt with the family, who referred them, the PEN, and internal notes for staff. | Optional. |
| Gender | Male, Female, Other or Prefer Not To Tell. | Required; starts as Male. |
| Category | Gen, SC, ST, OBC, EWS or Specially Abled. | Required; starts as Gen. |
| Mode of Transport | Cycle, School Vehicle or Guardian Vehicle. | Required; starts as School Vehicle. |
| Admission Date | The date of the admission. | Starts as today. |
Buttons
Section titled “Buttons”| Button | What it does | What happens next |
|---|---|---|
| Search & Prefill | Looks up the ex-student and fills the form. | The form fills, or a message says nothing was found. |
| Add Image / Capture | Adds the child’s photo from a file or the camera. | A preview of the photo shows. |
| Add Attachment | Uploads documents with the form. | The file names are listed below the button. |
| Register | Saves the applicant. | Admission added to school, and the Registration Form window opens. |
| Print (in the Registration Form window) | Prints the registration form. | The print window opens. |
After you save
Section titled “After you save”- The applicant is registered with a form number. They appear in View Applications, in By Date Range and in the Admission dashboard counts.
Good to know
Section titled “Good to know”- The date of birth must be written as DD-MM-YYYY, otherwise the box shows Invalid date format (DD-MM-YYYY).
- If you press Register again for the same first name, father’s name and class as the last one saved on this page, the form is refused as a duplicate.
- A returning student looked up with Search & Prefill still gets a new form number.
Messages you may see
Section titled “Messages you may see”| Message | What it means | What to do |
|---|---|---|
| Admission added to school | The applicant was registered. | No action needed. |
| This admission appears to be a duplicate. Please verify before resubmitting. | You tried to register the same name, father’s name and class again. | Check View Applications before registering again. |
| Please enter a value to search | Value is empty. | Type the number to search for. |
| Please choose a field to search by | Search by is empty. | Choose Aadhaar No, Enrollment No and so on. |
| No previous student found | Nothing matched the search. | Check the number, or fill the form by hand. |
| Form prefilled with ex-student details. A fresh Admission Form number will be generated. | The lookup worked. | Check the details and fill what is missing. |
| Attachment(s) uploaded | The files were saved. | No action needed. |
| Failed to upload attachment(s) | The upload did not complete. | Try again. |
| Bad/Slow Internet Connection, Please check your internet connection | The request did not reach the server. | Check the internet and try again. |
| First Name is required | A required box is empty. Similar messages appear for Class, Email, Phone Number, Blood Group, Session, Father’s Name and Admission Fee. | Fill the box. |
- Search the child in View Applications first, so the same child is not registered twice.
- Take the admission fee and print the Registration Form while the family is at the desk.
Stuck? Try this
Section titled “Stuck? Try this”| Problem | Likely cause | What to do |
|---|---|---|
| Register does nothing | A required box is empty or has a wrong value, such as a date of birth not in DD-MM-YYYY. | Look for red messages under the boxes and correct them. |
| The Registration Form window closed before I printed | Cancel closes it. | Open the applicant in View Applications and use its Print button. |
Did this page help?क्या इस पेज से मदद मिली?
Thanks! Glad it helped.धन्यवाद! अच्छा लगा कि काम बन गया।
Sorry about that. Ask in your own words, or write to us.माफ़ कीजिए। अपने शब्दों में पूछें, या हमें लिखें।