
Screen guide · Web app
Admission report by date range
Shows the applicants registered on the entrance form between two dates, with totals by gender, forms purchased, fee collected and a class-wise count. It belongs to the Admission pages (New Admission, View Applications, Dashboard) and appears when your role has Admission access and the Admissions module is switched on for the school.
यह पेज अंग्रेज़ी में है। कुछ समझ न आए तो ।
Admission Report lists the applicants whose admission date falls between the Start Date and the End Date you choose, as recorded through New Admission. The pages under Admissions that start with the pipeline (Pipeline, New Applicant, Admissions Report, Merit List) are a separate set with their own reports.
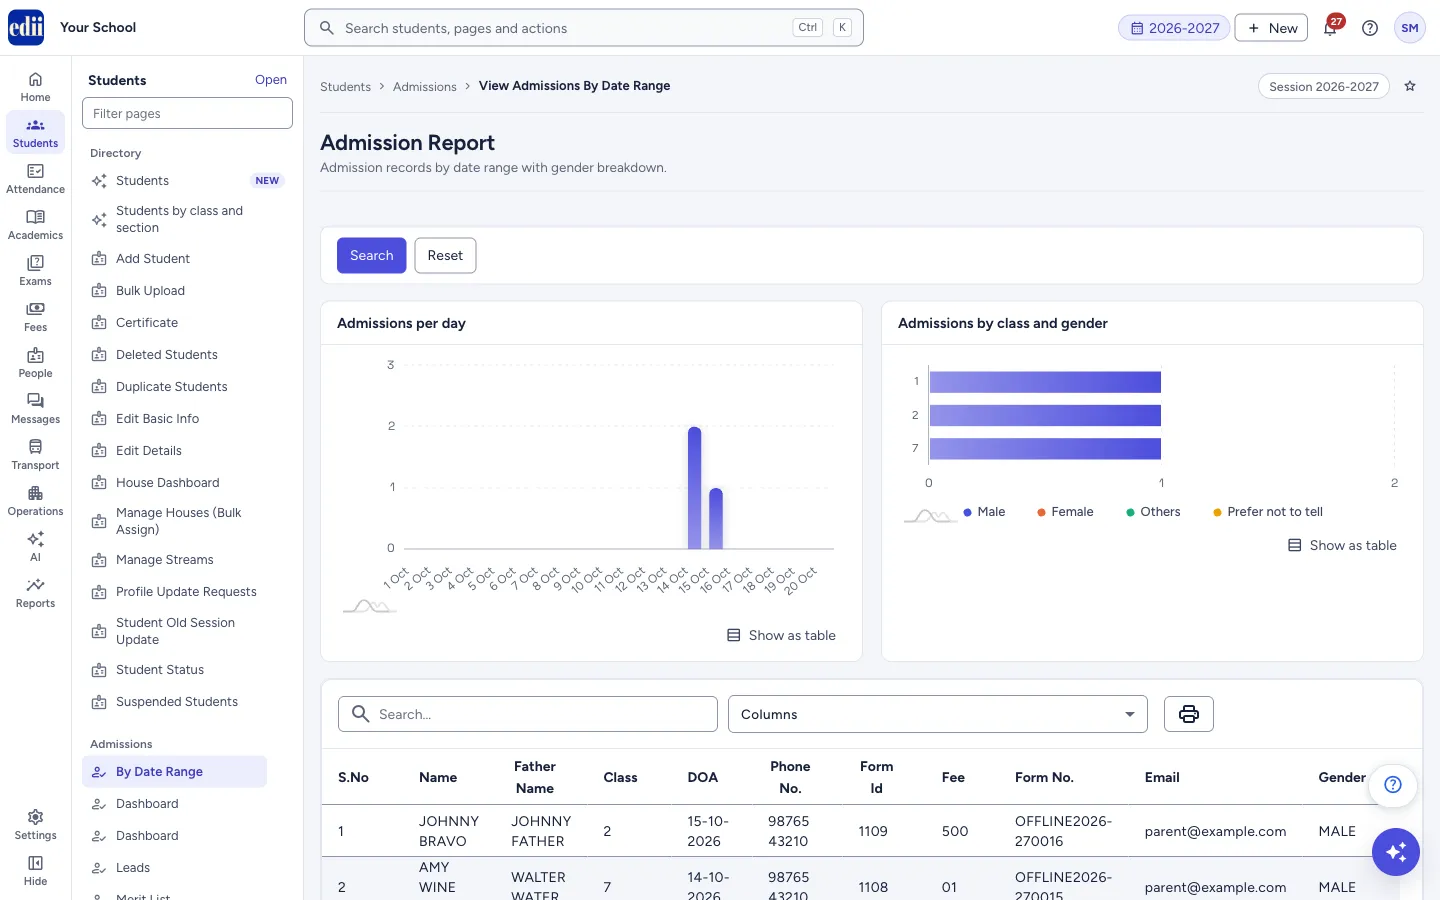
After you press Search you get two charts (Admissions per day and Admissions by class and gender), a table of applicants you can search, sort, print or download, Totals for the range, and an Admissions by class table.
The chart groups admissions by day when the range is up to 31 days, by week up to about six months, and by month for longer ranges. The heading changes to match (Admissions per day, Admissions per week or Admissions per month).
Who uses it and when
Section titled “Who uses it and when”The principal, the admission head and the office staff use it to see how many forms were sold and how many children were admitted in a period, for example a week of admission season or a whole month.
Before you start
Section titled “Before you start”- Applicants must have been registered on New Admission. If none were registered in the dates you choose, the report stays empty.
Where to find it
Section titled “Where to find it”- In school.edii.in: Students › Admissions › By Date Range
- Or press Ctrl K (⌘ K on a Mac) and type By Date Range.
- Address:
school.edii.in/view/view-admission-by-date-range - Who can see it: Needs Admission access for your role, and the Admissions module switched on for the school. If it is missing from your menu, ask your school admin.
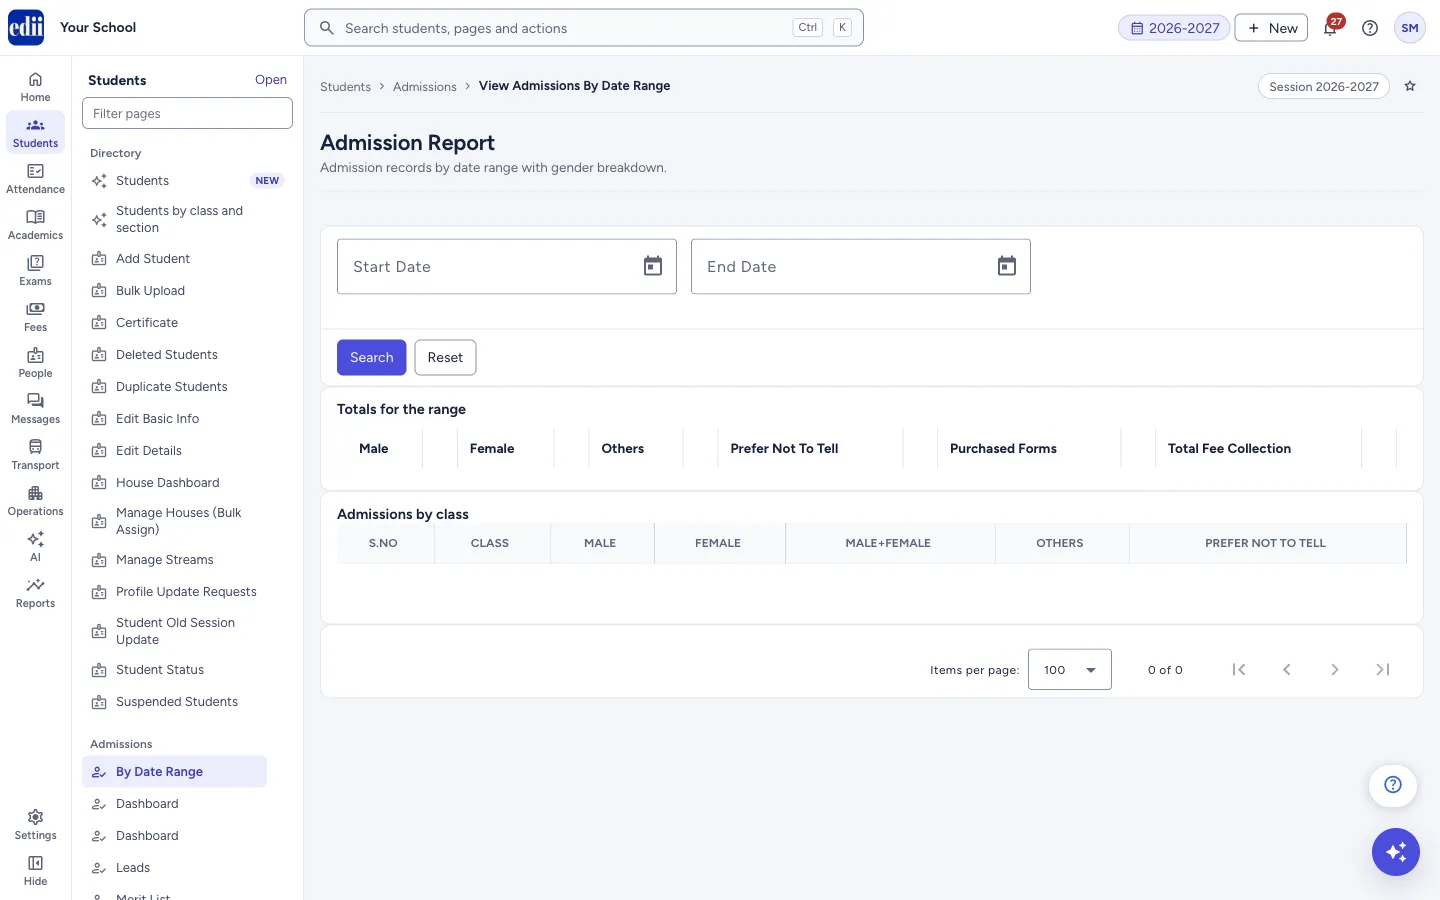 Open a bigger pictureतस्वीर बड़ी करें
Step by step
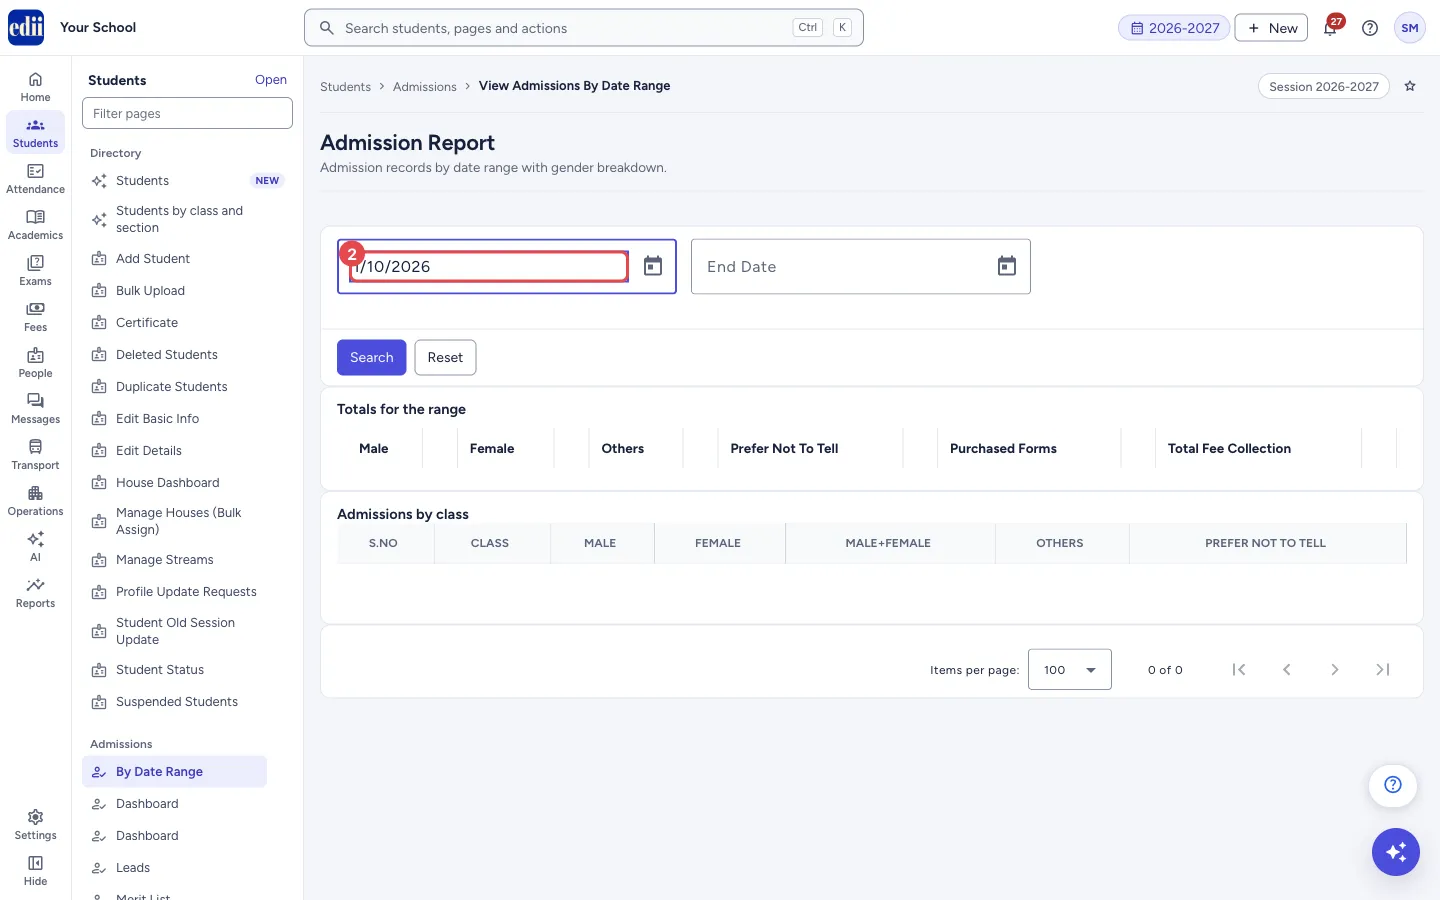
Section titled “Step by step”1. Choose the Start Date
Section titled “1. Choose the Start Date”Click Start Date. A calendar opens; pick the first day of the period. The box cannot be typed into, only picked from the calendar.
 Open a bigger pictureतस्वीर बड़ी करें
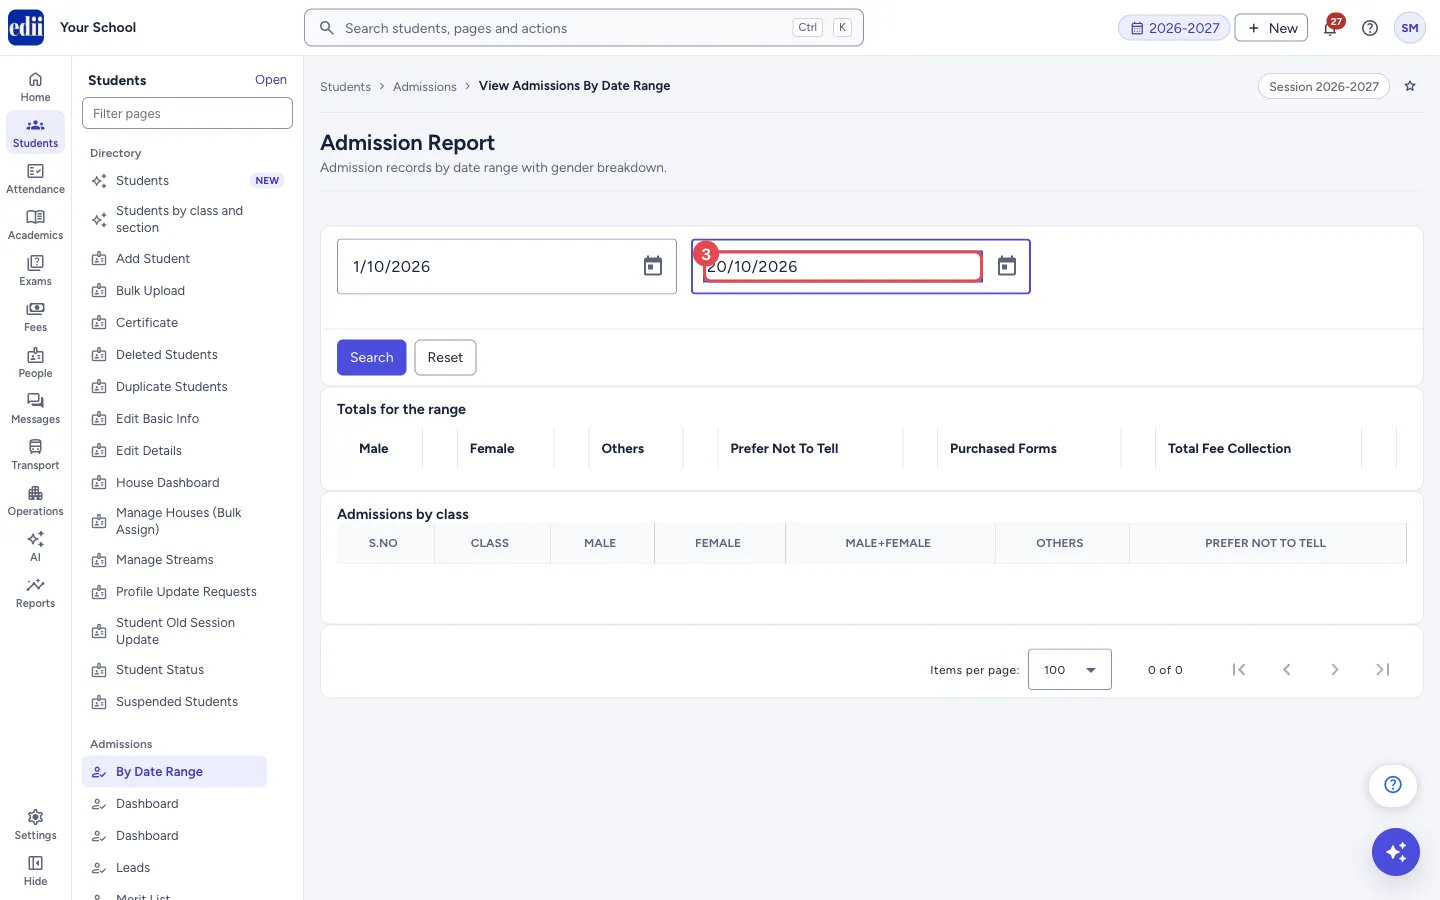
2. Choose the End Date
Section titled “2. Choose the End Date”Click End Date and pick the last day of the period.
 Open a bigger pictureतस्वीर बड़ी करें
3. Press Search
Section titled “3. Press Search”Press Search. The date boxes are replaced by the charts, the applicant table, Totals for the range and Admissions by class. While the report loads, a spinner shows.
 Open a bigger pictureतस्वीर बड़ी करें
4. Look at the charts
Section titled “4. Look at the charts”Use Show as table under a chart to see its numbers as a table instead of bars.
5. Find, sort and choose columns
Section titled “5. Find, sort and choose columns”Type in Search… to narrow the applicant table to rows containing that text. Click a column heading to sort by it. Use Columns to tick the columns you want, or Select All.
6. Print or download
Section titled “6. Print or download”Press the print icon. The menu offers Print and Download Excel File, Download Text File and Download CSV File. The file is named Admission Report.
7. Change the dates
Section titled “7. Change the dates”Press Reset to bring back the date boxes and hide the results, then choose new dates and press Search again.
Fields and filters
Section titled “Fields and filters”| Field | What it is | Notes |
|---|---|---|
| Start Date | First day of the period. | Picked from the calendar. |
| End Date | Last day of the period. | Picked from the calendar. |
| Search… | Filters the applicant table by any text in its rows. | Shown after the report loads. |
| Columns | Chooses which columns the applicant table shows and prints. | Includes a Select All tick. |
Buttons
Section titled “Buttons”| Button | What it does | What happens next |
|---|---|---|
| Search | Loads the applicants, totals and class-wise counts for the two dates. | The date boxes are hidden and the report appears. |
| Reset | Brings back the date boxes and hides the results. | Nothing is deleted; pick dates and press Search again. |
| Show as table | Under each chart: shows the chart’s numbers as a table. | The chart is replaced by a table. |
| Print icon | Opens a menu to print the applicant table or download it as Excel, text or CSV. | The print window opens, or a file is saved. |
Columns
Section titled “Columns”| Column | Meaning |
|---|---|
| S.No | Row number. |
| Name | The applicant’s name. |
| Father Name | Father’s name as entered. |
| Class | Class applied for. |
| DOA | Date of admission, as entered on the form. |
| Phone No. | Contact number. |
| Form Id | The form’s ID. |
| Fee | Admission fee recorded for the applicant. |
| Form No. | The form number. |
| Email address. | |
| Gender | Gender as entered. |
| Totals for the range | Counts of Male, Female, Others and Prefer Not To Tell, then Purchased Forms and Total Fee Collection for the dates you chose. |
| Admissions by class | For each class: MALE, FEMALE, MALE+FEMALE (the two added together), OTHERS and PREFER NOT TO TELL. |
Good to know
Section titled “Good to know”- This page only reads data. Nothing is saved, changed or sent.
- The table shows 100 rows at a time by default; use Items per page at the bottom to show more (up to 3000).
- Printing follows the school’s print settings for page size, orientation and font size. The printout carries Report Generated On with the date.
- MALE+FEMALE in the class table adds only those two columns; it does not include Others or Prefer Not To Tell.
Messages you may see
Section titled “Messages you may see”| Message | What it means | What to do |
|---|---|---|
| Bad/Slow Internet Connection, Please check your internet connection | The list of applicants could not be loaded. | Check the internet connection and press Search again. |
| Network Issue, Please Try Again. | The totals could not be loaded after the list. | Press Reset, then Search again. |
- Download the CSV or Excel file to total or sort the figures further.
- Before you press Search the Totals for the range and Admissions by class boxes are empty. That is normal.
Stuck? Try this
Section titled “Stuck? Try this”| Problem | Likely cause | What to do |
|---|---|---|
| The report is empty | No applicant has an admission date between the two dates you chose. | Widen the period, or check the dates you picked. |
| I cannot find the page in the menu | The page needs Admission access for your role and the Admissions module switched on for the school. | Ask your school administrator to give your role Admission access or to switch the module on. |
Did this page help?क्या इस पेज से मदद मिली?
Thanks! Glad it helped.धन्यवाद! अच्छा लगा कि काम बन गया।
Sorry about that. Ask in your own words, or write to us.माफ़ कीजिए। अपने शब्दों में पूछें, या हमें लिखें।