
Screen guide · Web app
Subtopics
Shows the subtopics of a topic for a class and subject, and lets you add, rename or remove them.
यह पेज अंग्रेज़ी में है। कुछ समझ न आए तो ।
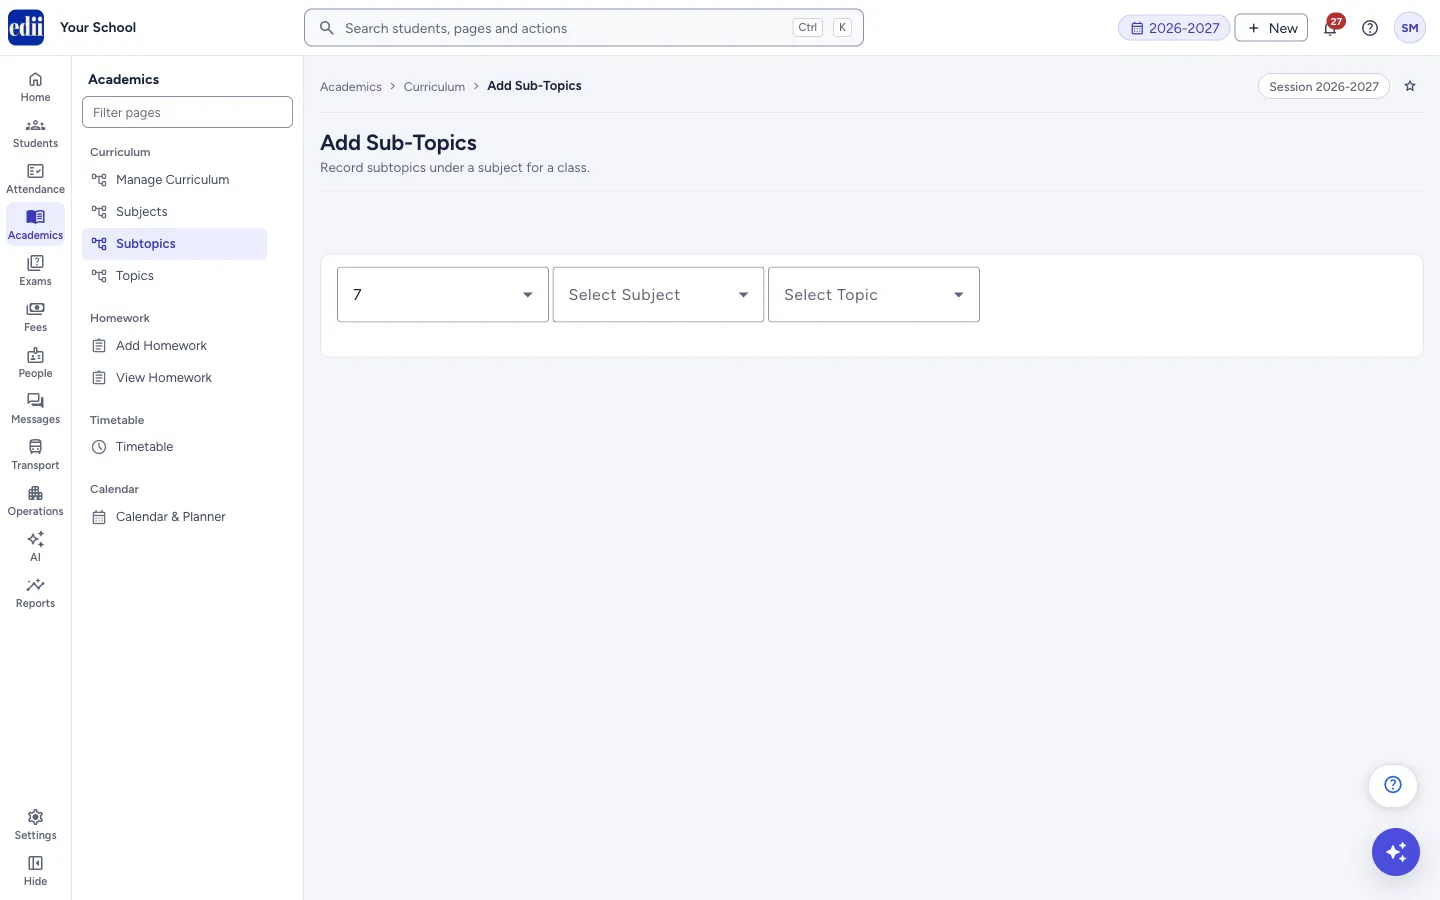
The screen is headed Add Sub-Topics. A subtopic sits under a topic, and a topic sits under a subject of a class. You choose the class, the subject and the topic, and the subtopics saved for that topic appear in boxes.
The boxes on this screen are labelled Sub-Topic and hold the subtopic names.
The same lists can also be edited together on Manage Curriculum.
Who uses it and when
Section titled “Who uses it and when”The exam in-charge or the academic head, when chapters are broken into smaller parts.
Before you start
Section titled “Before you start”- The class must have the subject (see Subjects), and the subject must have the topic (see Topics).
Where to find it
Section titled “Where to find it”- In school.edii.in: Academics › Curriculum › Subtopics
- Or press Ctrl K (⌘ K on a Mac) and type Subtopics.
- Address:
school.edii.in/add/add-subtopics - Who can see it: Staff whose role includes Exams access. Shown only when your school uses Exam in EDII. If it is missing from your menu, ask your school admin.
 Open a bigger pictureतस्वीर बड़ी करें
Step by step
Section titled “Step by step”1. Choose the class
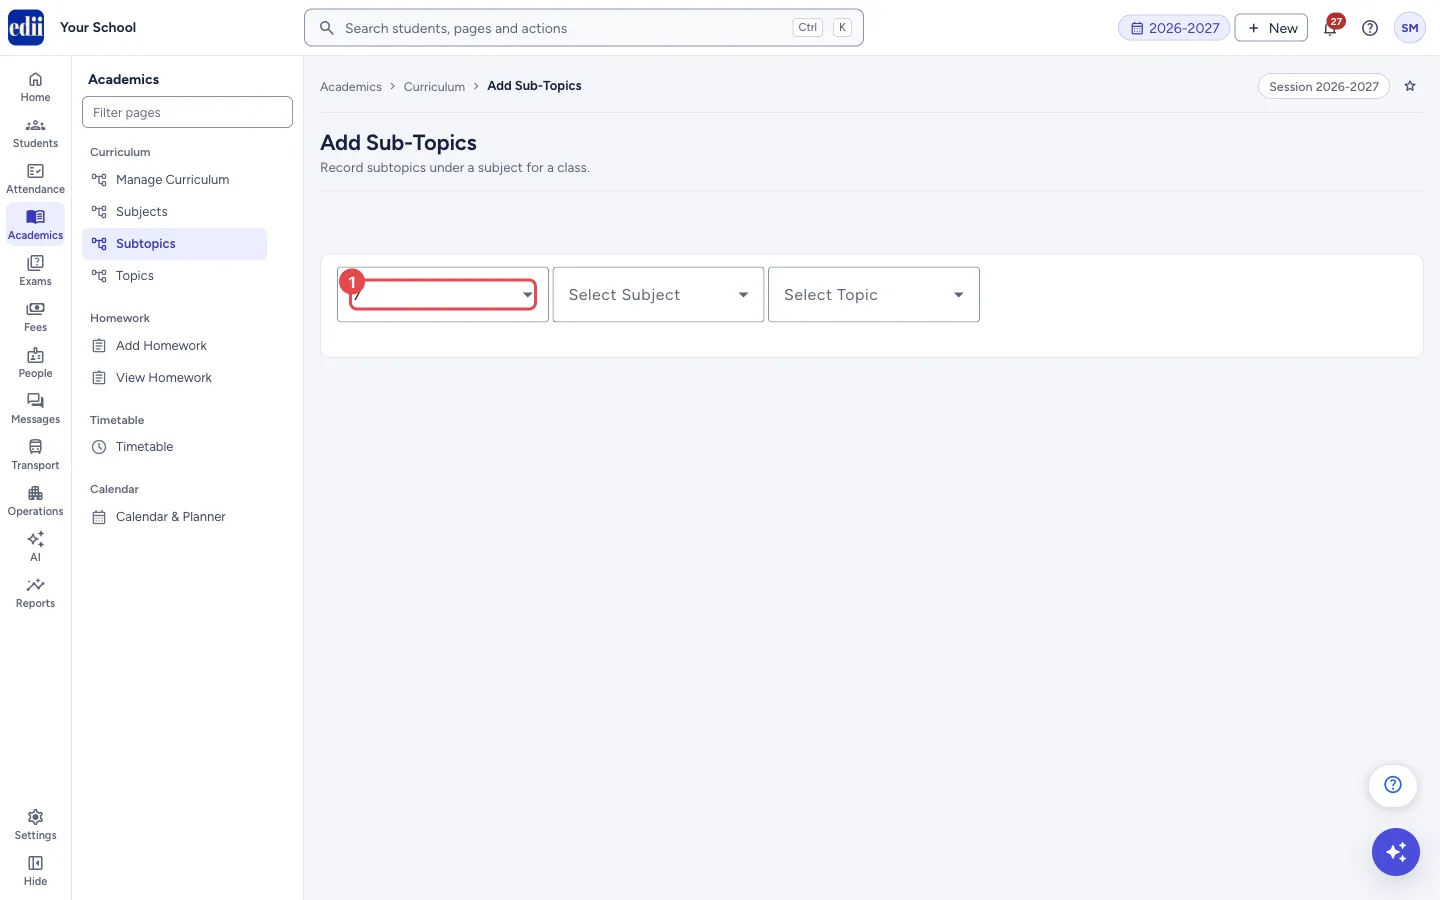
Section titled “1. Choose the class”Open Select Class and pick the class. The subjects of the class load into Select Subject. If it has none, you see No Subject Found, Please Add a Subject first.
 Open a bigger pictureतस्वीर बड़ी करें
2. Choose the subject
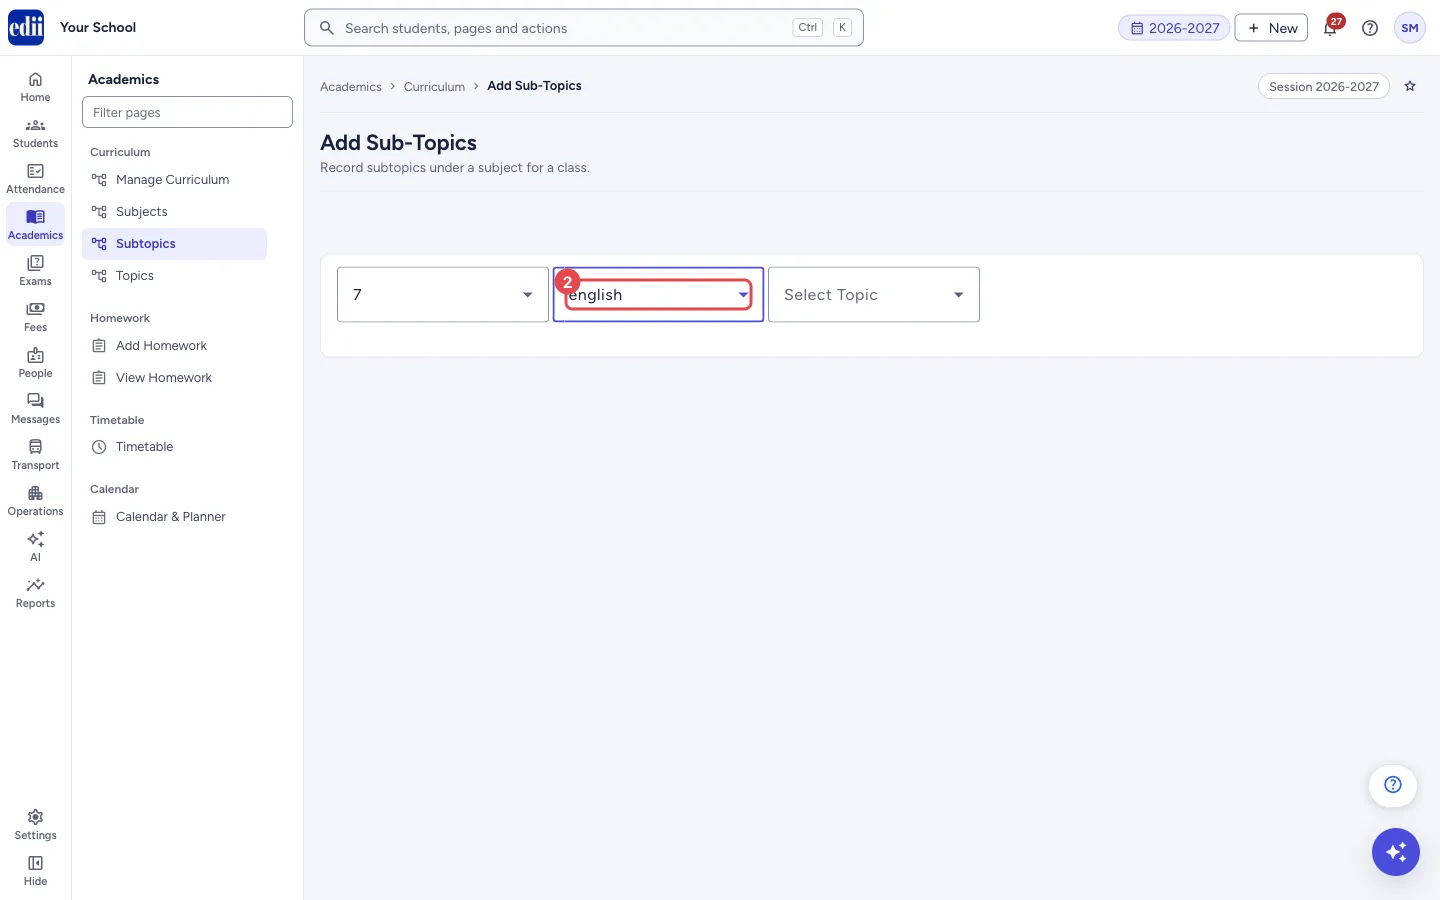
Section titled “2. Choose the subject”Open Select Subject and pick the subject. The topics load into Select Topic. If the subject has none, you see No Topics Exist for the subject, Please Add topics First.
 Open a bigger pictureतस्वीर बड़ी करें
3. Choose the topic
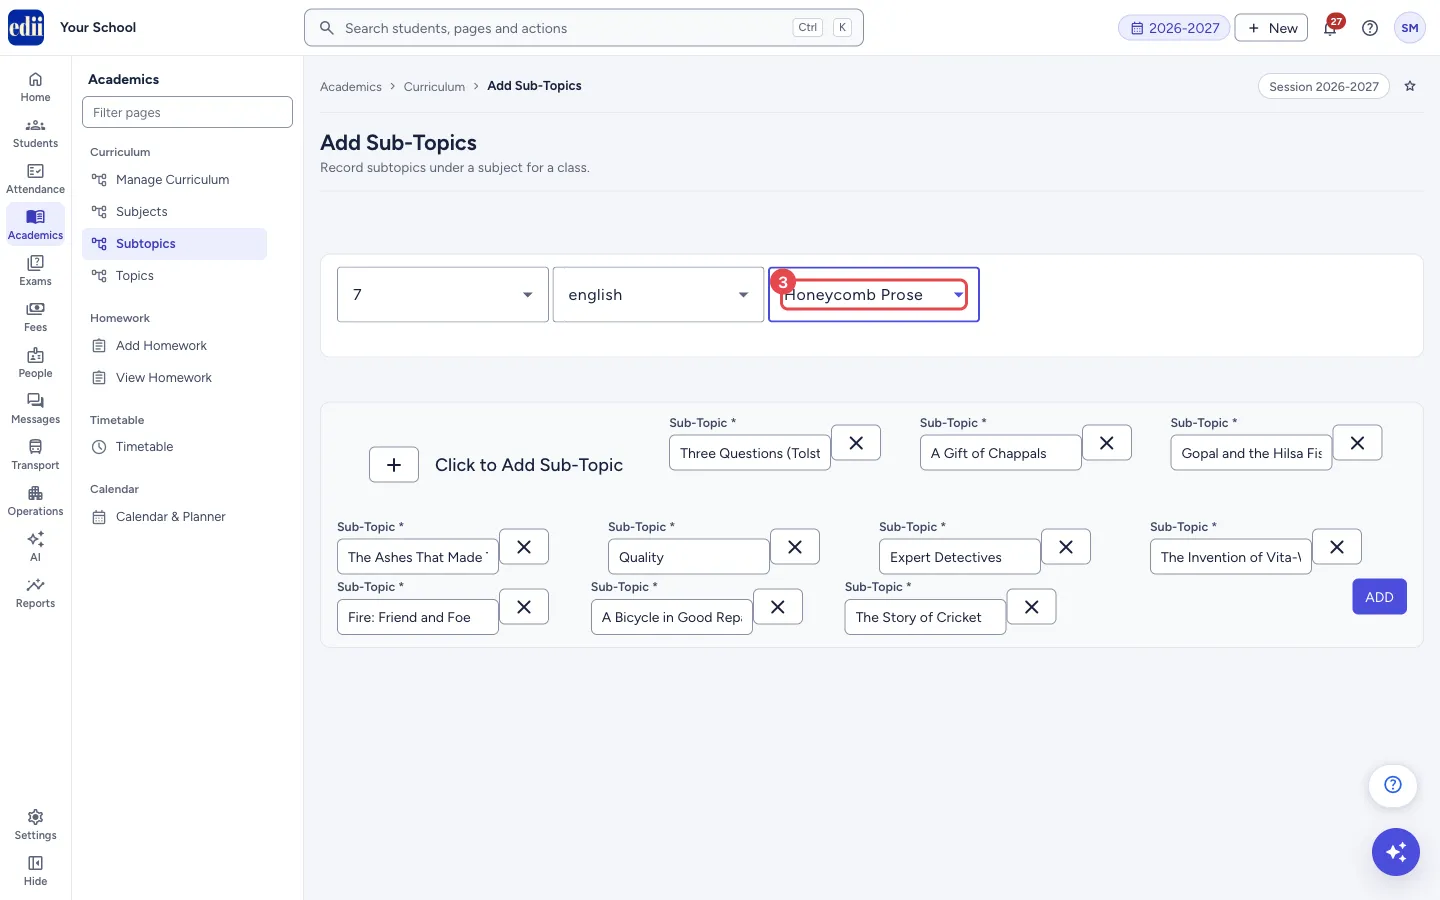
Section titled “3. Choose the topic”Open Select Topic and pick the topic. The subtopics saved for it appear in boxes under the heading Click to Add Sub-Topic.
 Open a bigger pictureतस्वीर बड़ी करें
4. Change the list and save
Section titled “4. Change the list and save”Click a box to change a name. The cross next to a box removes the subtopic from the list. The + button next to Click to Add Sub-Topic adds an empty box. A name that is already in the list shows a red note, Warning! Sub-Topic already Exists.
Select ADD. The message SubTopics Successfully Added shows. What you save is the whole list in the boxes for that topic.
Fields and filters
Section titled “Fields and filters”| Field | What it is | Notes |
|---|---|---|
| Select Class | The class. | Required. |
| Select Subject | The subject of the class. | Required. |
| Select Topic | The topic of the subject. | Required. |
| Sub-Topic * (box) | One subtopic name. | Required. |
Buttons
Section titled “Buttons”| Button | What it does | What happens next |
|---|---|---|
| + (Click to Add Sub-Topic) | Adds an empty box. | Type the name. |
| Cross (next to a box) | Removes that subtopic from the list. | Takes effect when you select ADD. |
| ADD | Saves the list of subtopics for the topic. | SubTopics Successfully Added. |
After you save
Section titled “After you save”- The subtopics are saved under the topic for the class and session.
Messages you may see
Section titled “Messages you may see”| Message | What it means | What to do |
|---|---|---|
| No Subject Found, Please Add a Subject first | The class has no subjects. | Add subjects on Subjects. |
| No Topics Exist for the subject, Please Add topics First | The subject has no topics. | Add topics on Topics. |
| Bad/Slow Internet Connection, Please check your internet connection | The data could not be loaded or saved. | Check the internet connection and try again. |
Did this page help?क्या इस पेज से मदद मिली?
Thanks! Glad it helped.धन्यवाद! अच्छा लगा कि काम बन गया।
Sorry about that. Ask in your own words, or write to us.माफ़ कीजिए। अपने शब्दों में पूछें, या हमें लिखें।