
Screen guide · Web app
Clinic Visits
Record each time a student visits the school clinic or nurse, with the complaint, vital signs, treatment and what happened next.
यह पेज अंग्रेज़ी में है। कुछ समझ न आए तो ।
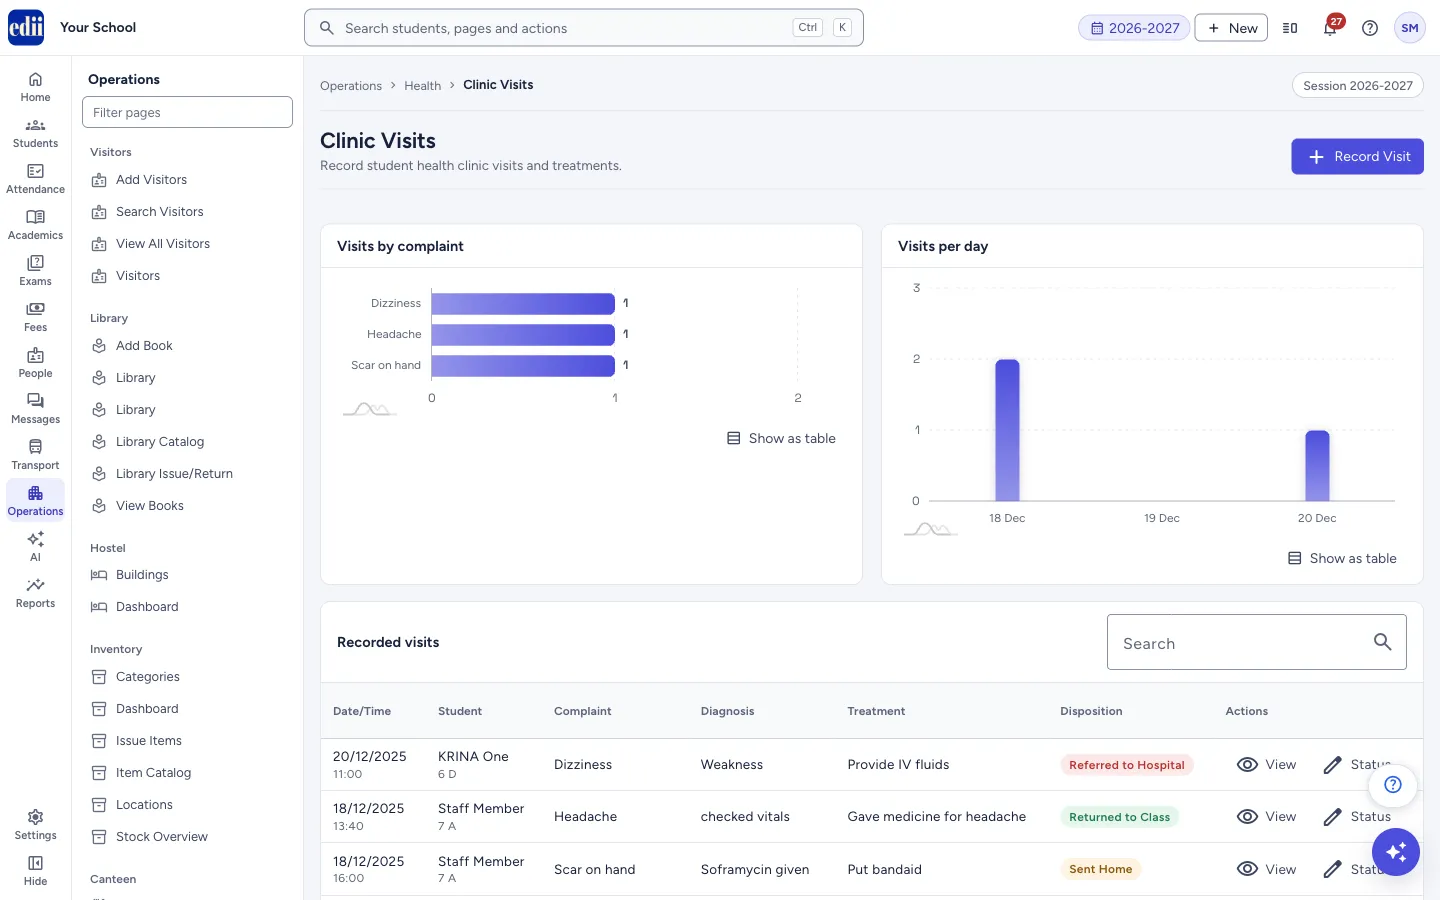
Clinic Visits keeps a log of student visits to the clinic. Use Record Visit to add one. The list Recorded visits shows the Date/Time, Student, Complaint, Diagnosis, Treatment and Disposition of each visit.
Above the list, two charts appear when there are visits: Visits by complaint and Visits per day (the page switches to per week or per month when the visits cover a longer period). Select Show as table under a chart to see the same numbers as a table.
Disposition is what happened to the student after the visit: Returned to Class, Sent Home, Referred to Hospital, Under Observation or First Aid Given. You can change it later with Status.
Who uses it and when
Section titled “Who uses it and when”The school nurse or the staff member in charge of the clinic records the visit when it happens, and updates the disposition if the student is sent home or to hospital later.
Before you start
Section titled “Before you start”- These pages appear in the Operations menu only when your school uses the Health Records module.
- The student must already be in the school’s student list.
Where to find it
Section titled “Where to find it”- In school.edii.in: Operations › Health › Clinic Visits
- Or press Ctrl K (⌘ K on a Mac) and type Clinic Visits.
- Address:
school.edii.in/health-records/clinic-visits - Who can see it: Shown only when your school uses Health Records in EDII. The page is tied to that module, not to a separate role, so it is in the Operations menu of staff who sign in to a school that has Health Records switched on. Diagnosis and treatment are private details about students: keep staff sign-ins limited to the people who should see them. If it is missing from your menu, ask your school admin.
 Open a bigger pictureतस्वीर बड़ी करें
Step by step
Section titled “Step by step”1. Look at the visits
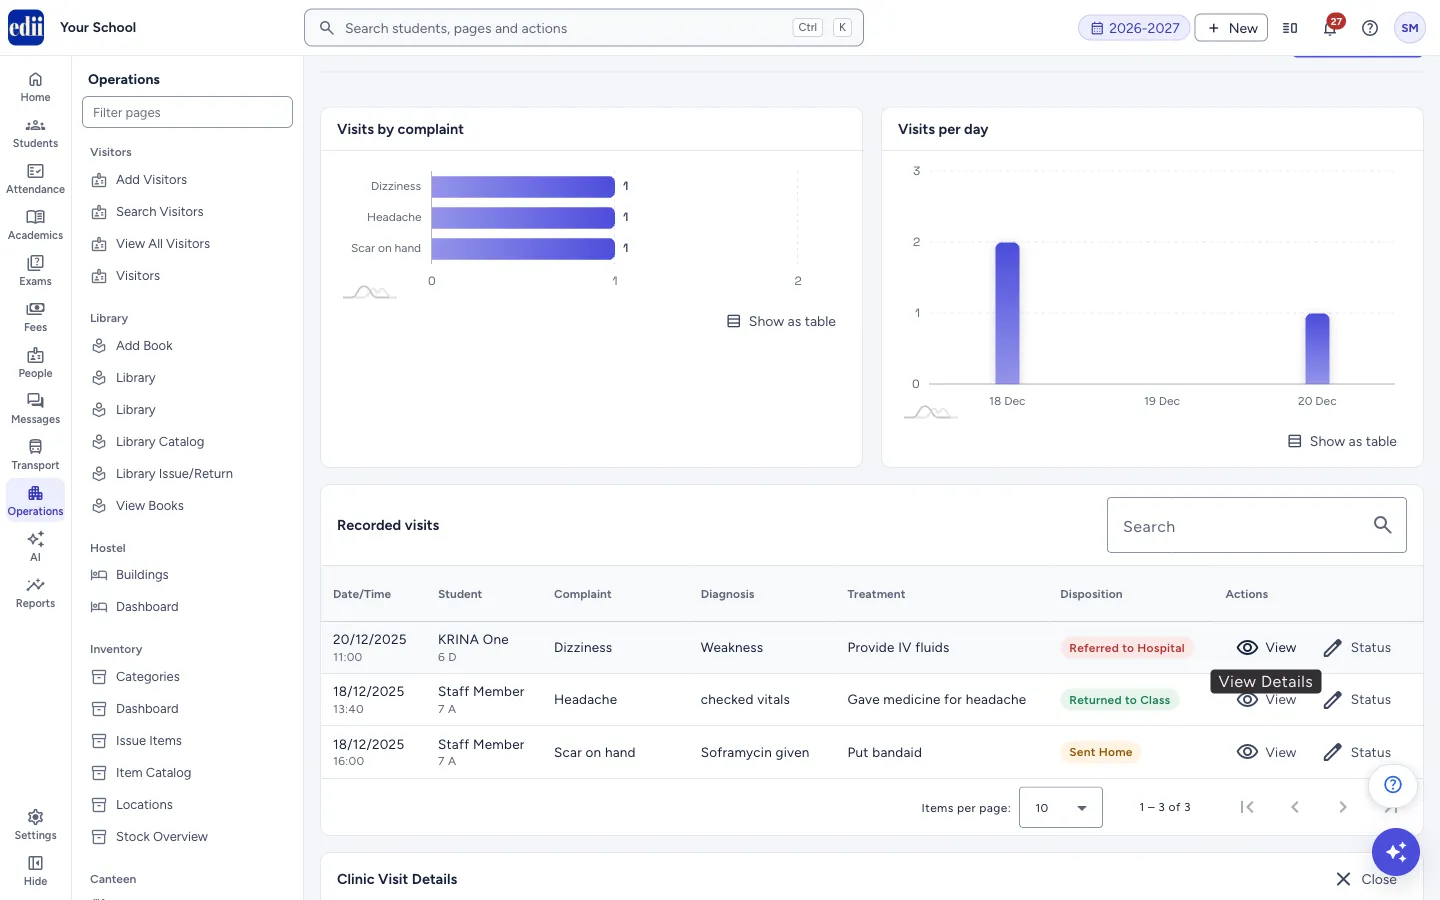
Section titled “1. Look at the visits”The charts and the table show all visits recorded. Type in Search to narrow the table and the charts. Select Date/Time or Student in the heading to sort. Use Items per page to show 10, 25, 50 or 100 rows.
 Open a bigger pictureतस्वीर बड़ी करें
2. Start a new visit
Section titled “2. Start a new visit”Select Record Visit. The form Record Clinic Visit opens. Under Student Information, type at least two letters of the name, EDII ID or roll number in Search Student and select the student (up to 8 are shown). Clear lets you pick another.
3. Fill the visit details
Section titled “3. Fill the visit details”In Visit Details the Visit Date starts as today. Enter the Visit Time, choose the Visit Type (Illness, Injury, First Aid, Medication, Follow-up, Emergency or Other) and type the Chief Complaint. Add Symptoms if you want to.
4. Add vital signs and treatment
Section titled “4. Add vital signs and treatment”Open Vital Signs to enter Temperature (°F), Blood Pressure, Pulse (bpm) and Respiratory Rate. In Diagnosis & Treatment fill Diagnosis, Treatment Given and Medication Given (name and dosage).
5. Say what happened next
Section titled “5. Say what happened next”In Disposition choose what happened to the student (it starts as Returned to Class). Type Attended By (nurse or doctor). Tick Parent Notified if the parent was told. Tick Follow-up Required if the student must come again; a Follow-up Date box then appears. Add Remarks if needed.
6. Save
Section titled “6. Save”Select Save Visit. The message Clinic visit recorded successfully appears and the visit is in the list. Save Visit stays switched off until you choose a student. Cancel leaves without saving.
7. View a visit
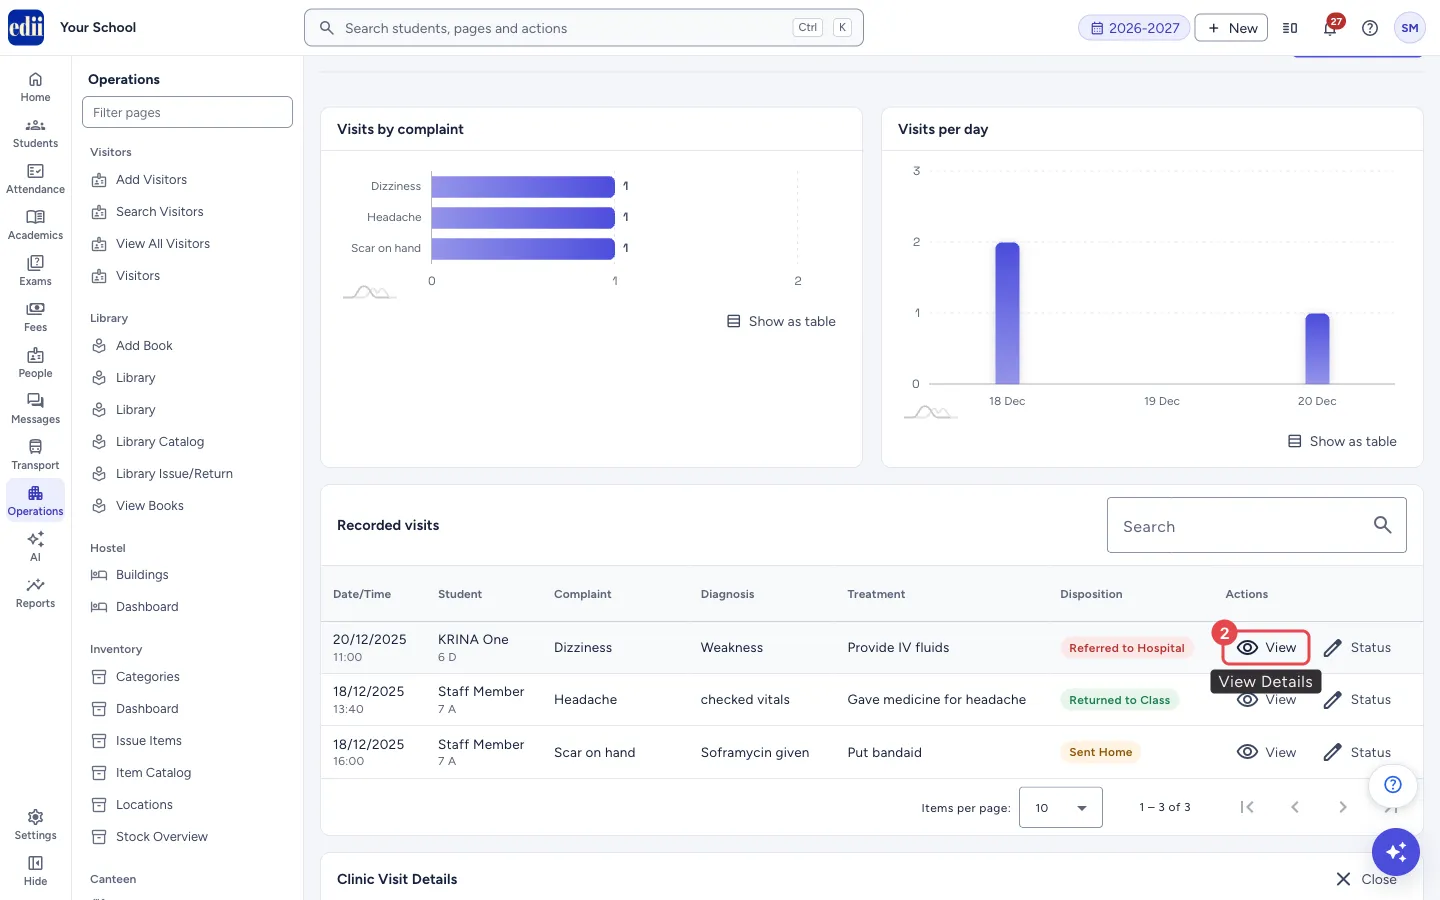
Section titled “7. View a visit”Select View on a row. A box Clinic Visit Details opens below the list with the student, visit information, vital signs, diagnosis and treatment, disposition, follow-up and remarks. Select Close to hide it.
 Open a bigger pictureतस्वीर बड़ी करें
8. Change the disposition later
Section titled “8. Change the disposition later”Select Status on a row. A box Update Visit Status shows the student and the current status. Select the new status. The message Status updated successfully appears. The current status button is greyed out.
Fields and filters
Section titled “Fields and filters”| Field | What it is | Notes |
|---|---|---|
| Search Student | Finds the student. | Required. Type at least 2 characters. |
| Visit Date, Visit Time | When the student came. | Both required. Date starts as today. Error: Time is required. |
| Visit Type | The reason category. | Required. Starts as Illness. |
| Chief Complaint | The main reason for the visit. | Required. Error: Chief complaint is required. |
| Symptoms | What the student describes. | Optional. |
| Temperature (°F), Blood Pressure, Pulse (bpm), Respiratory Rate | Vital signs taken at the visit. | Optional. Typed as text, for example 98.6 and 120/80. |
| Diagnosis, Treatment Given, Medication Given | What the nurse or doctor found and did. | Optional. |
| Disposition | What happened to the student after the visit. | Required. Returned to Class, Sent Home, Referred to Hospital, Under Observation or First Aid Given. Starts as Returned to Class. |
| Attended By | The nurse or doctor. | Optional. |
| Parent Notified | Records whether the parent was told. | Tick-box. Not ticked by default. |
| Follow-up Required, Follow-up Date | Records that the student has to come again, and when. | Follow-up Date shows only when Follow-up Required is ticked. |
| Remarks | Any other note. | Optional. |
Buttons
Section titled “Buttons”| Button | What it does | What happens next |
|---|---|---|
| Record Visit | Opens the form for a new visit. | The Record Clinic Visit form opens. |
| Save Visit | Saves the visit. | The list and charts open again with the new visit. |
| View | Shows the full details of a visit. | The Clinic Visit Details box opens below the list. |
| Status | Changes the disposition of a visit. | The Update Visit Status box opens. |
| Show as table | Under a chart, shows its numbers as a table. | A table replaces the picture. |
Columns
Section titled “Columns”| Column | Meaning |
|---|---|
| Date/Time | The visit date with the visit time under it. |
| Student | The student’s name with class and section. |
| Complaint | The chief complaint. |
| Diagnosis, Treatment | What was found and done. A dash means nothing was entered. |
| Disposition | What happened next. Green for Returned to Class, amber for Sent Home and Under Observation, red for Referred to Hospital, blue for First Aid Given. |
Good to know
Section titled “Good to know”- A saved visit cannot be edited. Only its Disposition can be changed, with Status.
- There is no Delete button for visits.
- If no visit is recorded the page says No clinic visits recorded.
Messages you may see
Section titled “Messages you may see”| Message | What it means | What to do |
|---|---|---|
| Please select a student and fill all required fields | The student, time, complaint or another required field is missing. | Choose the student and fill Visit Time and Chief Complaint. |
| Clinic visit recorded successfully | The visit is saved. | None needed. |
| Status updated successfully | The disposition is changed. | None needed. |
| Error recording visit | The visit could not be saved. | Check your internet connection and try again. |
| Error updating status | The disposition could not be changed. | Check your internet connection and try again. |
Did this page help?क्या इस पेज से मदद मिली?
Thanks! Glad it helped.धन्यवाद! अच्छा लगा कि काम बन गया।
Sorry about that. Ask in your own words, or write to us.माफ़ कीजिए। अपने शब्दों में पूछें, या हमें लिखें।