
Screen guide · Web app
User Config
Keep the school's lists of departments, designations and employee types that are used when adding staff, and set the order of departments on the public faculty page.
यह पेज अंग्रेज़ी में है। कुछ समझ न आए तो ।
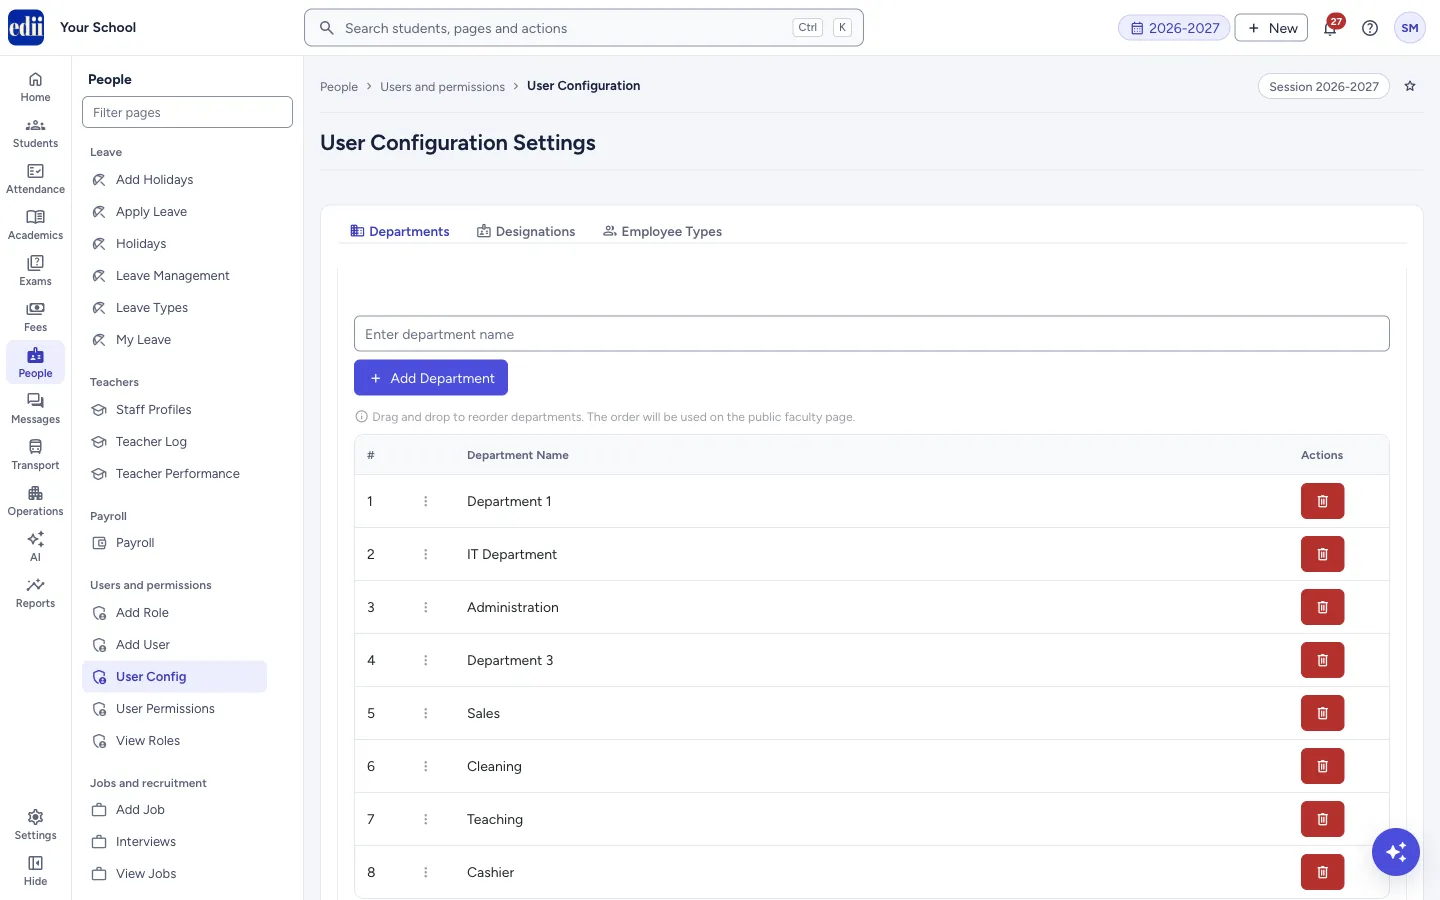
The page is headed User Configuration Settings and has three tabs: Departments, Designations and Employee Types. These lists feed the drop-down lists on the staff forms, such as Add User.
Adding or removing an item is saved at once; you do not have to wait for Save All Configurations. The same is true when you drag departments to a new order.
Who uses it and when
Section titled “Who uses it and when”The administrator, once when setting up the school and again when a new department, designation or kind of employment is introduced.
Where to find it
Section titled “Where to find it”- In school.edii.in: People › Users and permissions › User Config
- Or press Ctrl K (⌘ K on a Mac) and type User Config.
- Address:
school.edii.in/add/user-config - Who can see it: Staff whose role includes Users or Admin pages access. Shown only when your school uses User in EDII. If it is missing from your menu, ask your school admin.
 Open a bigger pictureतस्वीर बड़ी करें
Step by step
Section titled “Step by step”1. Add a department
Section titled “1. Add a department”On Departments, type the name in the box (Enter department name) and select Add Department (or press Enter). You see Department added successfully and the department joins the end of the list.
2. Put departments in order
Section titled “2. Put departments in order”Drag a row by the three dots at its left and drop it where you want it. The order is saved straight away (Department order updated) and is the order used on the public faculty page.
3. Add a designation
Section titled “3. Add a designation”Open Designations, type the name in the box (Enter designation name) and select Add Designation. You see Designation added successfully.
4. Add an employee type
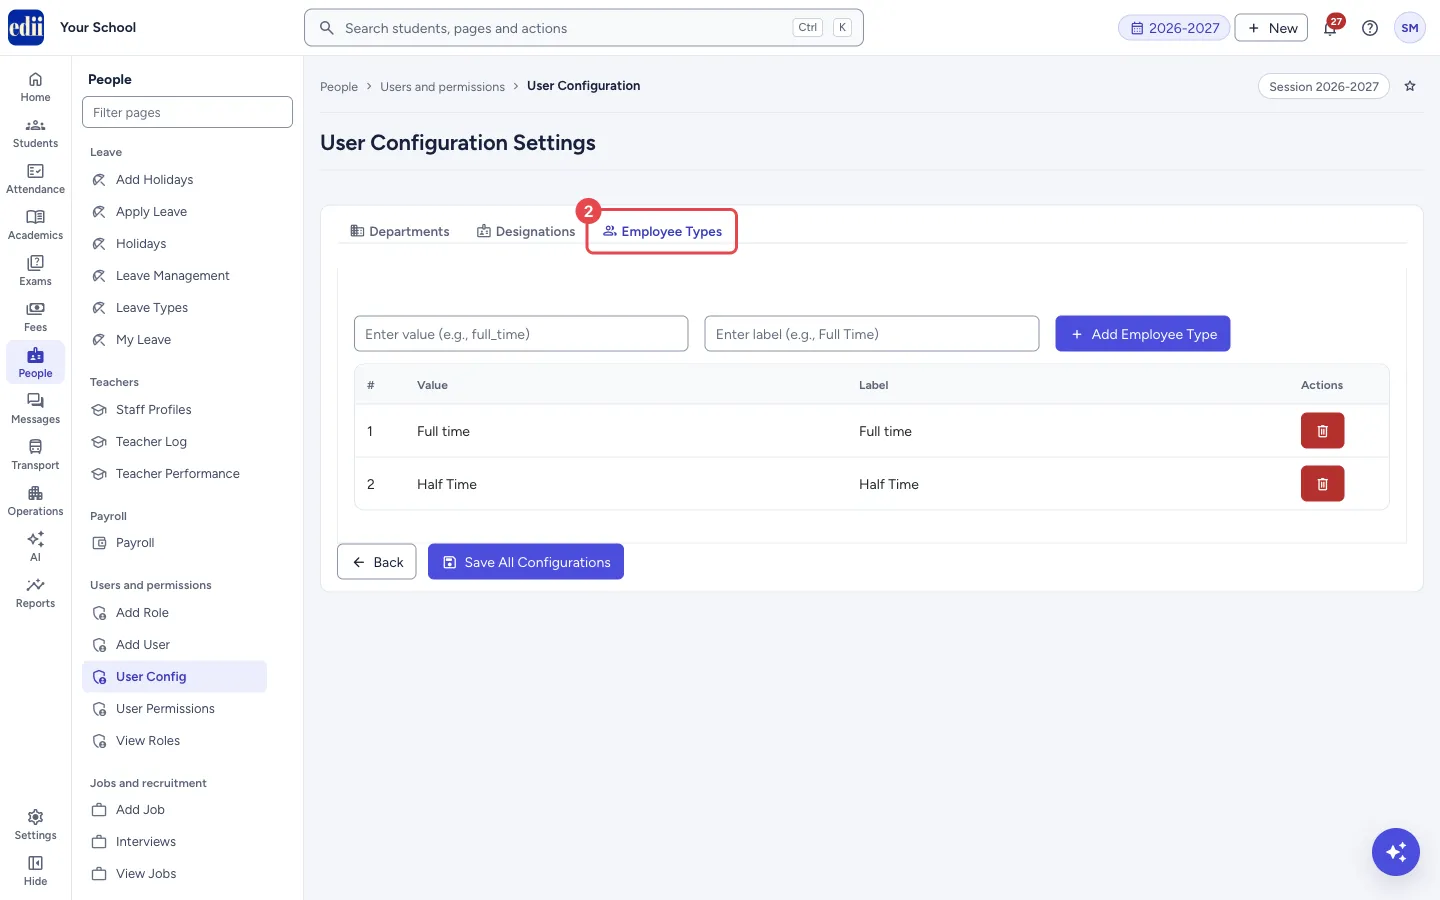
Section titled “4. Add an employee type”Open Employee Types. Type a value (for example full_time) and a label (for example Full Time), then select Add Employee Type. You see Employee type added successfully. Both boxes are needed.
 Open a bigger pictureतस्वीर बड़ी करें
5. Remove an item
Section titled “5. Remove an item”Select the red bin icon on the row. A window asks Are you sure you want to remove “<name>”? Select Remove to confirm. You see Department removed successfully, Designation removed successfully or Employee type removed successfully.
6. Save everything (optional)
Section titled “6. Save everything (optional)”Save All Configurations saves the three lists as they are now and shows Configurations saved successfully. Back returns to Add User.
Fields and filters
Section titled “Fields and filters”| Field | What it is | Notes |
|---|---|---|
| Department name | The name of a department, for example Administration or Teaching. | Required. A name already in the list is refused. |
| Designation name | The name of a post, for example Accountant. | Required. A name already in the list is refused. |
| Employee type value | The short code kept for the type, for example full_time. | Required. A value already in the list is refused. |
| Employee type label | The name people see, for example Full Time. | Required. |
Buttons
Section titled “Buttons”| Button | What it does | What happens next |
|---|---|---|
| Add Department / Add Designation / Add Employee Type | Adds the typed item to the list. | A message confirms it and the item shows in the table. |
| Save All Configurations | Saves the three lists as they stand. | Configurations saved successfully. |
| Back | Goes to Add User. | Add User opens. |
Columns
Section titled “Columns”| Column | Meaning |
|---|---|
| # | Position in the list. For departments this is the order used on the public faculty page. |
| Department Name / Designation Name | The item. |
| Value / Label (Employee Types) | The code and the name of the employee type. |
| Actions | The bin icon removes the item. |
Good to know
Section titled “Good to know”- Removing an item asks for confirmation first, and the removal is saved at once.
- Only departments can be reordered.
Messages you may see
Section titled “Messages you may see”| Message | What it means | What to do |
|---|---|---|
| Please enter a department name | The box is empty. | Type a name. |
| Department already exists | That name is already in the list. | Use a different name. |
| Please enter a designation name | The box is empty. | Type a name. |
| Designation already exists | That name is already in the list. | Use a different name. |
| Please enter both value and label for employee type | One of the two boxes is empty. | Fill both. |
| Employee type with this value already exists | That value is already in the list. | Use a different value. |
| Failed to add department | EDII could not save the change. | Try again. The same kind of message appears for designations and employee types, and for removing. |
| Error loading configurations | The lists could not be loaded. | Reload the page. |
Did this page help?क्या इस पेज से मदद मिली?
Thanks! Glad it helped.धन्यवाद! अच्छा लगा कि काम बन गया।
Sorry about that. Ask in your own words, or write to us.माफ़ कीजिए। अपने शब्दों में पूछें, या हमें लिखें।