
Screen guide · Web app
Leave Types
Set up the leave types of the session with their yearly quota, and see how many days each staff member has used.
यह पेज अंग्रेज़ी में है। कुछ समझ न आए तो ।
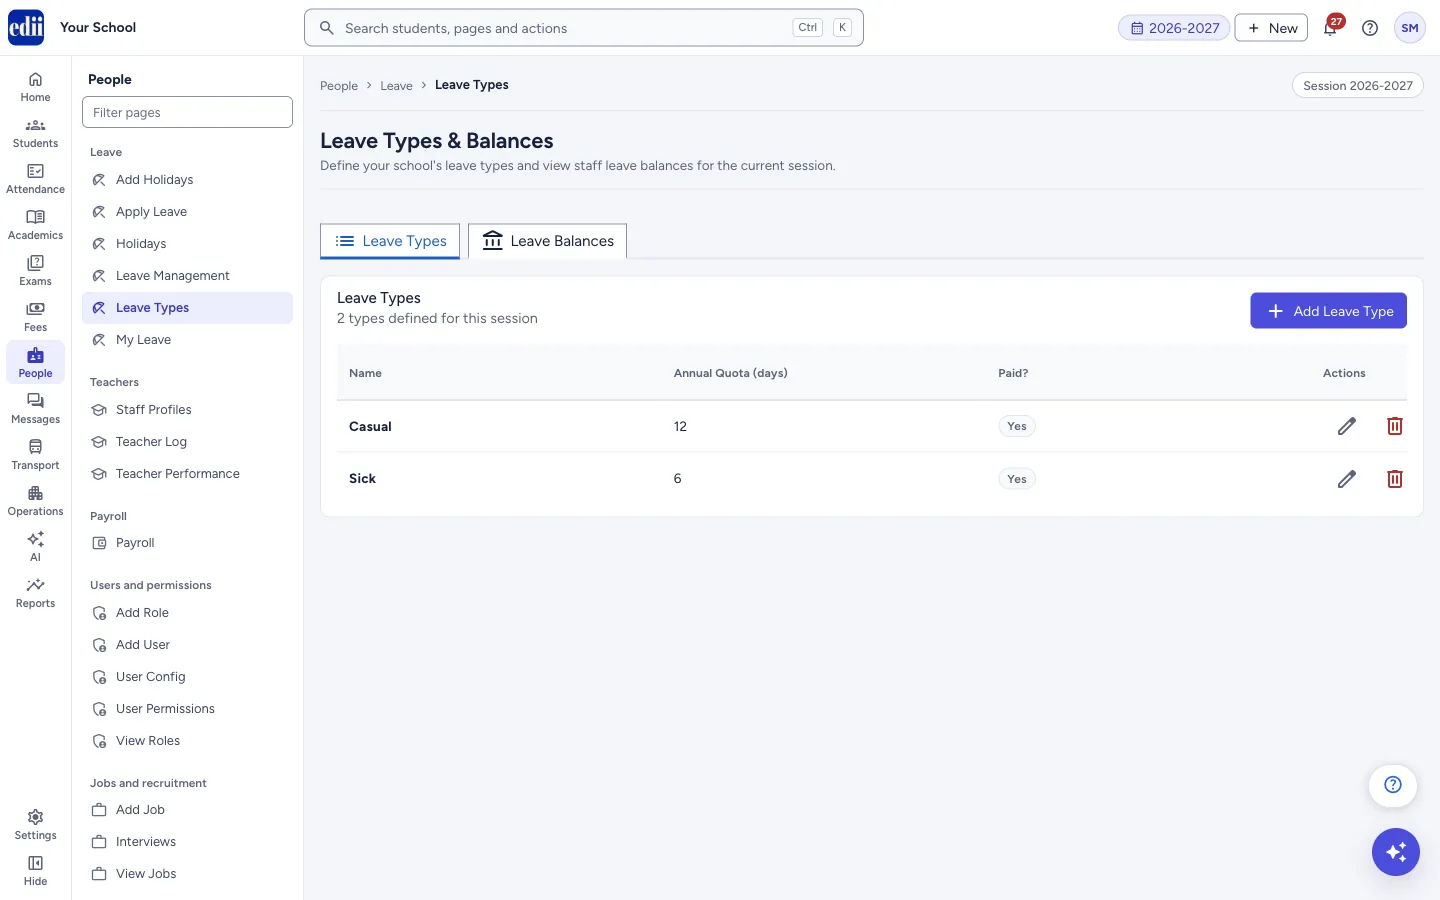
The page is headed Leave Types & Balances and has two tabs. Leave Types is the list of leave types your school allows in the selected session, each with an Annual Quota (days) and a Paid? column. Leave Balances shows, for each staff member and leave type, how many days are Allocated, Used and Pending, and what is left as Balance.
The quotas are used when staff apply for leave and when the administrator approves or rejects it.
Who uses it and when
Section titled “Who uses it and when”The administrator, at the start of a session, and again when the leave policy changes.
Before you start
Section titled “Before you start”- Decide your leave policy: the names, the yearly number of days, and which types are paid.
Where to find it
Section titled “Where to find it”- In school.edii.in: People › Leave › Leave Types
- Or press Ctrl K (⌘ K on a Mac) and type Leave Types.
- Address:
school.edii.in/add/manage-leave-types - Who can see it: Staff whose role includes Messages or Leave or Meetings access. Shown only when your school uses HR and Calendar in EDII. If it is missing from your menu, ask your school admin.
 Open a bigger pictureतस्वीर बड़ी करें
Step by step
Section titled “Step by step”1. Add a leave type
Section titled “1. Add a leave type”On the Leave Types tab select Add Leave Type. In the window fill Name (for example Casual Leave), Annual Quota (days) and the Paid Leave switch. Select Add.
The Add button stays disabled until the name is typed and the quota is 0 or more. You see Leave type “<name>” added.
2. Understand the Paid switch
Section titled “2. Understand the Paid switch”The line beside the switch changes as you turn it. Yes — full pay, counts against quota means the days are taken from the yearly quota. No — loss of pay (salary deducted) marks the type as leave without pay.
3. Change or delete a type
Section titled “3. Change or delete a type”Use the pencil icon to change a type: the window Edit Leave Type opens with the same fields and a Save button (Leave type updated.). Use the bin icon to delete: the window Delete Leave Type asks Are you sure you want to delete leave type: followed by the name. Select Delete to confirm (Leave type “<name>” deleted.).
4. Check the balances
Section titled “4. Check the balances”Select the Leave Balances tab. The table lists Staff ID, Name, Leave Type, Allocated, Used, Pending and Balance. Select Refresh on that tab to load it again. If nothing has been recorded yet, the tab says No leave balance data available for this session.
Fields and filters
Section titled “Fields and filters”| Field | What it is | Notes |
|---|---|---|
| Name | The name of the leave type, for example Casual Leave or Sick Leave. | Required. |
| Annual Quota (days) | How many days a staff member may take of this type in the session. | Required. 0 or more. |
| Paid Leave | Whether the type is paid. | Starts as Yes. |
Buttons
Section titled “Buttons”| Button | What it does | What happens next |
|---|---|---|
| Add Leave Type | Opens the window to add a leave type. | The window opens. Nothing is saved until you select Add. |
| Add / Save | Saves the new type, or your changes to an existing one. | Leave type “<name>” added. or Leave type updated. and the list refreshes. |
| Delete (bin icon) | Deletes the type after you confirm. | Leave type “<name>” deleted. |
Columns
Section titled “Columns”| Column | Meaning |
|---|---|
| Name | The leave type. |
| Annual Quota (days) | The days each staff member may take in the session. |
| Paid? | Yes or No. |
| Allocated (Leave Balances tab) | The yearly quota given to that staff member for the type. |
| Used | Days of approved leave. |
| Pending | Days asked for and not yet approved or rejected. |
| Balance | Allocated minus Used minus Pending. |
Good to know
Section titled “Good to know”- Leave types and balances belong to the session selected at the top of the screen.
- A staff member’s balance for a type is created when they first apply for that type, so the Leave Balances tab lists only people who have applied.
- On Apply Leave, the leave type a person picks (Casual, Sick, Paid and so on) is matched with the type you set up here by name; the word Leave in the name does not matter, so Casual Leave matches Casual. A type with no match has no limit.
- A paid type with a quota refuses a request that asks for more days than the balance shows (Allocated minus Used minus Pending). Unpaid types are not counted against a quota.
- Approving a request moves its days from Pending to Used. Rejecting, cancelling or deleting a pending request releases them.
Messages you may see
Section titled “Messages you may see”| Message | What it means | What to do |
|---|---|---|
| No leave types defined yet. Click Add Leave Type to get started. | No type has been added for this session. | Select Add Leave Type. |
| No leave balance data available for this session. | No staff member has applied for a quota-tracked leave type yet. | Nothing to do; balances appear after staff apply. |
| Network Issue, Please Try Again. | The request did not reach EDII. | Check the internet and try again. |
- Add the types before the session starts so that staff can apply from day one.
- Use the same names that staff see on Apply Leave: Casual, Sick, Paid, Unpaid, Maternity or Paternity.
Did this page help?क्या इस पेज से मदद मिली?
Thanks! Glad it helped.धन्यवाद! अच्छा लगा कि काम बन गया।
Sorry about that. Ask in your own words, or write to us.माफ़ कीजिए। अपने शब्दों में पूछें, या हमें लिखें।