
Screen guide · Web app
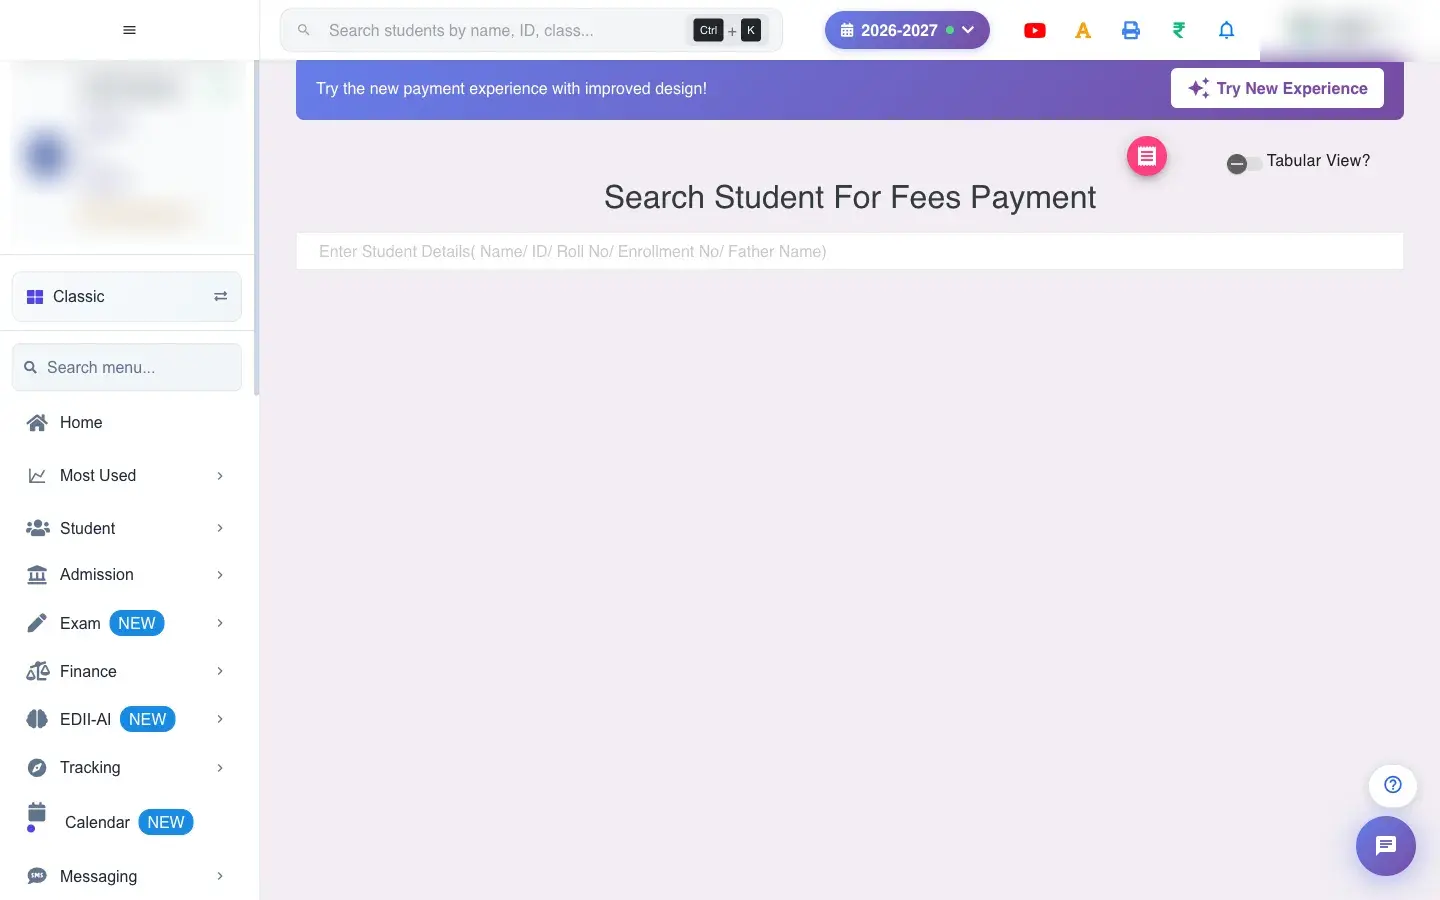
Search Student For Fees Payment
Collect school fees in the classic cashier screen: find the student, pick the months to pay, adjust amounts, add one-time fees, choose the payment mode and print the receipt.
यह पेज अंग्रेज़ी में है। कुछ समझ न आए तो ।
Search Student For Fees Payment (Finance › Payment) is the classic fee counter. You search for a student, and the same screen then shows their fees month by month. You tick the months being paid, check the amounts, choose how the money was received, and press Pay Fees. A receipt is made and can be printed.
A banner offers Try New Experience, the redesigned payment screen (Fees Payment). Both collect fees the same way; you can switch back at any time.
Who uses it and when
Section titled “Who uses it and when”The accountant or office staff use it at the fee counter every working day.
Before you start
Section titled “Before you start”- The student must be active. A suspended student shows <name> is suspended. Revoke the suspension before collecting fees. and an inactive one <name> is inactive and is not eligible for fee collection.
- Fees are collected in order, oldest month first. If an older month is unpaid and you skip it you see Fees Selection is Not in Sequence…. A school can allow this in Configuration › Preferences › Finance › Collect Fees if Old Fees is Pending.
Where to find it
Section titled “Where to find it”- Menu: Finance › Payment
- Address:
/view/payment - If it is missing from your menu, your role does not include it. Ask your school admin.
 Open a bigger pictureतस्वीर बड़ी करें
Step by step
Section titled “Step by step”1. Find the student
Section titled “1. Find the student”Type a Name, ID, Roll No, Enrollment No or Father Name in Enter Student Details and choose the student. If nothing matches you see Student not found, please search again.
2. Check the student’s details
Section titled “2. Check the student’s details”The receipt panel shows ID/SR Number, Name, Class, Father’s Name and Mother’s Name. The Date of the receipt is required and starts on today. You may add an External Invoice ID and a Remark.
3. Choose the months to pay
Section titled “3. Choose the months to pay”The fee table lists each month and its fee heads with Actual (the amount due) and To Pay. Tick the months being paid, or Select All. Show All Months reveals months beyond the next due one. Skip Installment pays months outside the school’s installment groups. Click here for quick fees payment picks the next due month for you. Show Transport Fees adds the bus fee.
4. Adjust the amounts
Section titled “4. Adjust the amounts”You may change To Pay for a fee head to take a part payment. It cannot be more than what is due (Fees Amount Entered is more than the Fees Amount, Please fix it), cannot be negative (Total amount cannot be negative), and a discount cannot exceed the balance (Excess discount entered. Discount set to 0.). Discounts Applied lists concessions already given.
5. Add one-time fees (optional)
Section titled “5. Add one-time fees (optional)”Under Additional One-Time Fees (Optional) you can add charges like lab or apparatus fees: enter the Fee Name, Month, Total (₹), Paid (₹) and Discount (₹) and select Add Fee (Additional fee added successfully). The table lists the added fees; the remove button deletes one, but a fee that is already partly paid can only have its payment adjusted.
6. Choose how the money was received
Section titled “6. Choose how the money was received”Under Amount Receiving Details choose Cash, Chq./DD (cheque number and bank), Debit/Credit (card number and bank), Cash+Chq/DD (cash amount plus cheque with account number) or Online/UPI/Wallet (the UTR number). Only the modes your school has switched on are shown.
7. Pay
Section titled “7. Pay”Select Pay Fees (or Pay Balance Fees to pay everything left for the session). If no months or amounts are chosen you see You Cannot pay the fees without selecting the fees!/ Fees has to be Number. On success the receipt opens for printing.
8. Check the Master Ledger
Section titled “8. Check the Master Ledger”The Master Ledger strip at the bottom shows each month’s ACT. (amount due), what was paid and the balance, and Balance For Session totals.
Fields and filters
Section titled “Fields and filters”| Field | What it is | Notes |
|---|---|---|
| Enter Student Details | Find the student. | Name, ID, Roll No, Enrollment No or Father Name. |
| Date | Receipt date. | Required. |
| External Invoice ID / Remark | Your own reference and note. | Optional. |
| To Pay (per fee head) | Amount received now. | Cannot exceed the amount due. |
| Payment mode details | Cheque no and bank, card no and bank, account no, UTR no. | Shown for the chosen mode. |
| Additional fee: Fee Name / Month / Total / Paid / Discount | A one-time charge. | Paid cannot exceed Total. |
Buttons
Section titled “Buttons”| Button | What it does | What happens next |
|---|---|---|
| Pay Fees / Pay Balance Fees | Records the payment and creates the receipt. | The receipt can be printed. |
| Add Fee | Adds a one-time fee line. | Additional fee added successfully. |
| Select All / Show All Months / Skip Installment | Controls which months are shown or ticked. | Only changes the selection. |
| Try New Experience | Opens Fees Payment (new). | Unsaved entries are lost. |
| Cancel | Closes the payment without saving. | Nothing is recorded. |
After you save
Section titled “After you save”- A fee receipt is created with a receipt number and the amounts for each fee head and month; the ledger and the school’s collection reports update at once.
- Part payments reduce the balance of that fee head; the rest stays due.
- The receipt appears in Fee Receipts and can be reprinted at any time.
- Parents see the payment in the student app.
Good to know
Section titled “Good to know”- Fees are collected oldest month first unless the school’s preference allows skipping.
- A payment cannot exceed what is due, and a discount cannot exceed the balance.
- Suspended and inactive students cannot pay here.
- The receipt date is required.
- A fee that has been partly paid cannot be removed, only adjusted.
Messages you may see
Section titled “Messages you may see”| Message | What it means | What to do |
|---|---|---|
| Student not found, please search again | No match. | Check the spelling. |
| <name> is suspended. Revoke the suspension before collecting fees. | Suspended students cannot pay. | Unsuspend first. |
| Fees Selection is Not in Sequence. If You still want to collect fees, Please click on Configuration>Preferences>Finance>Collect Fees if Old Fees is Pending as True | An older month is unpaid. | Pay the older month first, or ask an admin to allow it. |
| You Cannot pay the fees without selecting the fees!/ Fees has to be Number | No fee selected or a non-number. | Tick months and check amounts. |
| Fees Amount Entered is more than the Fees Amount, Please fix it. | Too much entered. | Reduce the amount. |
| Excess discount entered. Discount set to 0. | The discount was too big. | Enter a smaller discount. |
| Total payment + discount cannot exceed remaining balance of ₹… | Over the balance. | Reduce the amounts. |
| Cannot remove “<fee>” - this fee has already been partially paid. You can only adjust the payment amount. | A part-paid fee cannot be deleted. | Change the paid amount. |
| Network Issue, Please Try Again. | A request failed. | Check the receipt list before trying again so you do not collect twice. |
- After a network error, check Fee Receipts before collecting again to avoid a double receipt.
- Use the Remark for the cheque date or the parent’s name.
- Collect transport fees in the same receipt by turning on Show Transport Fees.
Stuck? Try this
Section titled “Stuck? Try this”| Problem | Likely cause | What to do |
|---|---|---|
| A month is greyed out or blocked | An earlier month is unpaid. | Pay in order, or ask an admin to allow old fees pending. |
| A payment mode is missing | The school has not switched it on. | Ask an admin to enable it in Preferences. |
Did this page help?क्या इस पेज से मदद मिली?
Thanks! Glad it helped.धन्यवाद! अच्छा लगा कि काम बन गया।
Sorry about that. Ask in your own words, or write to us.माफ़ कीजिए। अपने शब्दों में पूछें, या हमें लिखें।