
How-to · Web app
Roles and permissions
कौन क्या देख सकता है
Create a role and choose what it can open.
यह पेज अंग्रेज़ी में है। कुछ समझ न आए तो ।
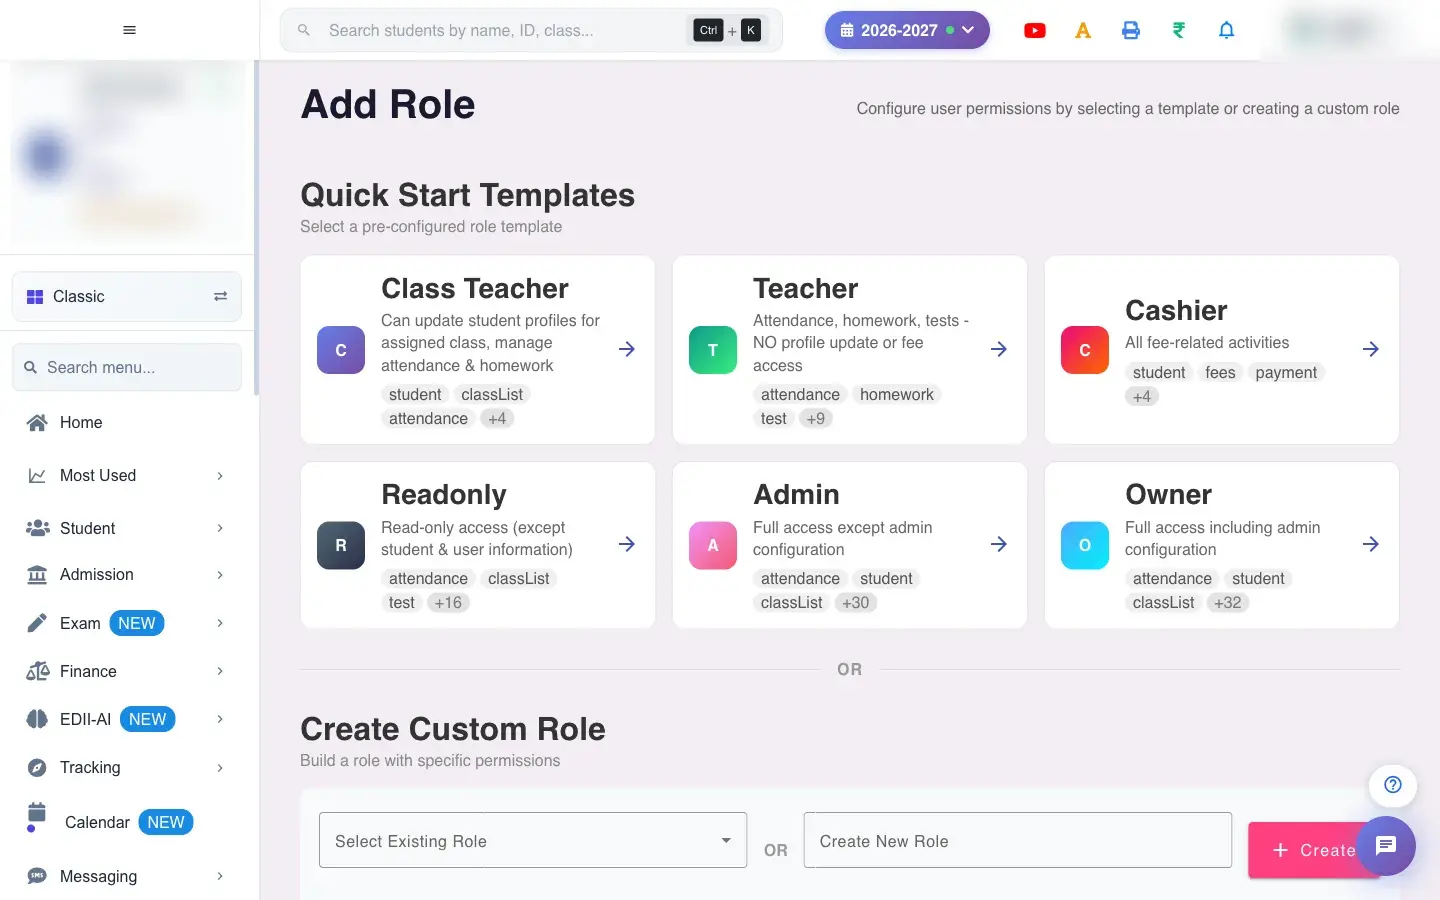
Add Role (User › Add) defines roles. Use Quick Start Templates (Class Teacher, Teacher, Cashier, Readonly, Admin, Owner) to start from a ready set, or Create Custom Role: type a name under Create New Role and select Create (Roles Created). Choose an existing role under Select Existing Role, then tick what it can open on each app and screen and select Save Role Permissions (Roles Added). Applying a template shows Default role “…” applied.
Before you start
Section titled “Before you start”- Decide which screens each kind of staff should see.
1. Start from a template or a blank role
Section titled “1. Start from a template or a blank role”Pick a template, or type a new name and select Create.
 Open a bigger pictureतस्वीर बड़ी करें
2. Set access
Section titled “2. Set access”Tick the apps and screens the role may use.
3. Save
Section titled “3. Save”Select Save Role Permissions. Roles Added confirms it.
Full details of this screen Roles and permissions
What happens next
Section titled “What happens next”- Staff with the role get exactly that access the next time they sign in.
Good to know
Section titled “Good to know”- A role name cannot be empty or repeated.
Stuck? Try this
Section titled “Stuck? Try this”| You see | Why | What to do |
|---|---|---|
| A teacher cannot open a screen | Their role lacks access. | Add the screen to the role and save. |
Did this page help?क्या इस पेज से मदद मिली?
Thanks! Glad it helped.धन्यवाद! अच्छा लगा कि काम बन गया।
Sorry about that. Ask in your own words, or write to us.माफ़ कीजिए। अपने शब्दों में पूछें, या हमें लिखें।