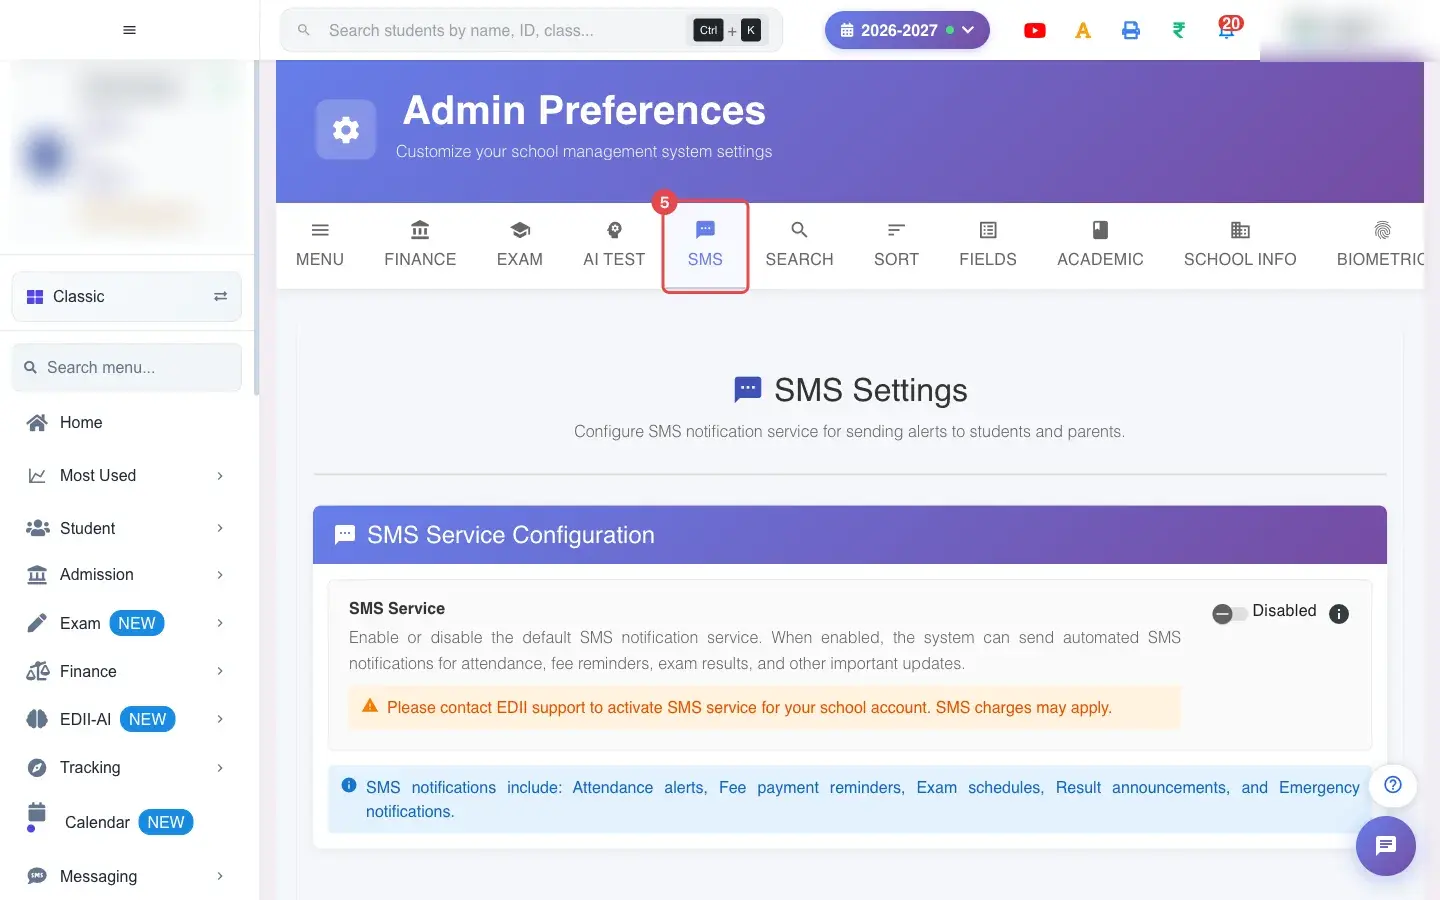
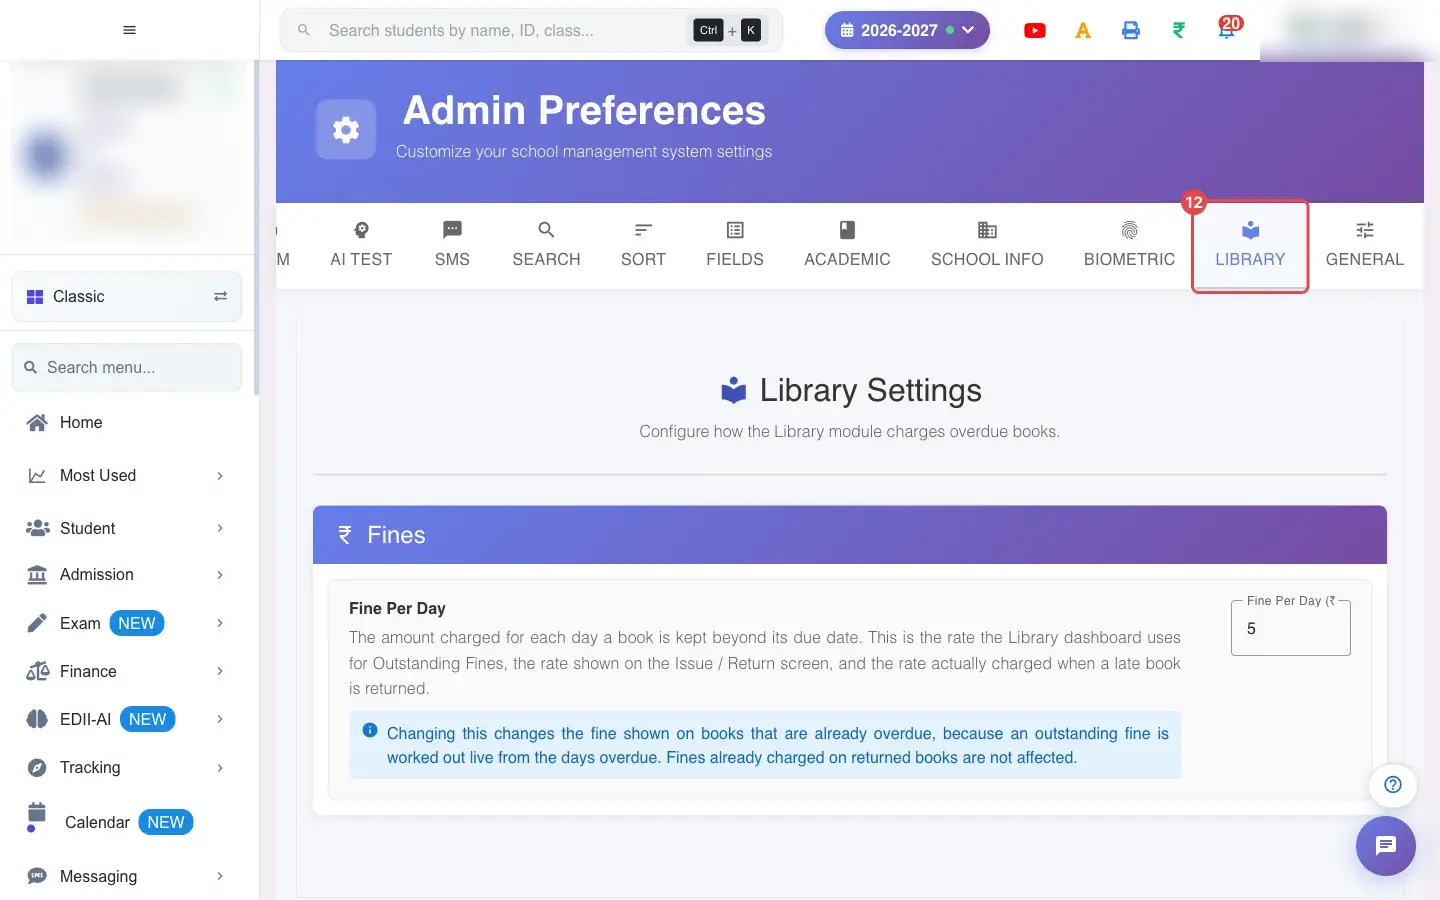
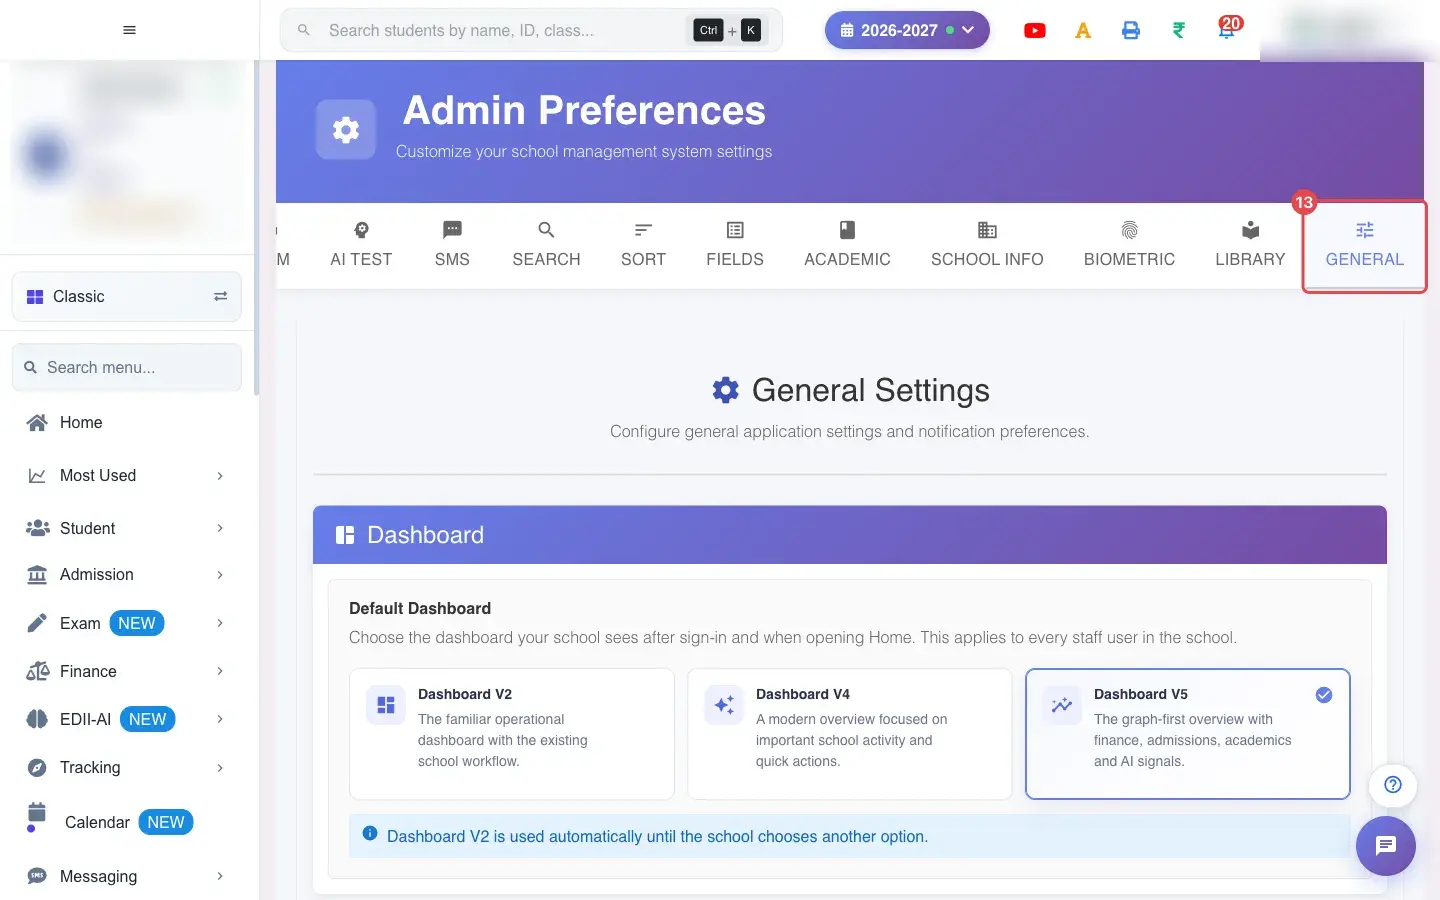
Admin Preferences (Configuration › Admin Preferences) holds the settings that change how EDII behaves for the whole school. It has thirteen tabs: Menu, Finance, Exam, AI Test, SMS, Search, Sort, Fields, Academic, School Info, Biometric, Library and General. Most switches save as soon as you change them; boxes with a save button are saved with that button.
Also searched as: preferences, settings, admin preferences, school settings, receipt settings, module on off, sort order, add student fields, counter, biometric machine, data reset
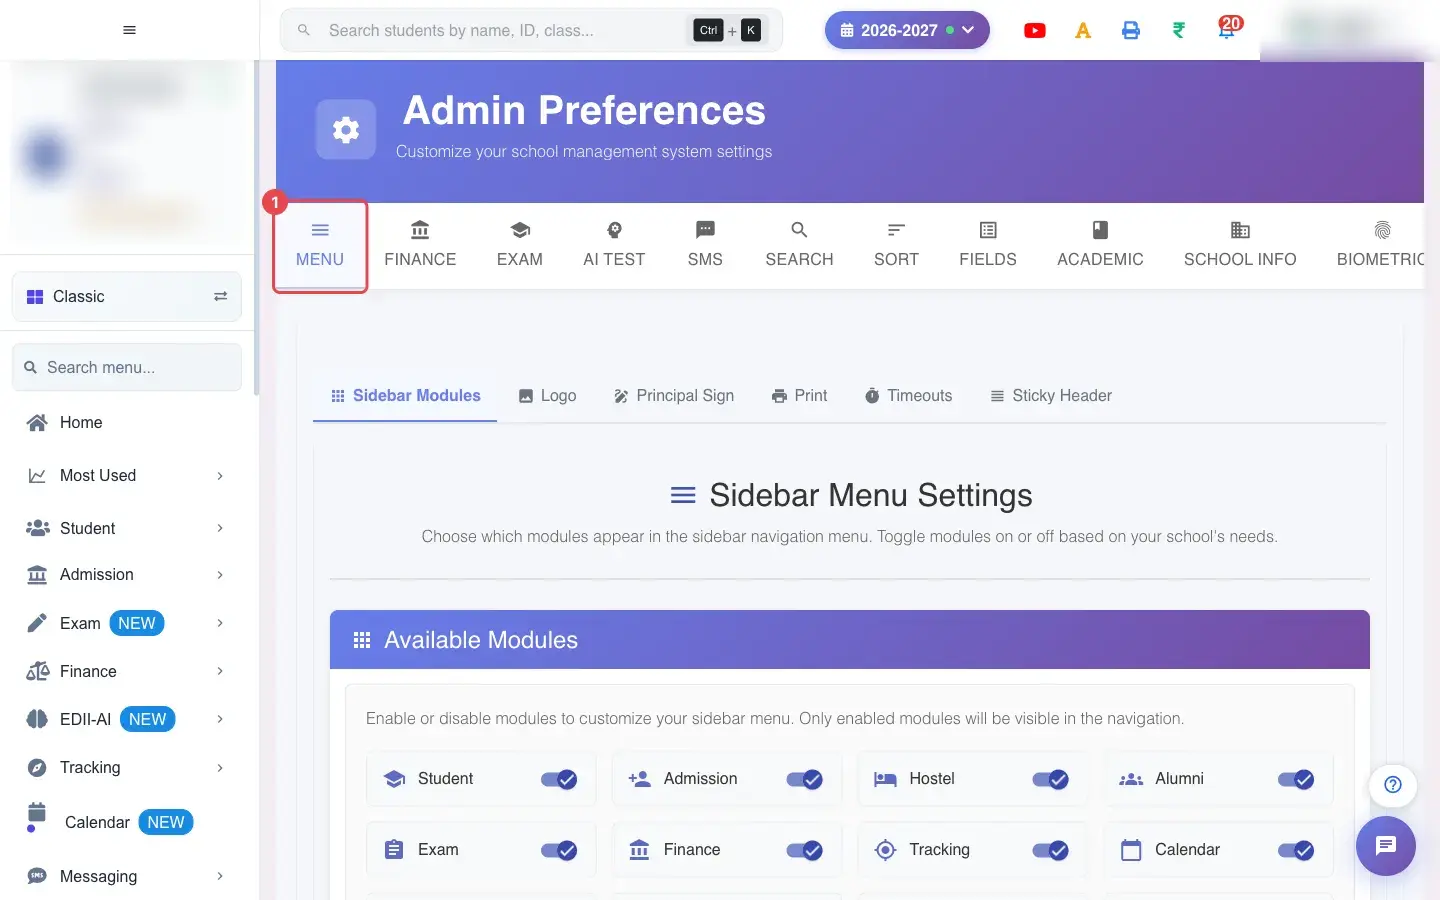
The Menu tab decides what the school sees. Available Modules has a switch for each part of EDII (Student, Admission, Hostel, Alumni, Exam, Finance, Tracking, Calendar, SMS, E Learning, Support, Social Media, Library, User, Visitor, Report, HRMS, Dashboard, Certificates, Events, Canteen, Inventory, Website, Complaint, Health Records, Meeting, EDII AI, Training Academy, House, Reports Center). A module that is switched off disappears from the menu for everyone.
Below it: Logo Management (the School Logo used on documents), Signature Management (a Signature Caption / Designation, Save Caption, upload a Signature Image or draw one and select Use Drawn Signature; Remove Signature and Clear), Text Transformation (Data Case Transformation), Page Layout (Print Orientation, Paper Size), Document Features (Enable Watermark, Dual Logo on TC), Report Font Settings (Report Font Size, Custom Font Size, Character Limit for Fields), Notification Display Duration (success and error timeouts), User Activity Status (online, away and offline timeouts in minutes) and Header Behavior (Sticky Table Headers).
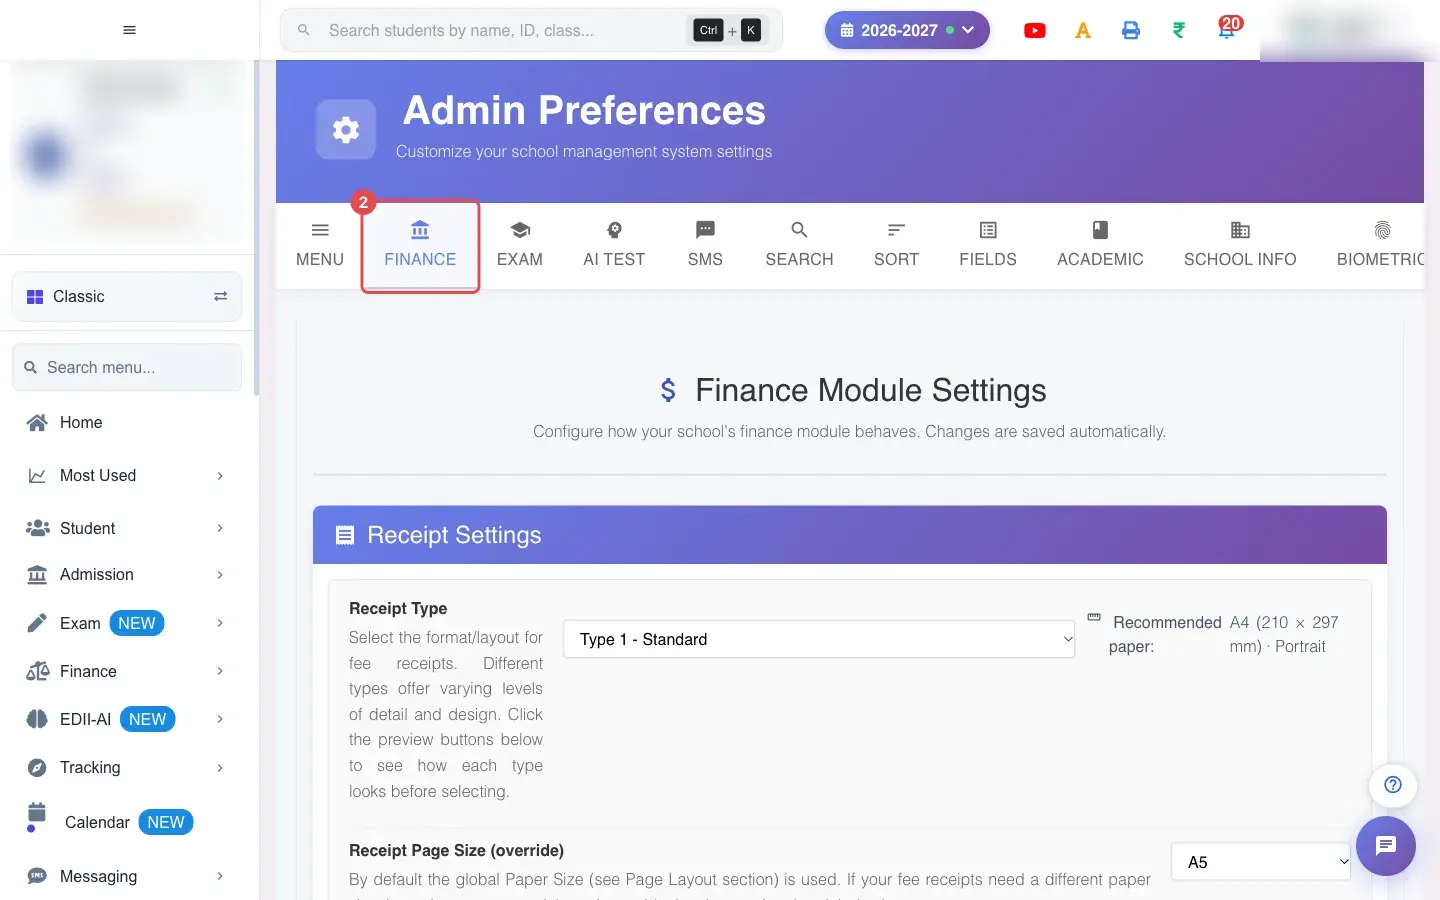
Receipt Settings: choose the Receipt Type (Type 1 to Type 8 designs), an optional Receipt Page Size and Receipt Orientation override, the Number of Receipt Copies and whether to Print Each Receipt on New Page.
Fee Collection Settings: Require Old Fees to be Paid First (a student must clear earlier dues before paying later months), Lock Fees Module and Bypass Session Filter in Finance. Report Settings: Exclude Suspended Students from Reports.
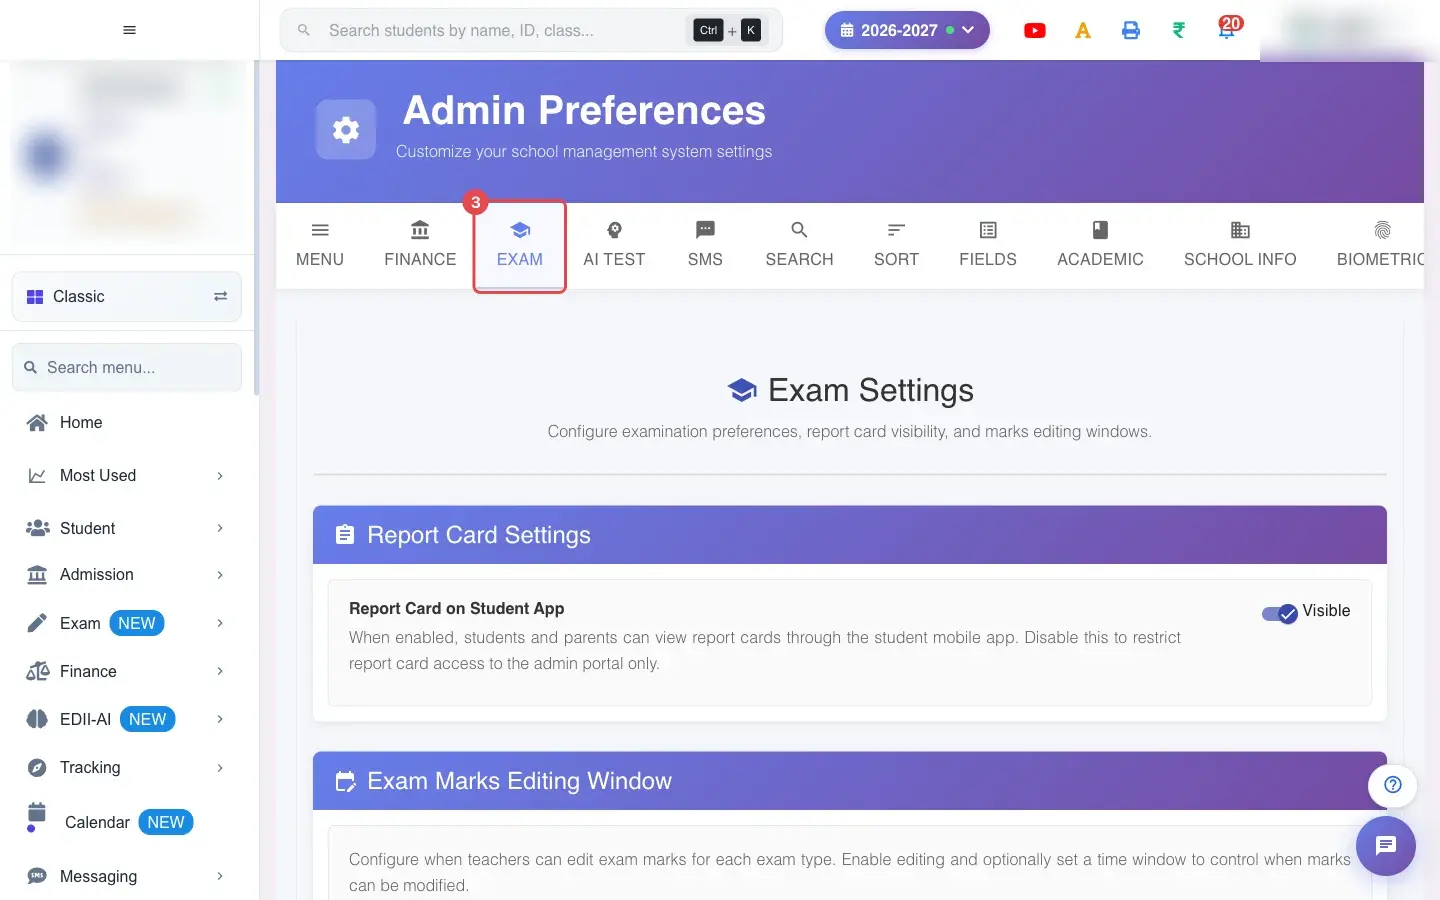
Report Card Settings has Report Card on Student App (whether parents see report cards in the app). Exam Marks Editing Window lets you set, for each Exam Type, Enable Edit and the From Date & Time and To Date & Time during which teachers may enter or change marks; outside the window marks are locked.
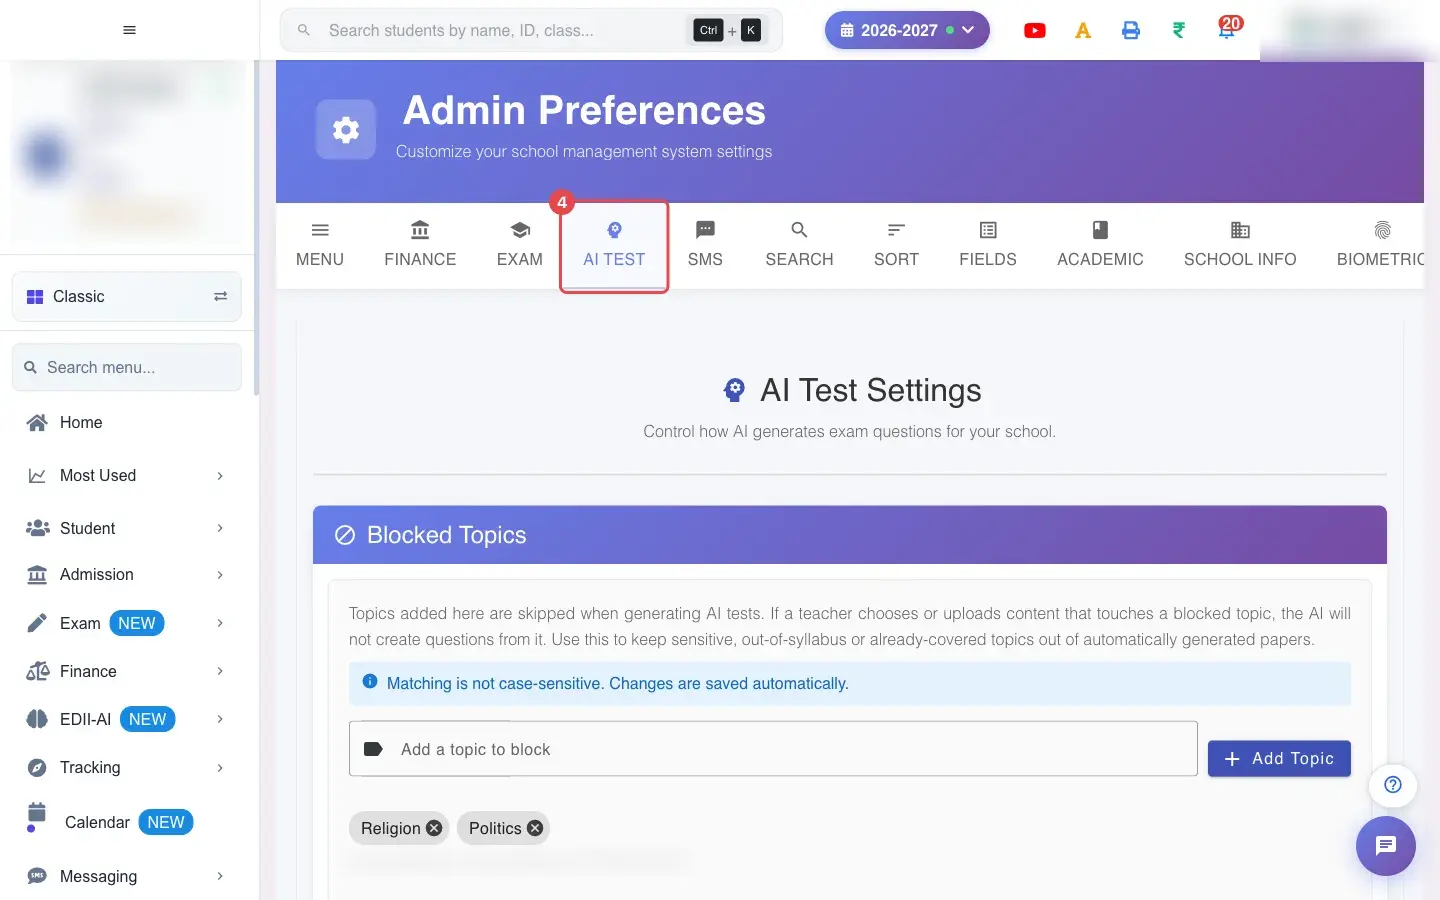
Blocked Topics: add topics the AI must not use in tests (Add a topic to block). Automatic Topic Tests: when a teacher completes a topic, EDII can auto-create a practice test; choose the Board, Difficulty, Questions per test, Days available and the Question types (at least one is required), then Save Auto-Test Settings.
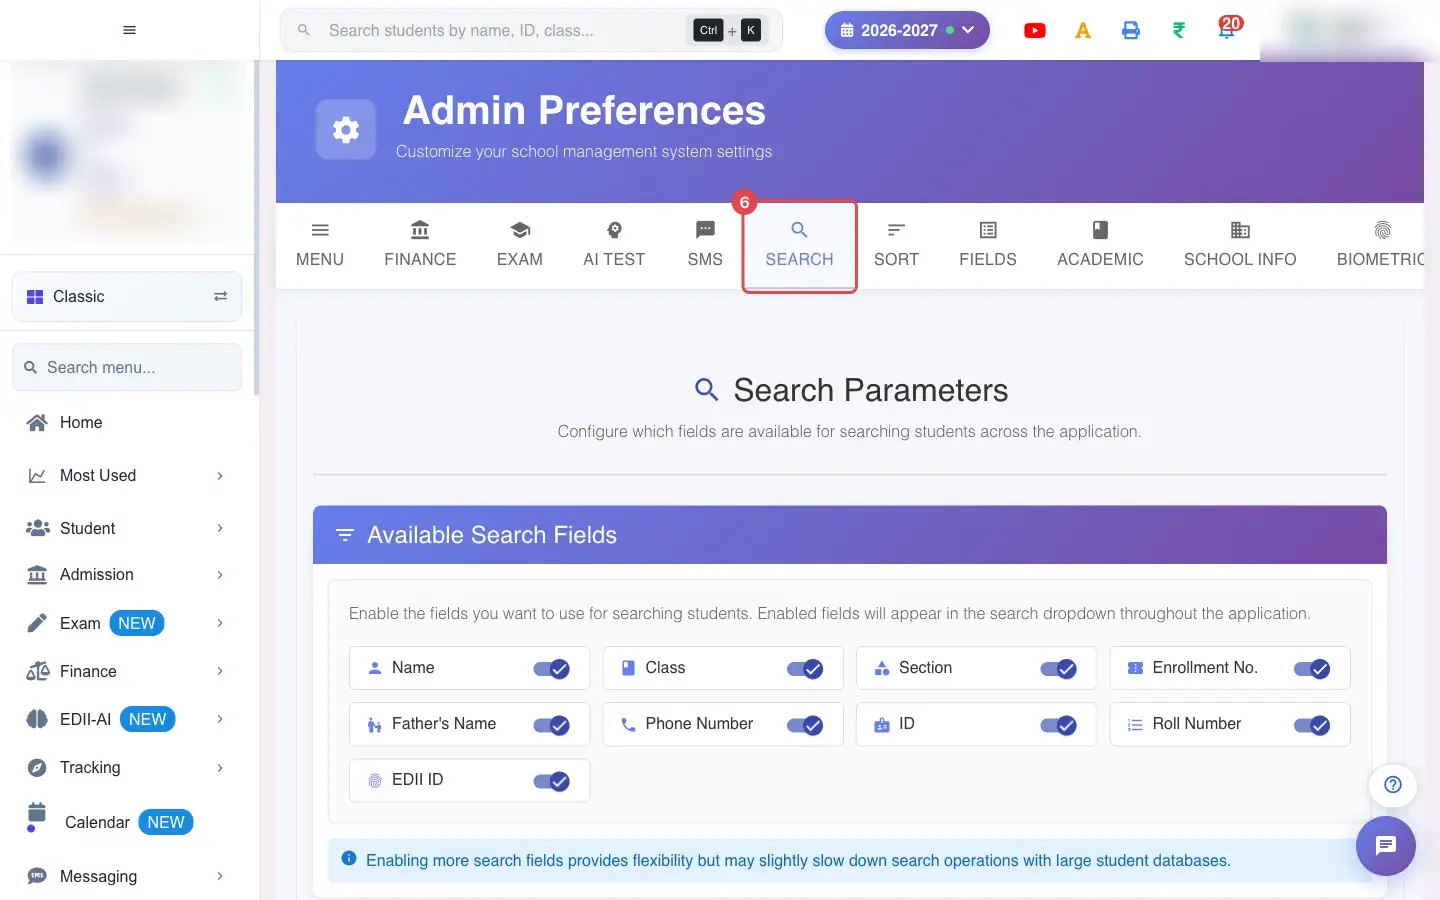
Available Search Fields has a switch for each field staff can search students by: name, class, section, enrollment number, father’s name, phone number, ID number, roll number and EDII ID.
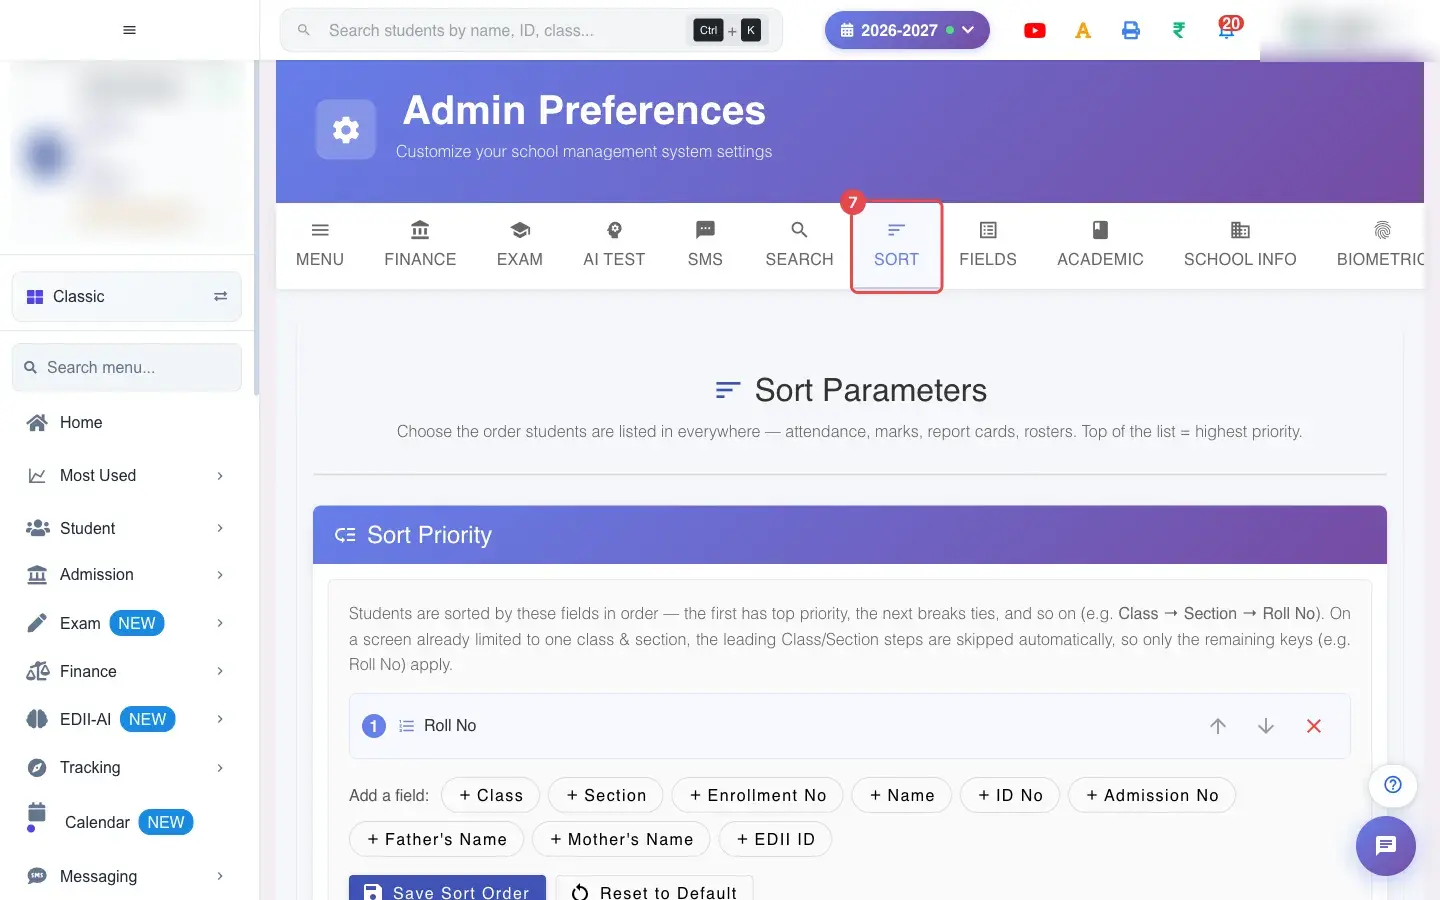
Sort Priority sets how students are ordered everywhere. Add a field to build the order (for example class, section, roll number, name), reorder it, then Save Sort Order (Sort order saved.) or Reset to Default (Sort order reset to default.).
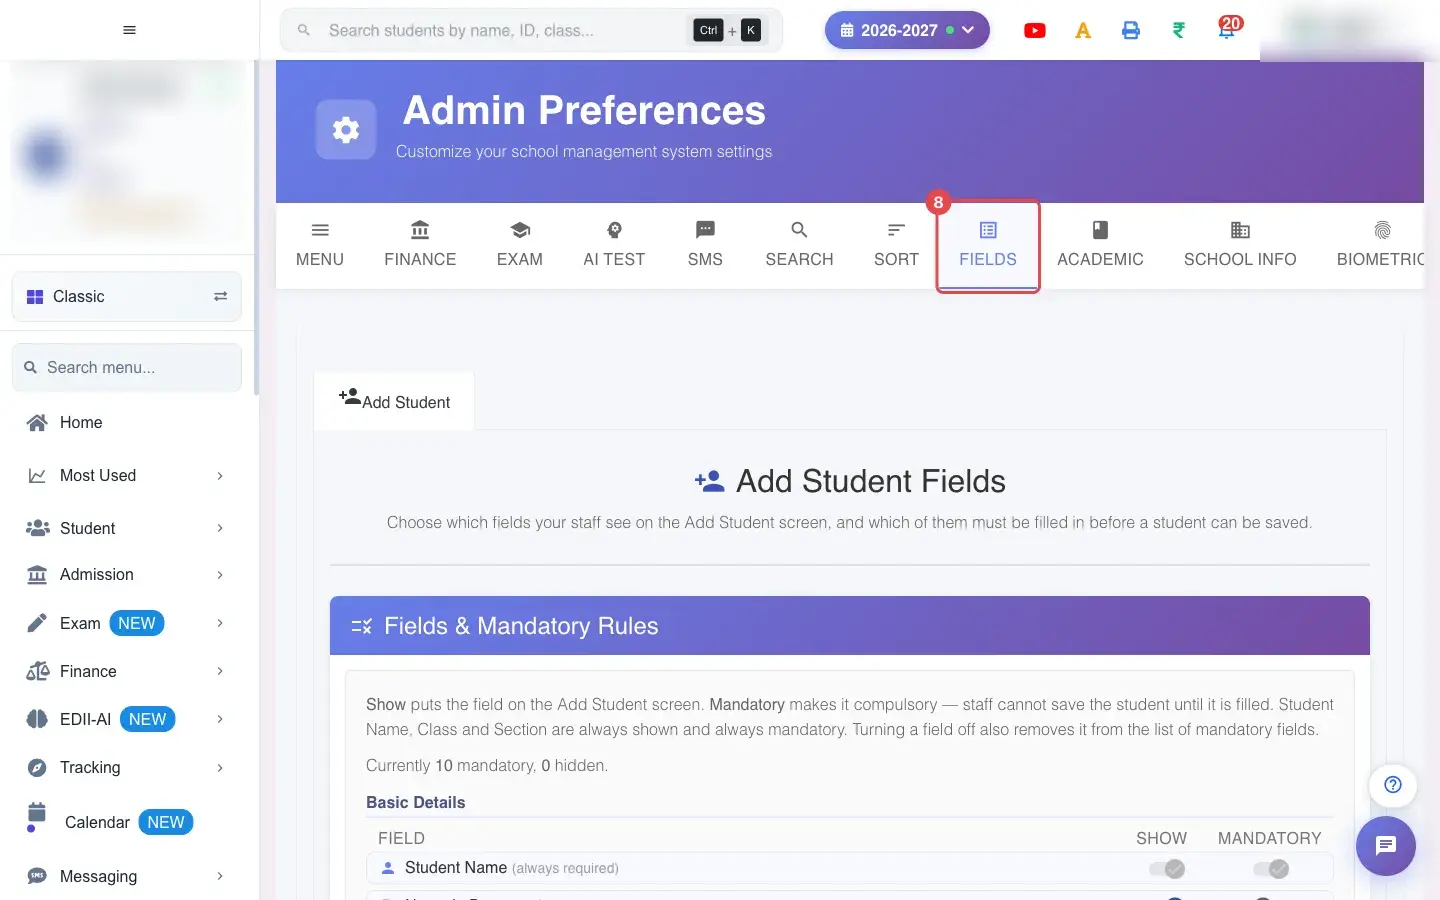
Fields & Mandatory Rules controls the Add Student screen. For each field choose Show (it appears on the form) and Mandatory (a student cannot be saved without it). Student Name, Class and Section are always shown and required; switching a field off also removes it from the mandatory list. A summary reads, for example, “10 mandatory, 0 hidden”. Select Save Add Student Fields (Add Student fields saved.) or Reset to Default.
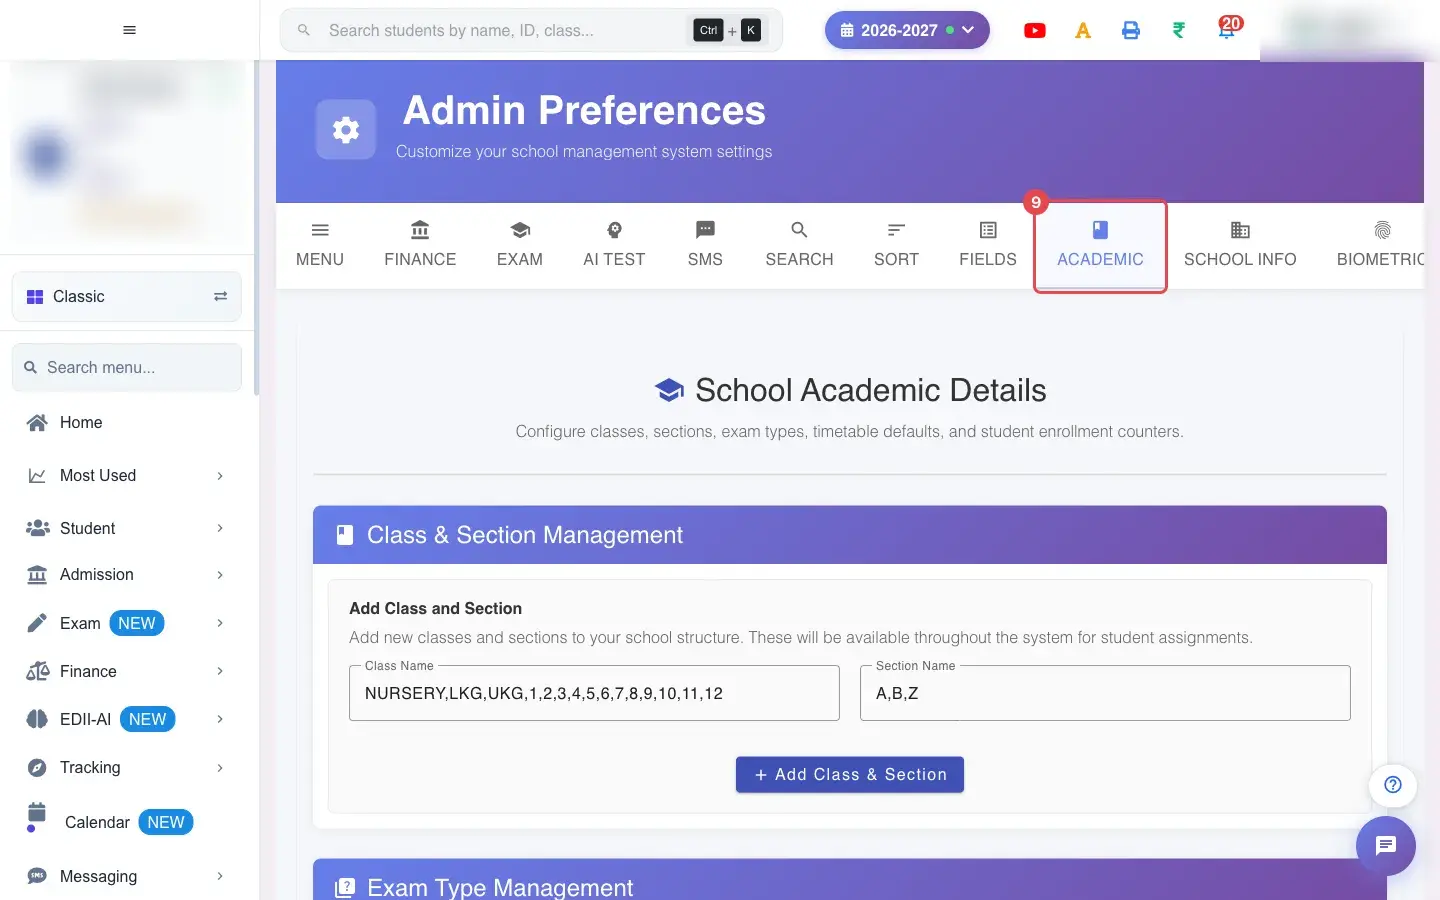
Class & Section Management: add a class and its sections (Add Class & Section). Exam Type Management: add the exam types (Save Exam Types). House Management: open Manage Houses. School Hours: Starts at and Ends at. Timetable Settings: Periods Per Day and the Periods.
Counter Settings shows the Current Form No., Current Student ID and Current Admission Form ID and lets you set each counter (Set Counter), skip the enrollment-number check, or use Auto-Fix Counters. Counter Type and Auto-Generate Student ID let the school choose automatic IDs by class (Class-wise Configuration: class, optional section, Letter/Prefix, Start From, Digits, with a Sample ID). Roll Number Management can auto-generate roll numbers for a class and section.
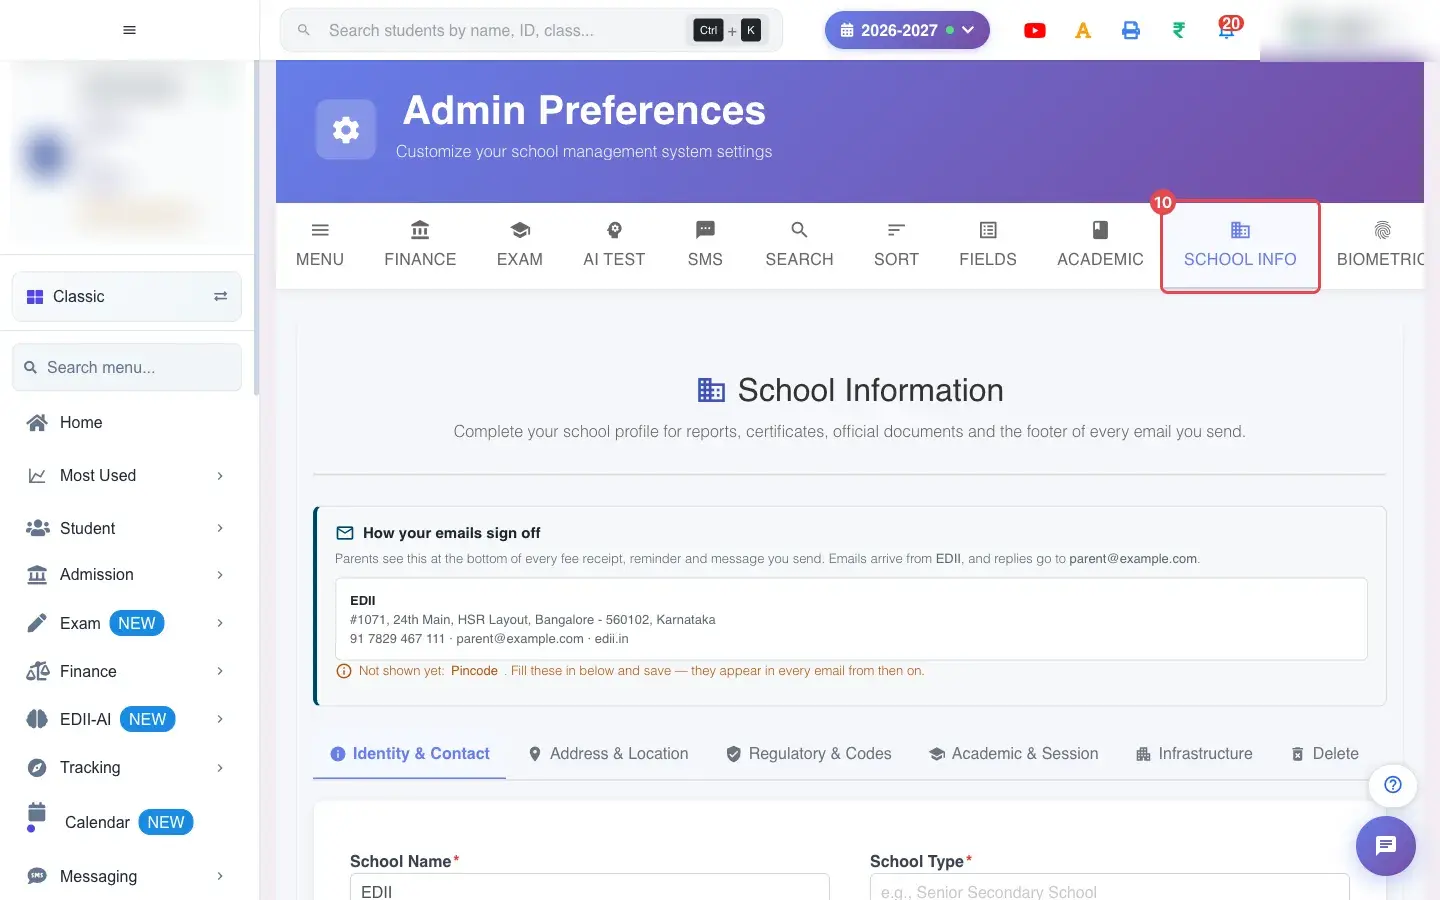
Fill the school’s identity: School Name, School Type, Branch Name, Principal Name, School Email, up to four phone numbers, School Website, Motto, About School, the full address with city, state and pin code, latitude and longitude (you can capture your current position), affiliation and codes (Affiliation No., Board Name, School Code, UDISE Code, GST No., PAN, TAN and registration numbers), Current Session and Session List, Currency, School Established Year, transport, land and building details and counts of classrooms, staff rooms, computers and toilets. How your emails sign off controls the signature on emails. PAN and TAN are checked for format (for example AAAAA0000A).
At the end is the Data Reset (Danger Zone) for administrators: choose One session only or ALL school data, the session, whether to also delete setup, and select Preview to see how many records would be affected. Resetting needs an OTP sent to the school email and typing the confirmation text; everything is archived first and can be restored. Use it only under guidance.
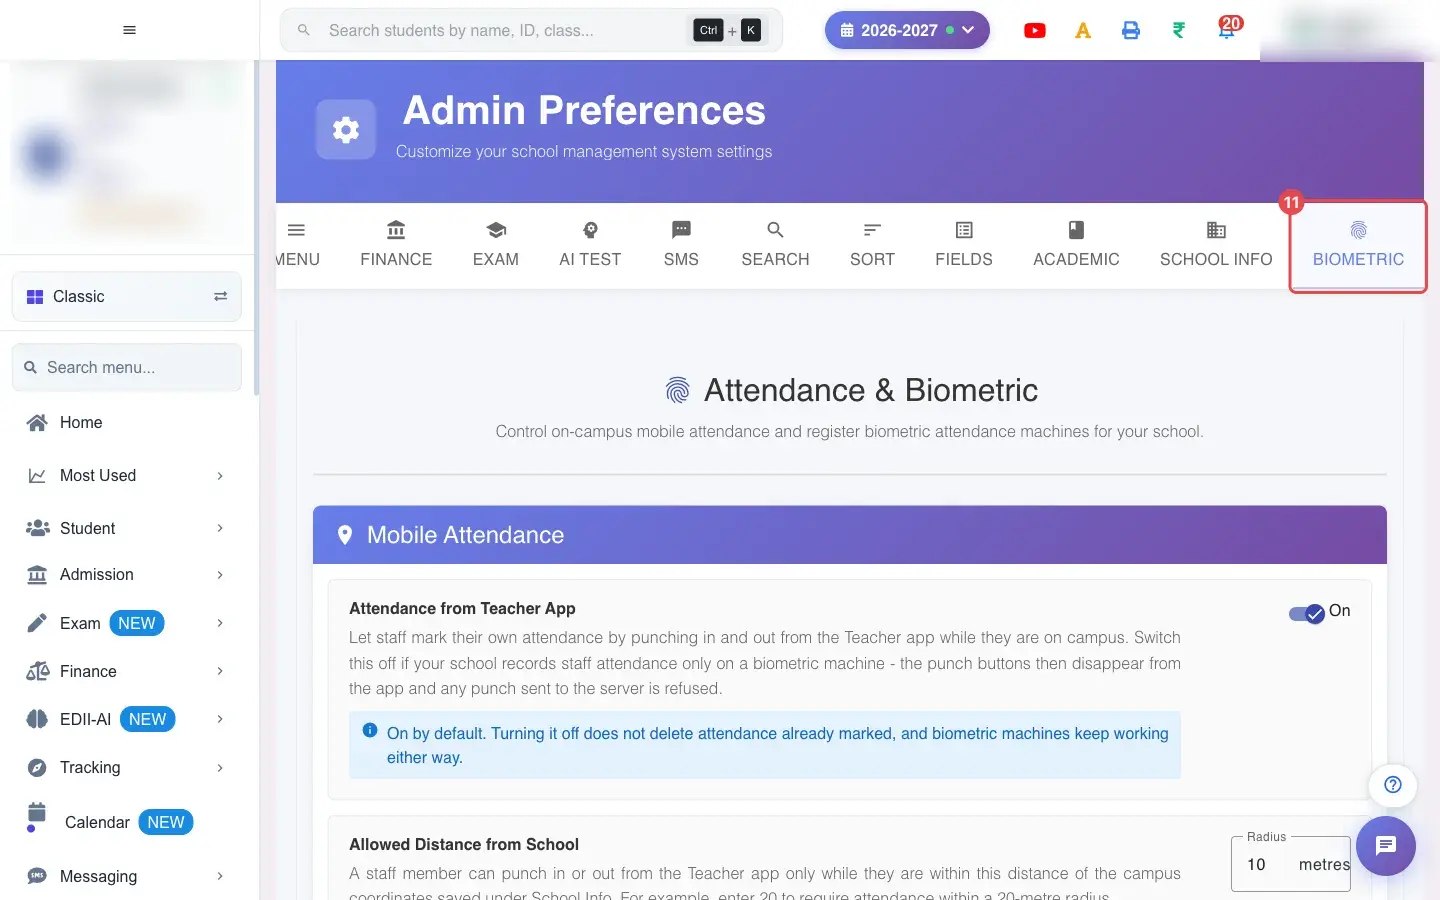
Mobile Attendance: allow Attendance from Teacher App and set the Allowed Distance from School (Radius). Add Biometric Machine: enter the Machine ID, pick the Vendor (Mantra or eSSL) and an optional Name, and add it. Registered Machines lists the school’s machines with Status and a delete Action.
Dashboard: choose the Default Dashboard. Display Settings: the Website Font Size in pixels. Notification Settings: switch WhatsApp Notifications, Fee Payment Messages, Student/Parent App Notifications and Teacher App Notifications on or off. Student App Settings: Student Photo Editing, Auto-tag Students in Buzz Photos, and Details Students Can Ask To Correct (choose All, None or particular fields; Clear all).

 Open a bigger pictureतस्वीर बड़ी करें
 Open a bigger pictureतस्वीर बड़ी करें
 Open a bigger pictureतस्वीर बड़ी करें
 Open a bigger pictureतस्वीर बड़ी करें
 Open a bigger pictureतस्वीर बड़ी करें
 Open a bigger pictureतस्वीर बड़ी करें
 Open a bigger pictureतस्वीर बड़ी करें
 Open a bigger pictureतस्वीर बड़ी करें
 Open a bigger pictureतस्वीर बड़ी करें
 Open a bigger pictureतस्वीर बड़ी करें
 Open a bigger pictureतस्वीर बड़ी करें
 Open a bigger pictureतस्वीर बड़ी करें
 Open a bigger pictureतस्वीर बड़ी करें