
Screen guide · Web app
Add Fees Master
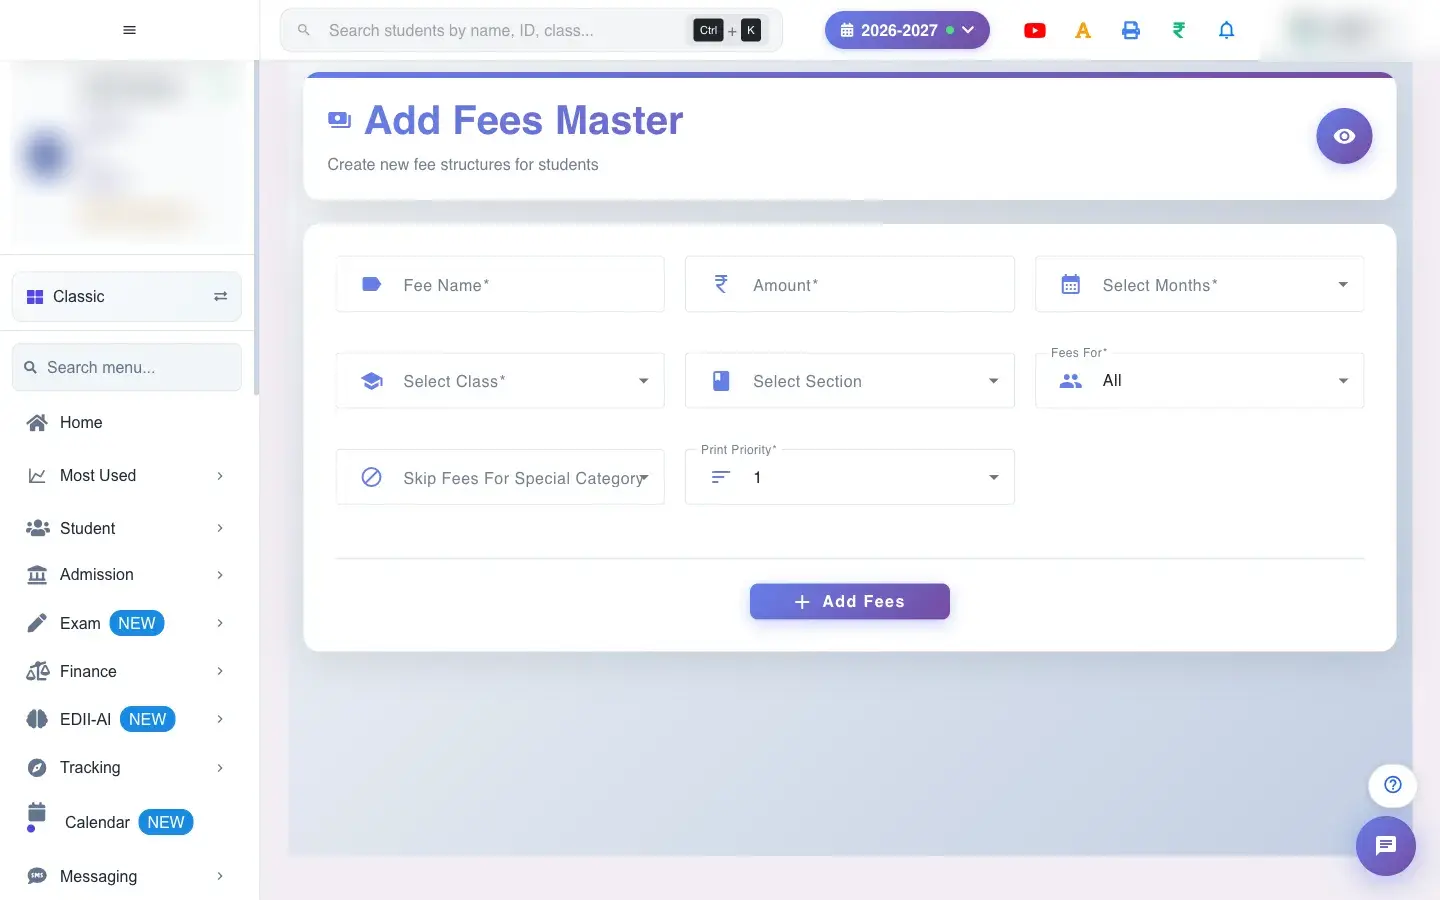
Create a fee head (such as Tuition, Transport or Exam Fee) with its amount, the months it applies to, the classes and sections it is charged to, whether it is for everyone or selected students, and its position on the printed receipt.
यह पेज अंग्रेज़ी में है। कुछ समझ न आए तो ।
Add Fees Master (Finance › Add fee head) is where each fee your school charges is defined. One entry creates the fee for every month, class and section you choose, so setting up a year of tuition takes one pass instead of hundreds.
A fee can be for all students (a normal fee) or for selected students only (an optional fee that only the chosen students pay). You can skip students of a special category, charge only new or old students, or limit it to a stream.
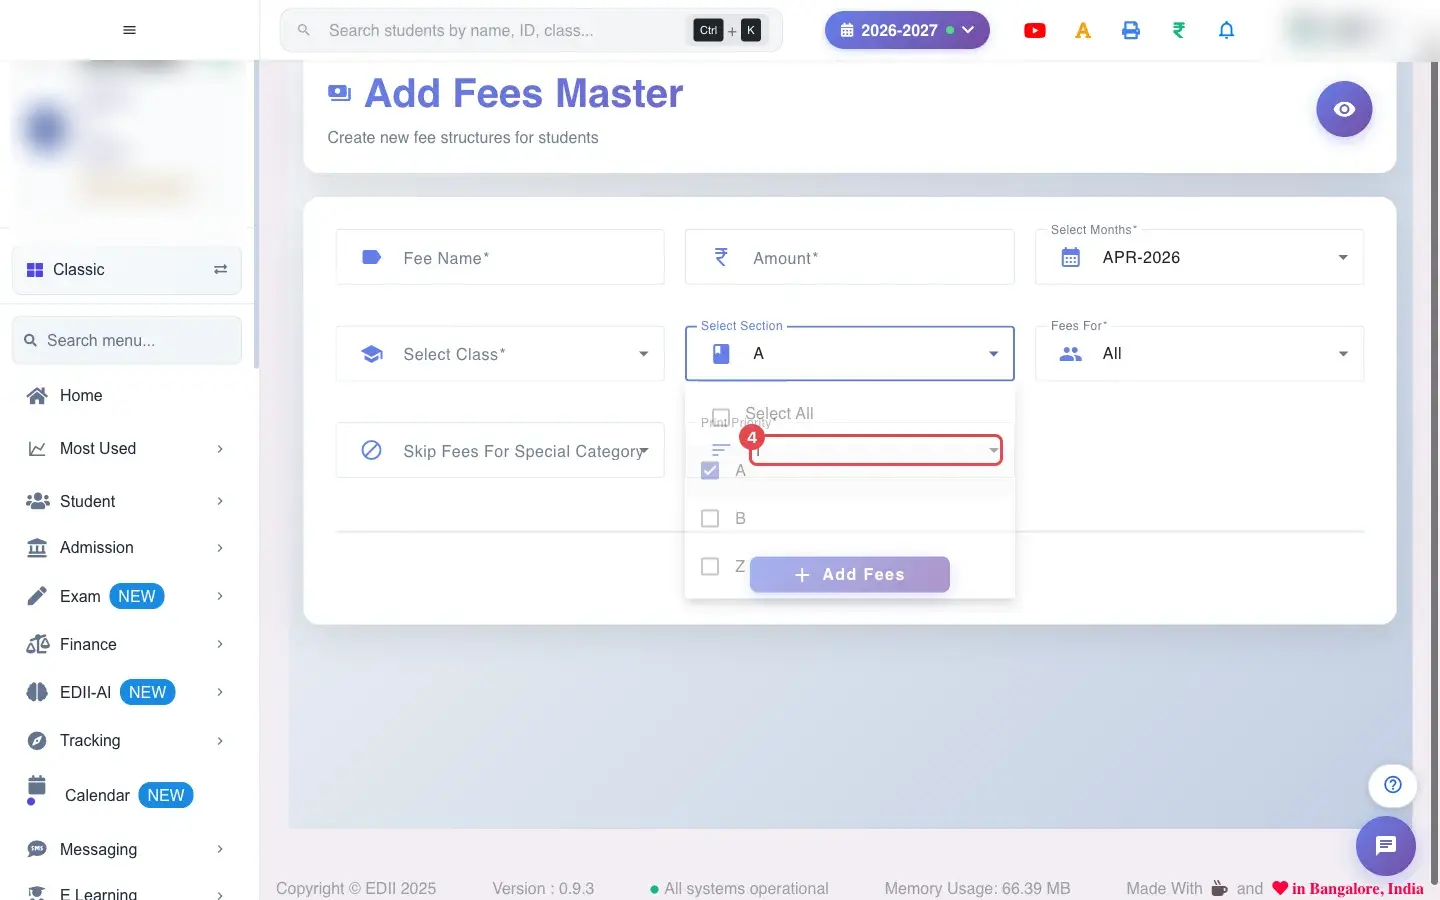
The Print Priority controls where this fee appears on the printed receipt: 1 is printed first.
Who uses it and when
Section titled “Who uses it and when”The accounts head sets up fees at the start of each session, and again whenever a new fee is introduced mid-year.
Before you start
Section titled “Before you start”- Classes, sections and months for the session must exist.
- Decide the amount per month and the months it is charged in.
- Check Fees Master first so you do not create the same fee twice; EDII warns if the fee already exists.
Where to find it
Section titled “Where to find it”- Menu: Finance › Add fee head
- Address:
/add/add-fee-master - If it is missing from your menu, your role does not include it. Ask your school admin.
 Open a bigger pictureतस्वीर बड़ी करें
Step by step
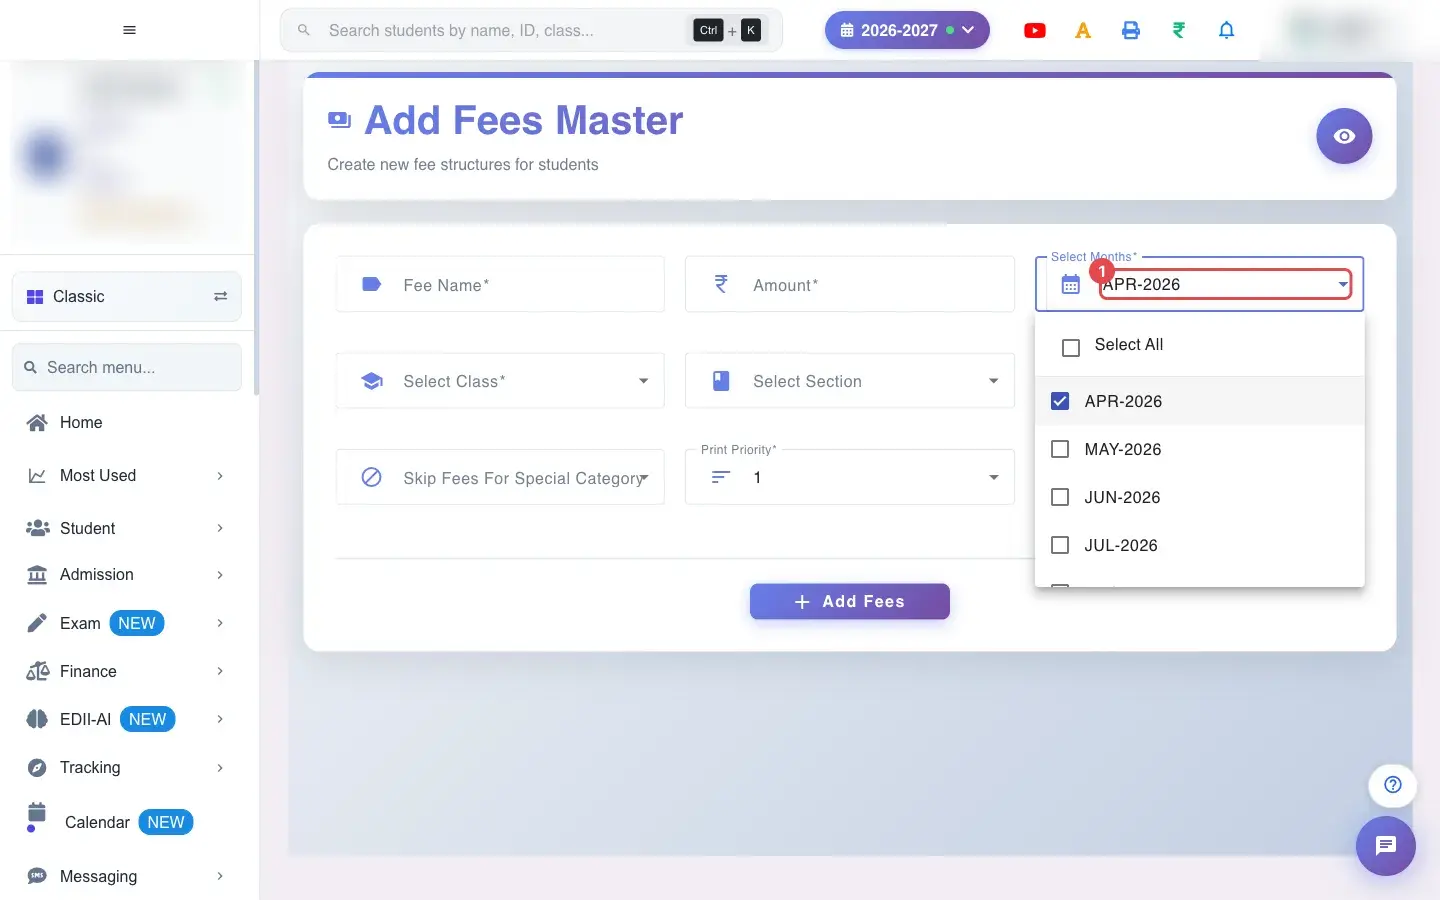
Section titled “Step by step”1. Choose Select Months (for example APR-2026)
Section titled “1. Choose Select Months (for example APR-2026)”Choose Select Months: tick each month the fee is charged in, or Select All. At least one month is required.
 Open a bigger pictureतस्वीर बड़ी करें
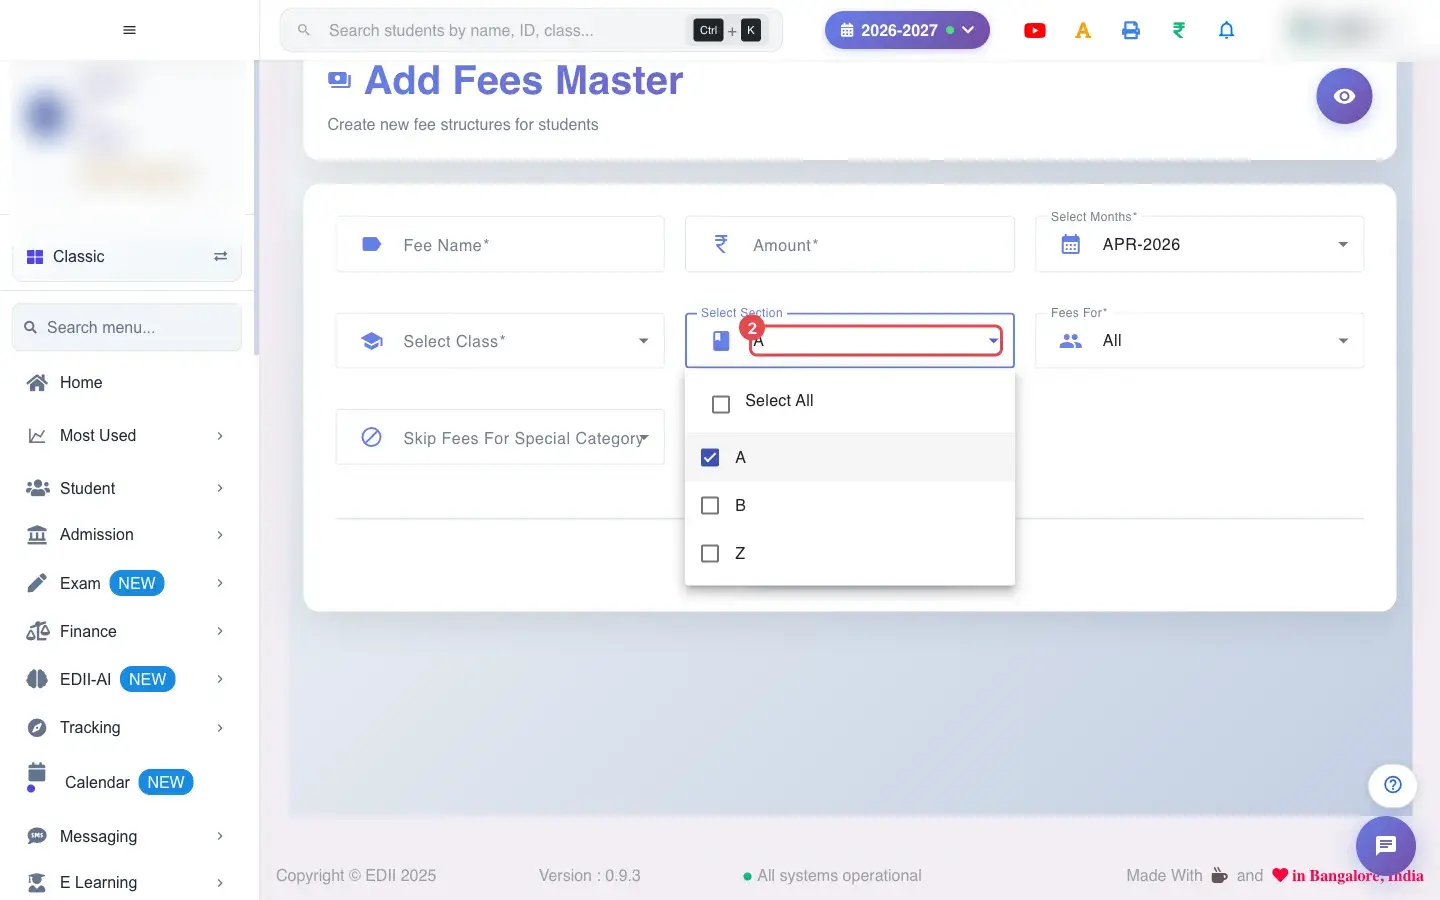
2. Choose Select Section (for example A)
Section titled “2. Choose Select Section (for example A)”Choose Select Section.
 Open a bigger pictureतस्वीर बड़ी करें
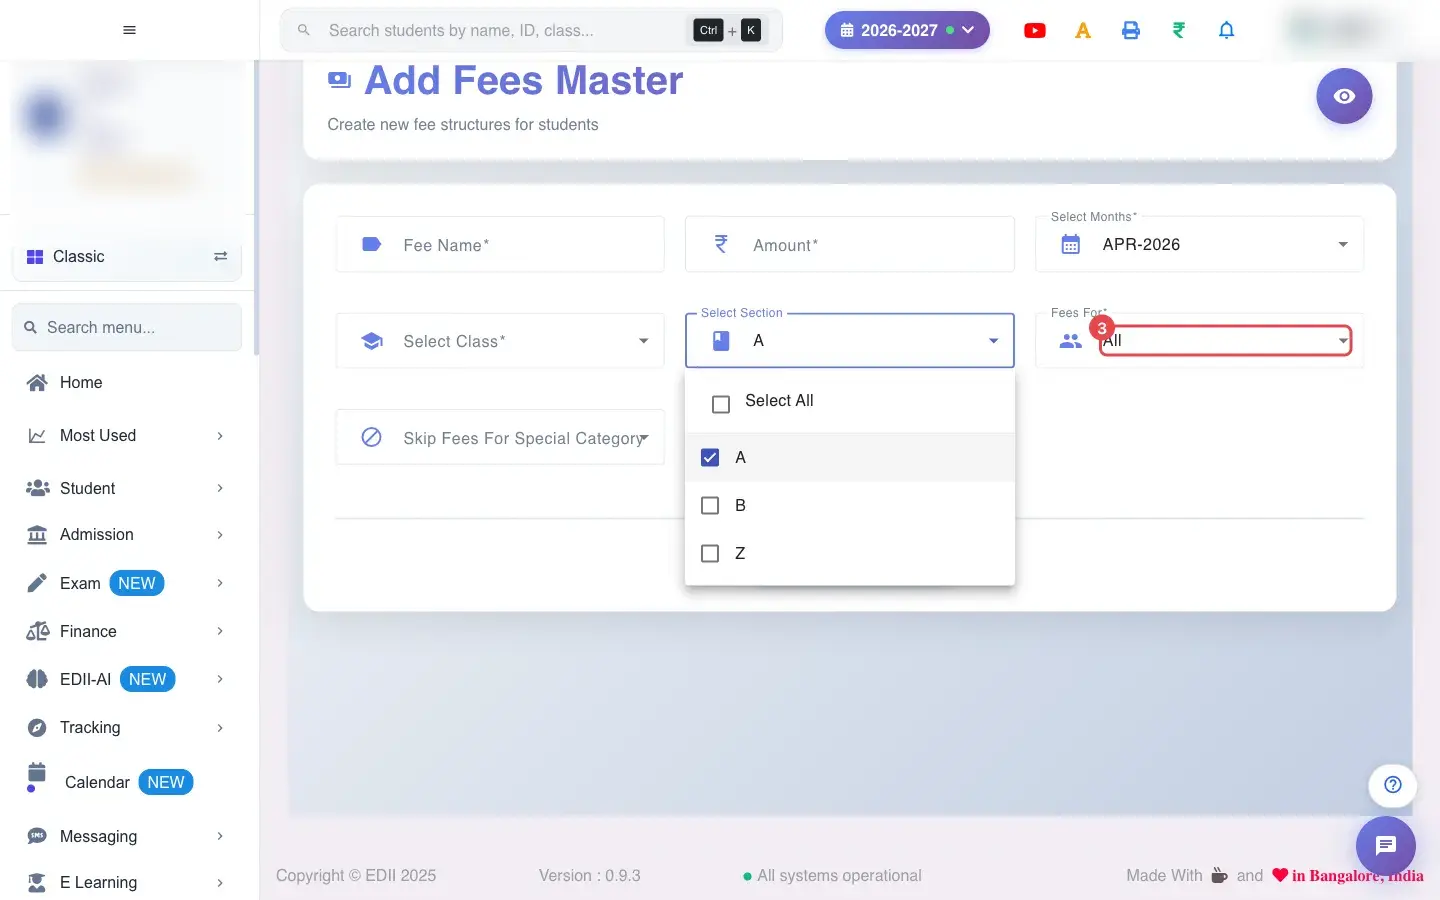
3. Choose Fees For (for example All)
Section titled “3. Choose Fees For (for example All)”Choose Fees For: All students, or Selected students only.
 Open a bigger pictureतस्वीर बड़ी करें
4. Choose Print Priority (for example 1)
Section titled “4. Choose Print Priority (for example 1)”Choose Print Priority (1 to 20): the order of this fee on the printed receipt.
 Open a bigger pictureतस्वीर बड़ी करें
5. Name the fee and set the amount
Section titled “5. Name the fee and set the amount”Type the Fee Name (existing names are suggested so you reuse the same wording) and the Amount (required). The amount is per month for each month you chose.
6. Choose the class
Section titled “6. Choose the class”Select Class picks one or several classes the fee applies to. It is required.
7. Choose who pays
Section titled “7. Choose who pays”With Fees For = All every student in the chosen classes and sections is charged. With Selected the fee becomes an optional fee and a Select Students list lets you add only the students who pay it (Add Students). Use Skip Fees For Special Category to leave out students of a category such as staff children, and Fees For New/Old Student to charge only new or only old students. Select Stream limits it to a stream.
8. Add a missing category
Section titled “8. Add a missing category”If the category you want to skip is not in the list, enter its name under Enter New Category Name and save it (Category added successfully).
9. Add the fees
Section titled “9. Add the fees”Select Add Fees. The message Fees: <name> Successfully Added confirms it. If the same fee already exists you see Fees: <name> Exists Already, Please Recheck To Ensure Data in Fees.
With data
Section titled “With data”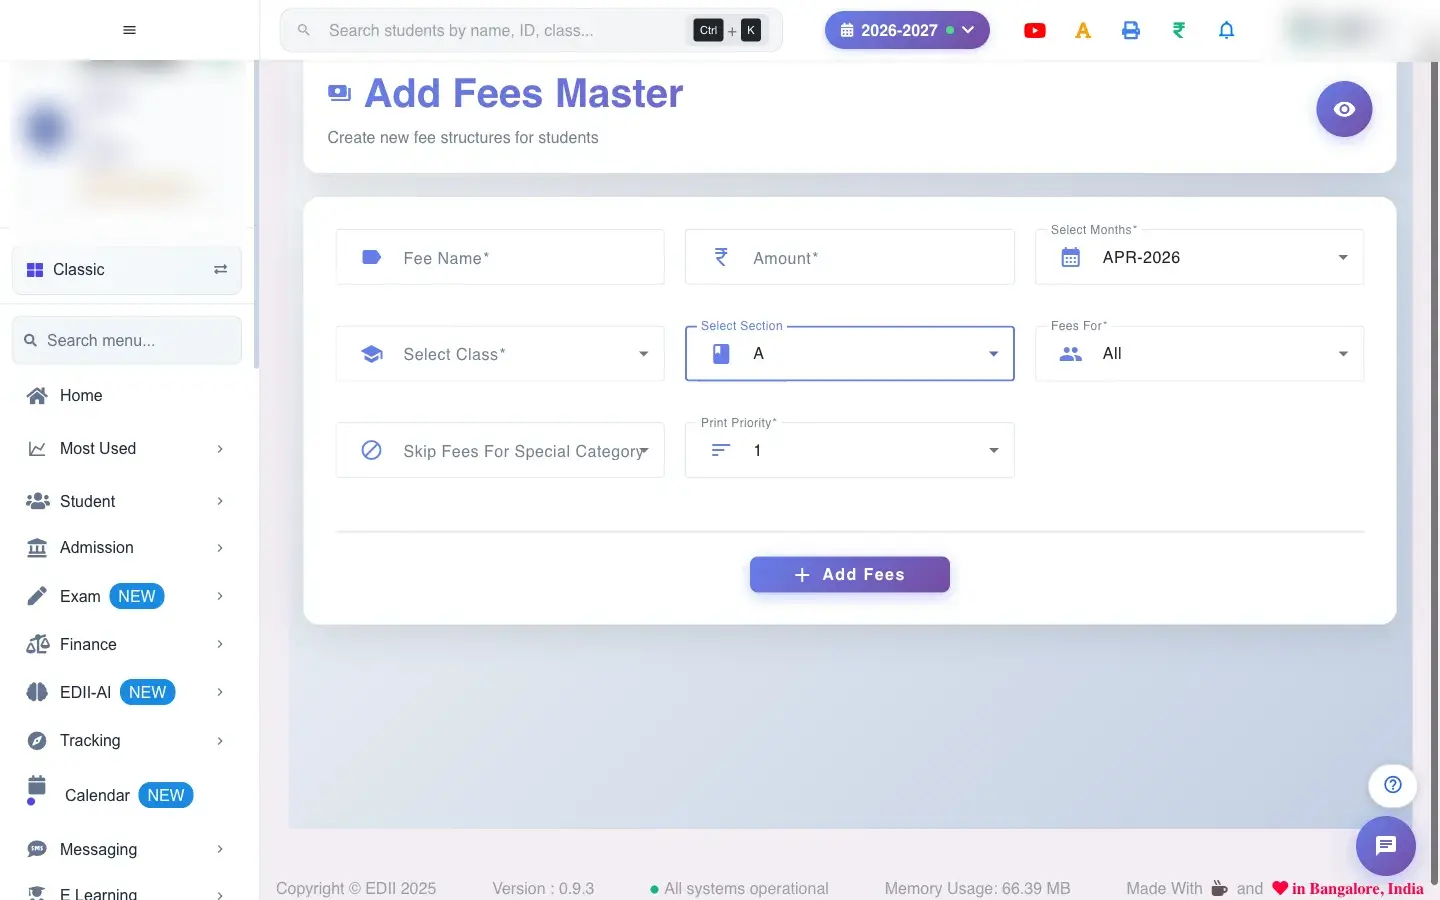 Open a bigger pictureतस्वीर बड़ी करें
Fields and filters
Section titled “Fields and filters”| Field | What it is | Notes |
|---|---|---|
| Fee Name | The name students and parents see. | Required. |
| Amount | Rupees per month. | Required. |
| Select Months | Months the fee is charged in. | At least one. |
| Select Class / Select Section | Where the fee applies. | Class required. |
| Fees For | All students or Selected students. | Selected makes it an optional fee. |
| Skip Fees For Special Category | Leaves out a category of students. | Optional. |
| Fees For New/Old Student | Charge only new or only old students. | Optional. |
| Print Priority | Order on the printed receipt. | 1 to 20; 1 is first. |
Buttons
Section titled “Buttons”| Button | What it does | What happens next |
|---|---|---|
| Add Fees | Creates the fee for the chosen months, classes and sections. | Appears in Fees Master and in fee collection. |
| Add Students | Adds students to a Selected fee. | Only they are charged. |
| Save (category) | Adds a new special category. | Category added successfully. |
After you save
Section titled “After you save”- The fee is created for every month, class and section you chose and shows in Fees Master.
- Students in those classes are charged from the chosen months, and the fee appears in fee collection, receipts and reports.
- For a Selected fee only the students you added are charged.
Good to know
Section titled “Good to know”- Fee name, amount, at least one month, a class and Fees For are required.
- Print priority runs from 1 to 20 and decides the order on the printed receipt.
- A duplicate fee is flagged with a warning.
Messages you may see
Section titled “Messages you may see”| Message | What it means | What to do |
|---|---|---|
| Fees: <name> Successfully Added | The fee was created. | Check Fees Master. |
| Fees: <name> Exists Already, Please Recheck To Ensure Data in Fees | A fee with this name exists. | Check Fees Master before adding again. |
| Warning: … | A note from the system about the fee. | Read it before continuing. |
| Fee Name is required / Amount is required / Month is required / Class is required / Fees For is required / Print Priority is required | A required field is empty. | Fill it. |
| Bad/Slow Internet Connection, Please check your internet connection | A request failed. | Try again. |
- Add the fee for all classes at once, then change individual classes in Fees Master.
- Use Selected for fees only some children pay, such as transport or a club.
- Give the main fee (Tuition) priority 1 so it prints first.
Stuck? Try this
Section titled “Stuck? Try this”| Problem | Likely cause | What to do |
|---|---|---|
| A fee was added to the wrong months | The wrong months were ticked. | Edit or delete the fee in Fees Master. |
| A student does not see the fee | The fee is Selected and the student was not added, or they are in a skipped category. | Check the fee’s students in Fees Master. |
Did this page help?क्या इस पेज से मदद मिली?
Thanks! Glad it helped.धन्यवाद! अच्छा लगा कि काम बन गया।
Sorry about that. Ask in your own words, or write to us.माफ़ कीजिए। अपने शब्दों में पूछें, या हमें लिखें।