
Screen guide · Web app
Add New Student
The step-by-step form for admitting a new student: five tabs from mandatory details to additional information, with duplicate and PEN checks, prefill from a former student, photo upload and fees, ending in Submit.
यह पेज अंग्रेज़ी में है। कुछ समझ न आए तो ।
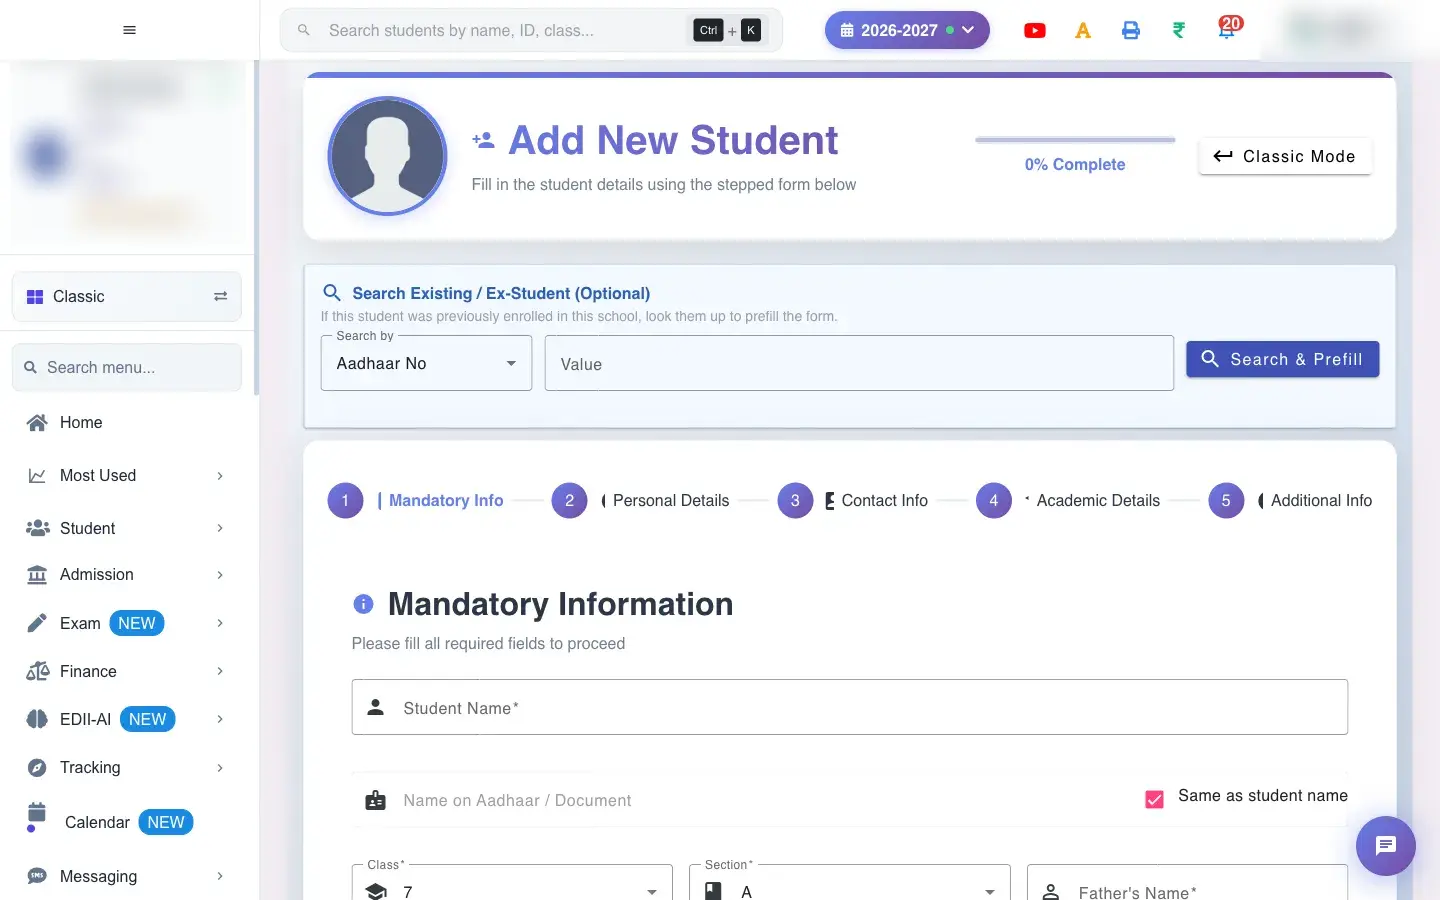
Add New Student is the main admission form. It is a stepped form with five tabs: Mandatory Info, Personal Details, Contact Info, Academic Details and Additional Info. A % Complete indicator at the top shows how much of the form you have filled in.
Only the Mandatory Info tab has to be complete to submit. The other tabs hold everything else the school records about a child and can be filled in now or edited later.
Before you start typing you can look up a former student to prefill the form (useful for re-admissions). The system then generates a fresh student ID, enrollment number and admission form number for the new admission.
Who uses it and when
Section titled “Who uses it and when”The admission office or school administrator uses it for each new admission, usually after the admission form or entrance test is accepted.
Before you start
Section titled “Before you start”- Classes, sections and the academic session must exist. Houses, categories and streams appear only if the school has set them up.
- The student ID and admission form number are generated by the school’s settings (Preferences › Academic Details). You do not type them here.
- Keep a passport-size photo (up to 10 MB) ready if you want to add one now.
Where to find it
Section titled “Where to find it”- Menu: Student › Add Student
- Address:
/add/add-student-v2 - If it is missing from your menu, your role does not include it. Ask your school admin.
 Open a bigger pictureतस्वीर बड़ी करें
Step by step
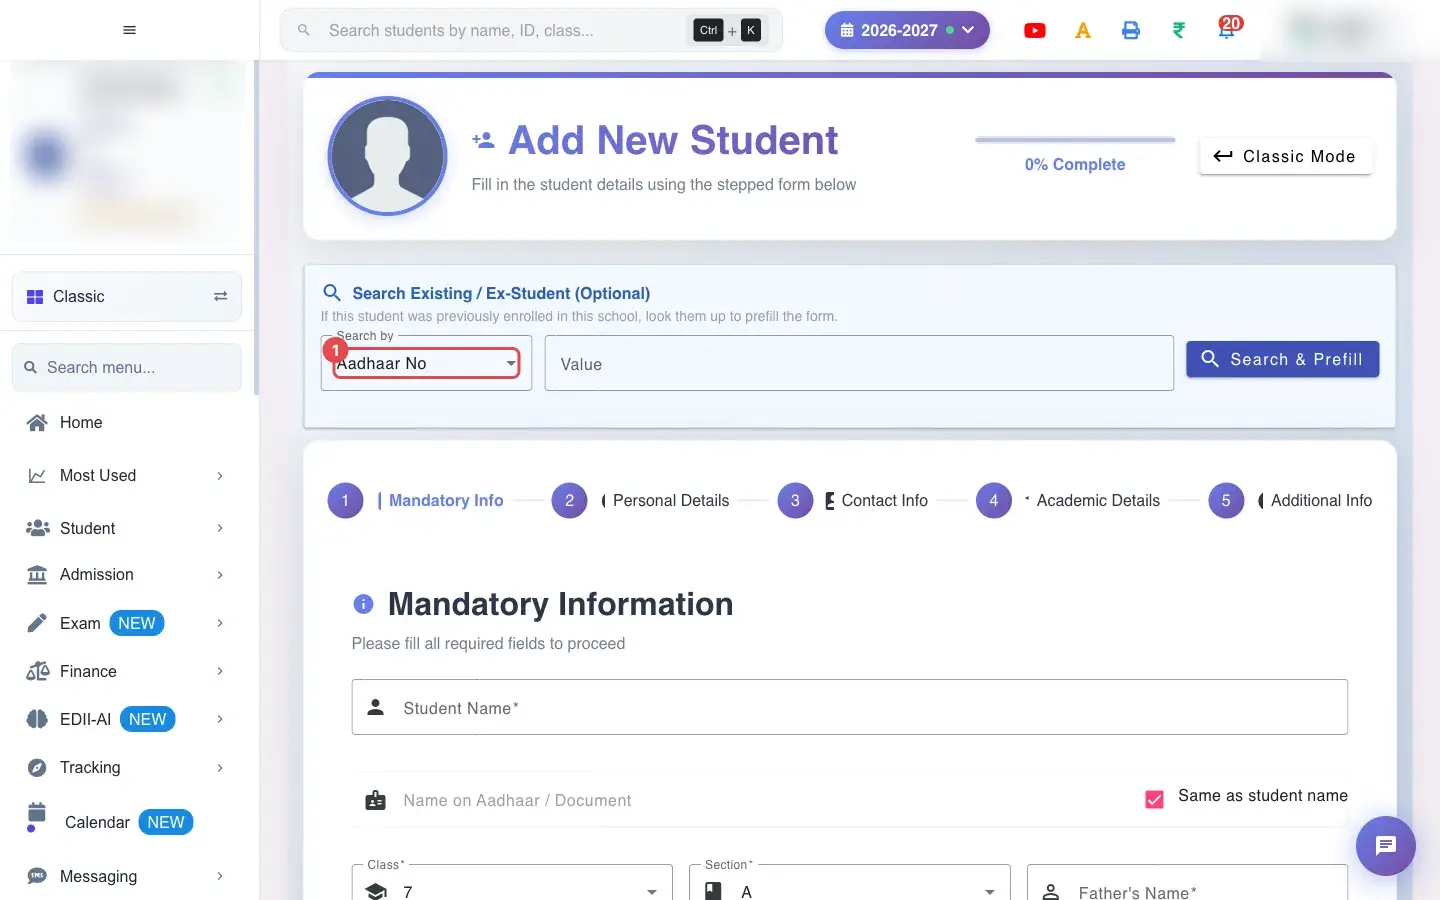
Section titled “Step by step”1. Choose Search by (for example Aadhaar No)
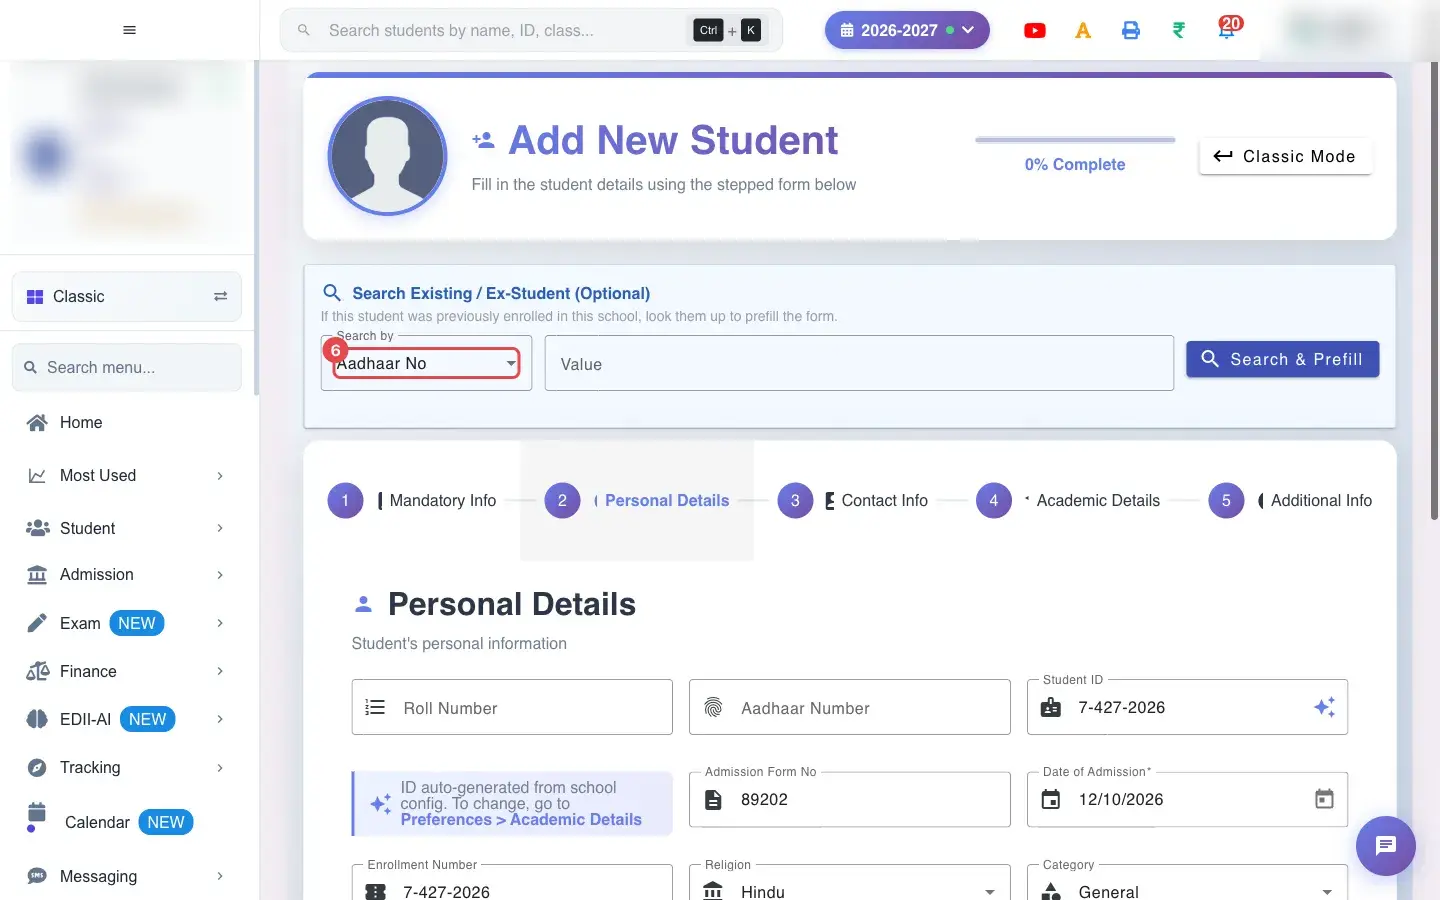
Section titled “1. Choose Search by (for example Aadhaar No)”In the optional Search Existing / Ex-Student box, choose what to search by (for example Aadhaar No) and type the Value, then select Search & Prefill to bring back a former student’s details.
 Open a bigger pictureतस्वीर बड़ी करें
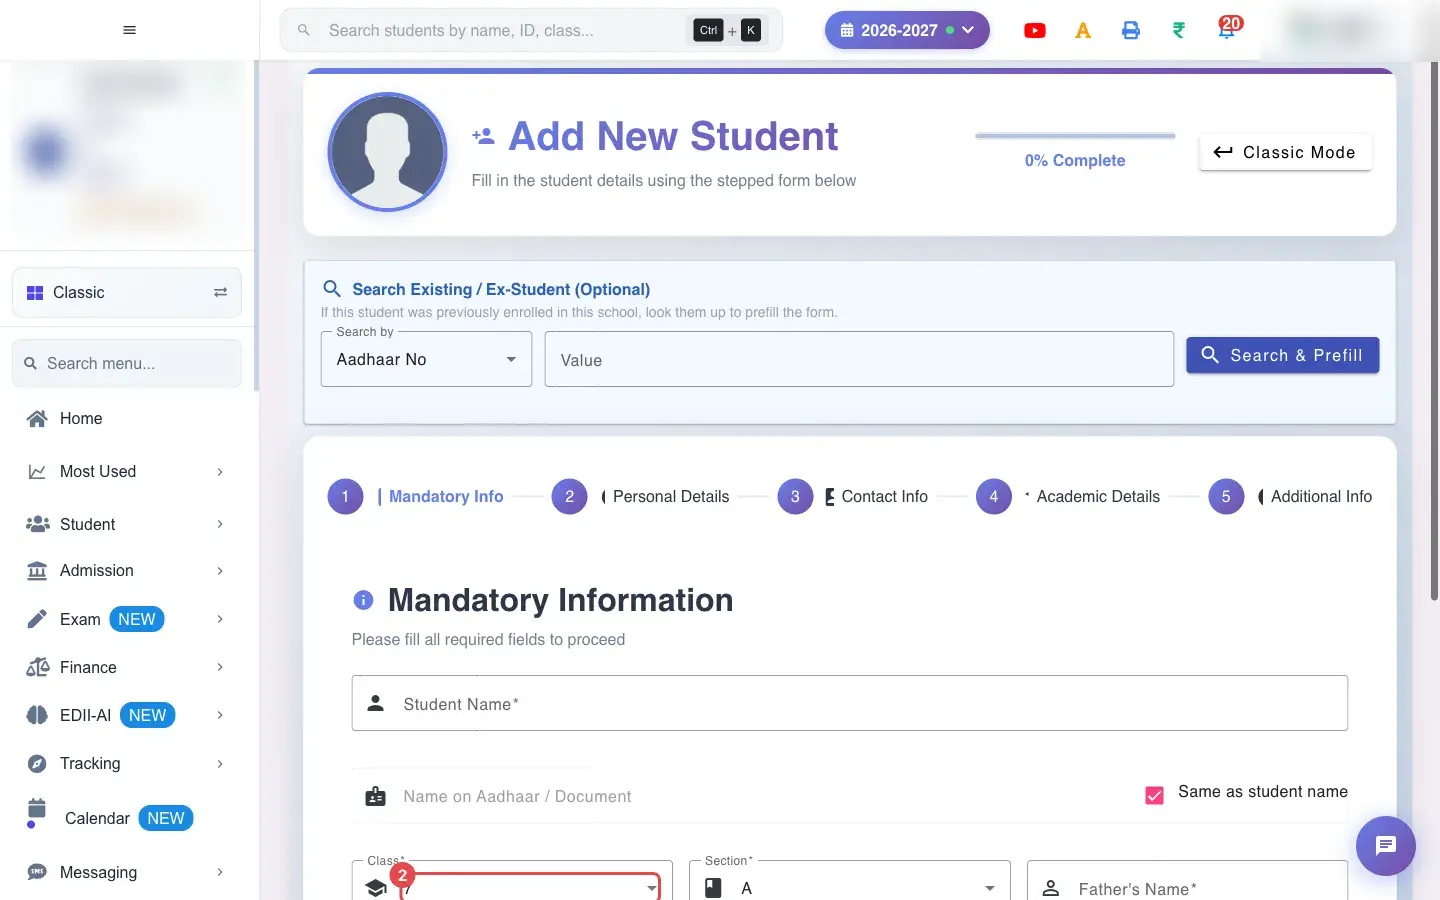
2. Choose Class (for example 7)
Section titled “2. Choose Class (for example 7)”Choose the Class for the new admission.
 Open a bigger pictureतस्वीर बड़ी करें
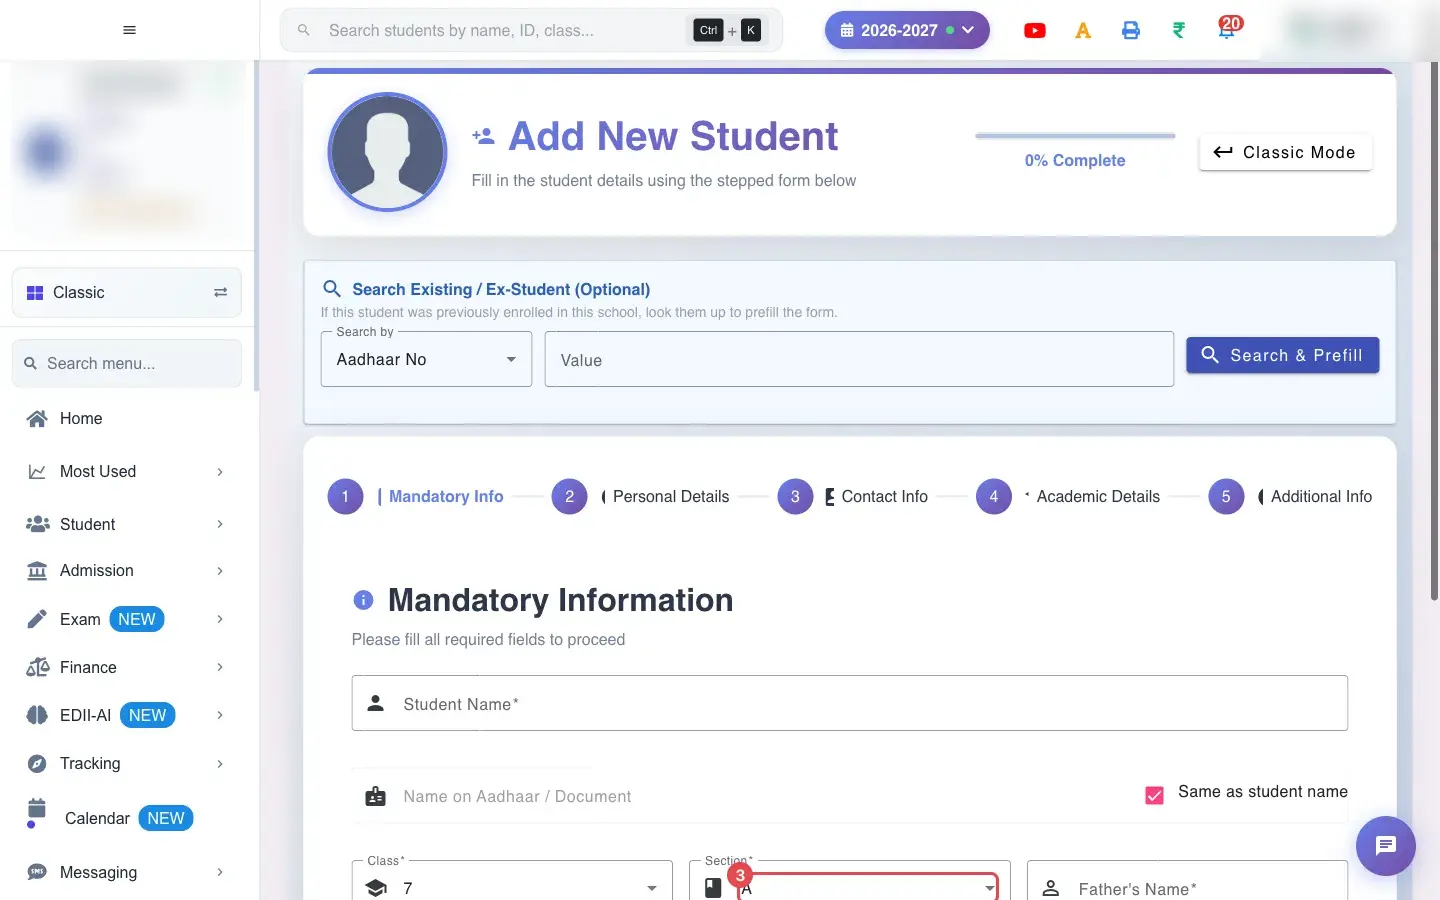
3. Choose Section (for example A)
Section titled “3. Choose Section (for example A)”Choose the Section.
 Open a bigger pictureतस्वीर बड़ी करें
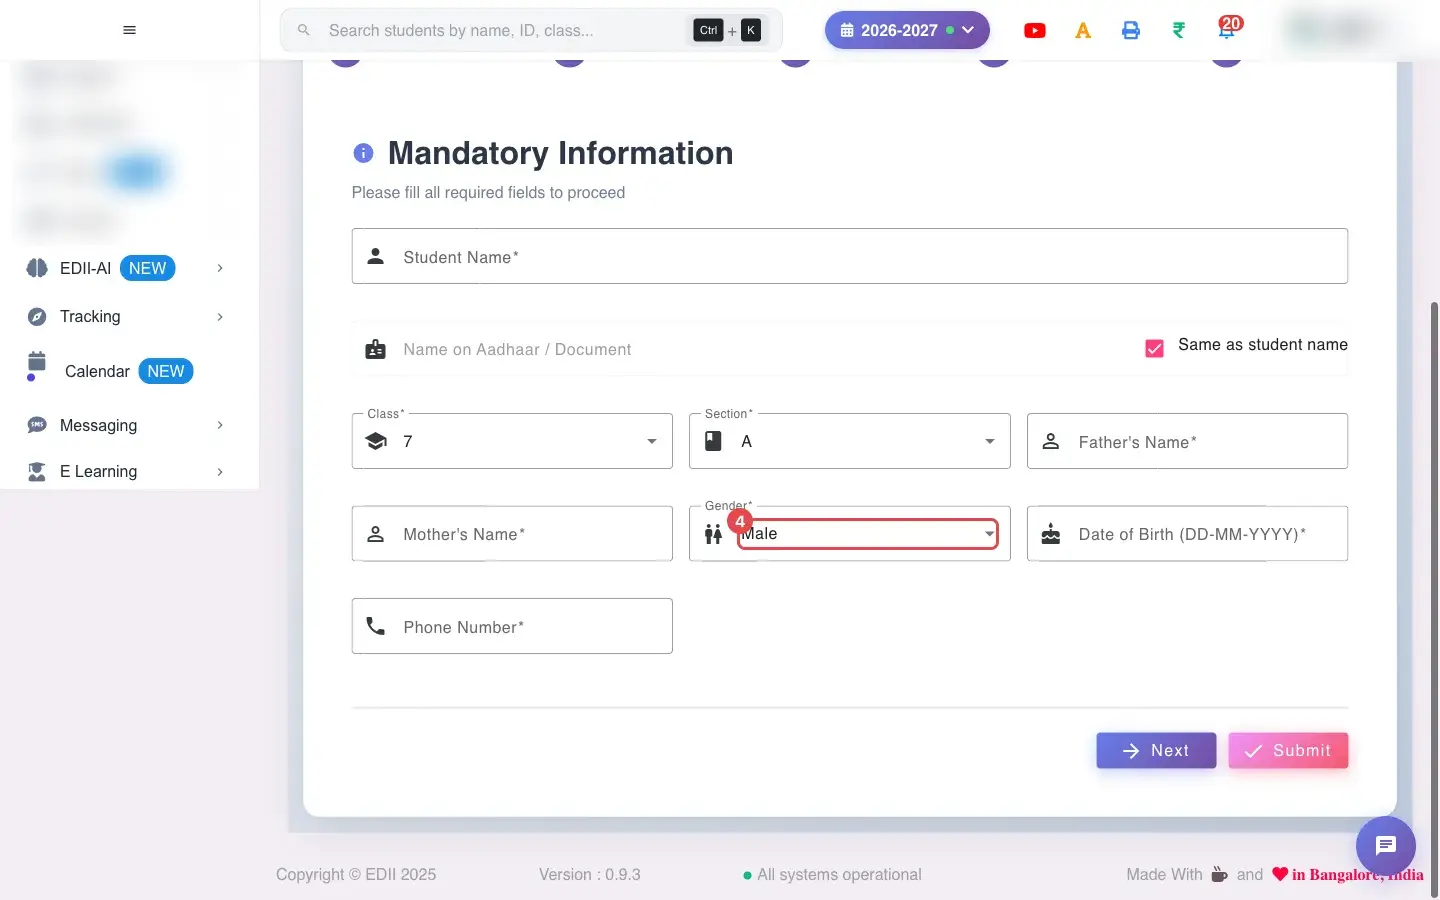
4. Choose Gender (for example Male)
Section titled “4. Choose Gender (for example Male)”Choose the Gender.
 Open a bigger pictureतस्वीर बड़ी करें
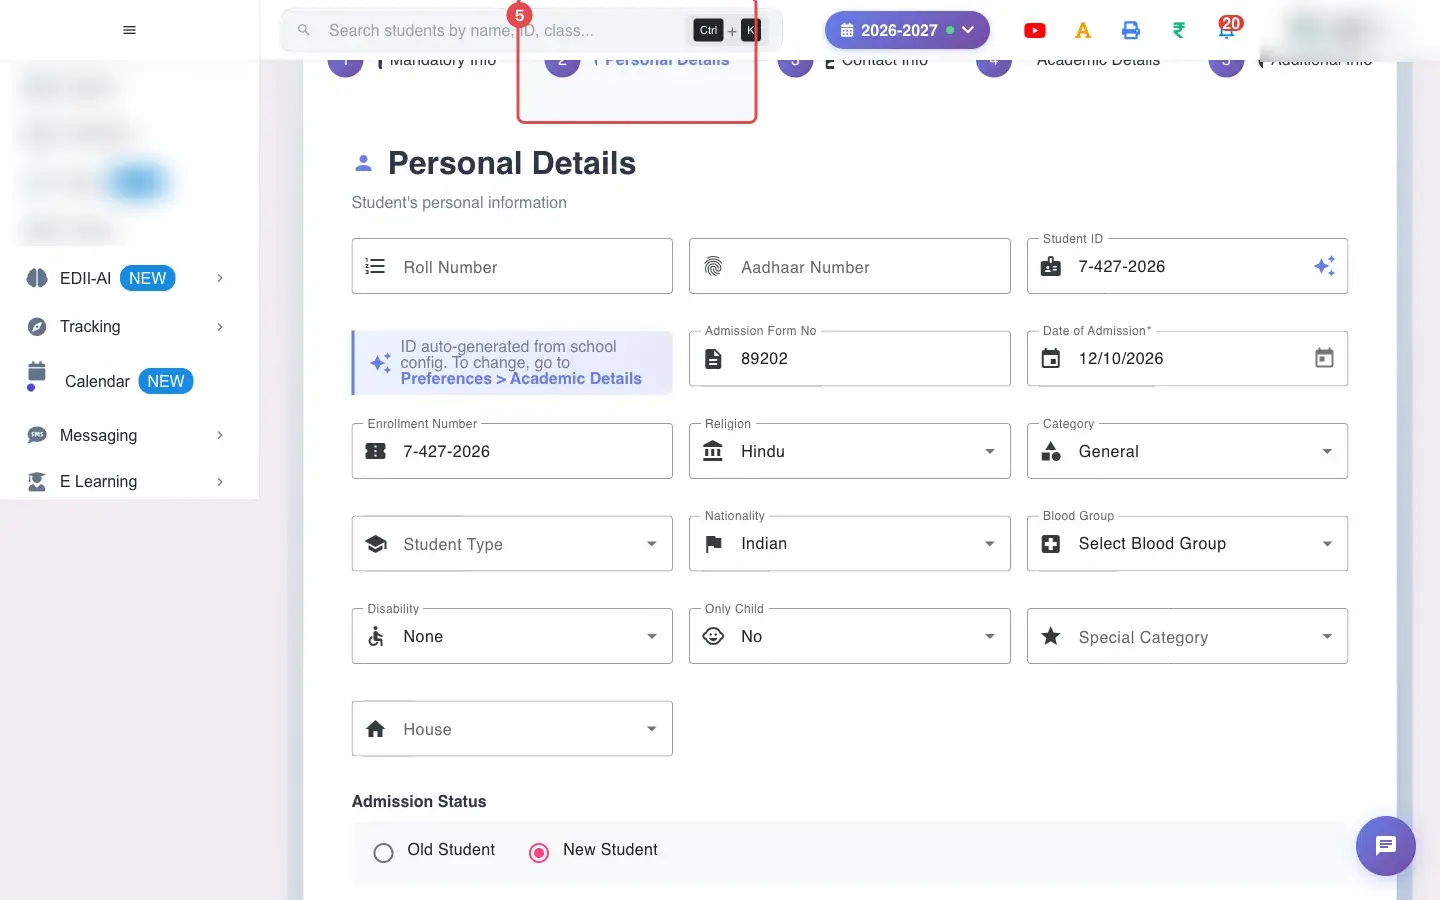
5. Open the 2 Personal Details tab
Section titled “5. Open the 2 Personal Details tab”Open the Personal Details tab.
 Open a bigger pictureतस्वीर बड़ी करें
6. Choose Search by (for example Aadhaar No)
Section titled “6. Choose Search by (for example Aadhaar No)”The ex-student search stays available on this tab.
 Open a bigger pictureतस्वीर बड़ी करें
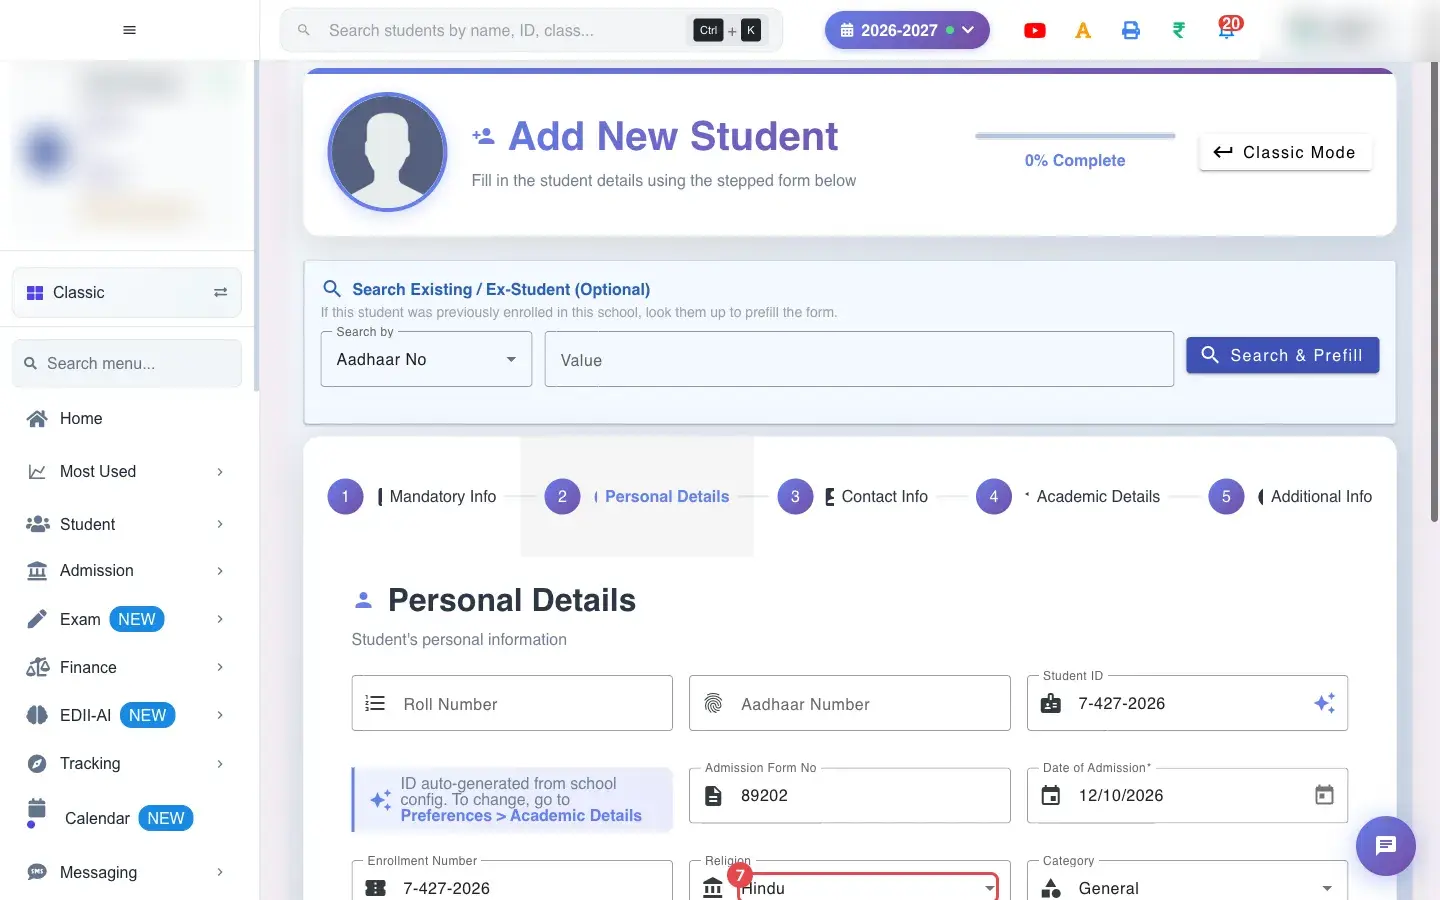
7. Choose Religion (for example Hindu)
Section titled “7. Choose Religion (for example Hindu)”Choose the Religion.
 Open a bigger pictureतस्वीर बड़ी करें
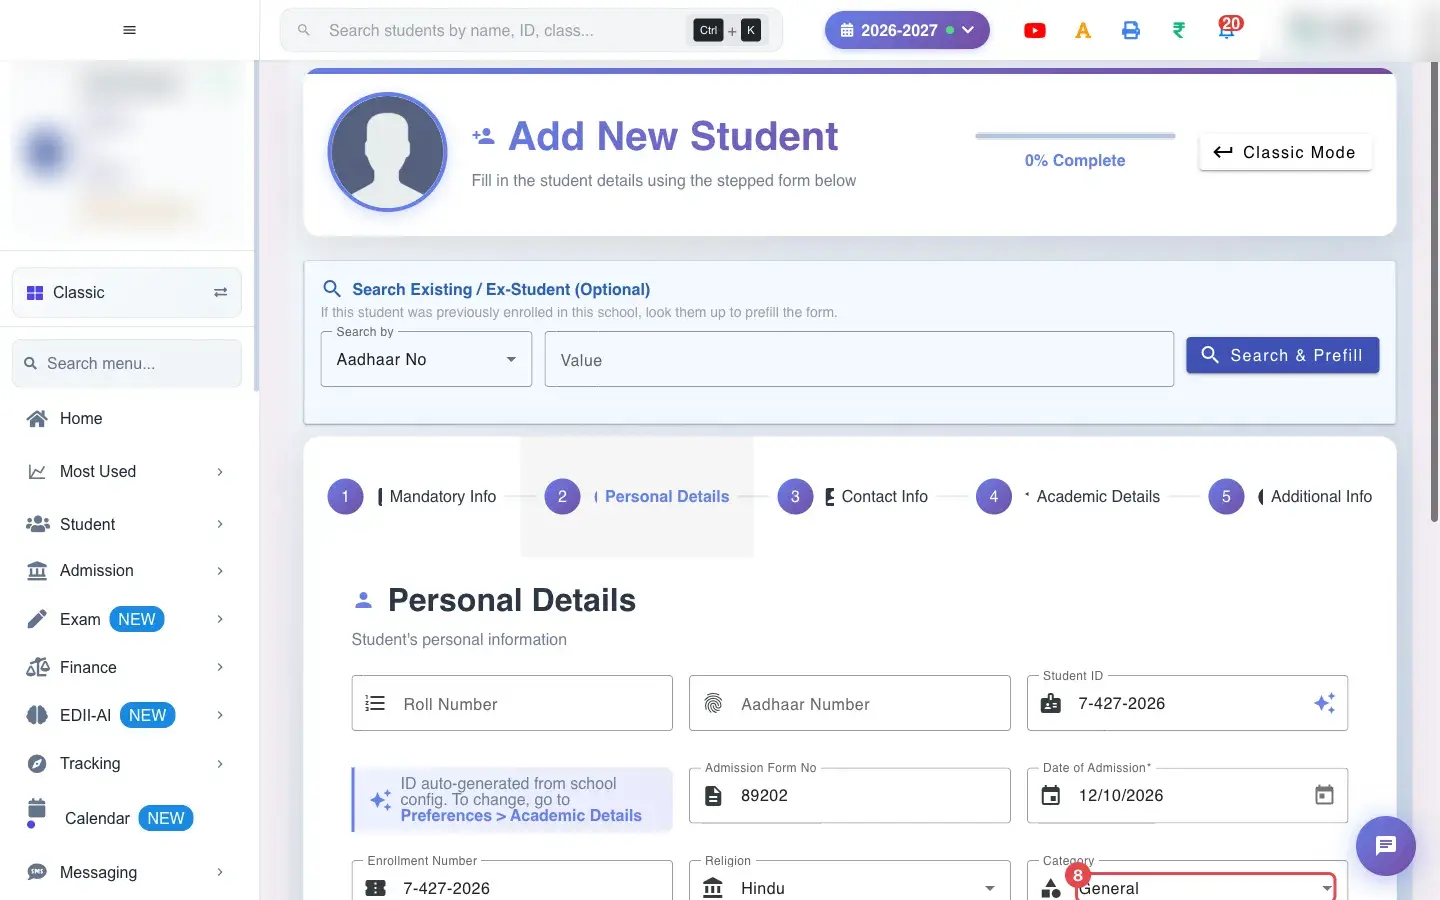
8. Choose Category (for example General)
Section titled “8. Choose Category (for example General)”Choose the Category (General, OBC and so on; Enter New Category adds a new one to the list).
 Open a bigger pictureतस्वीर बड़ी करें
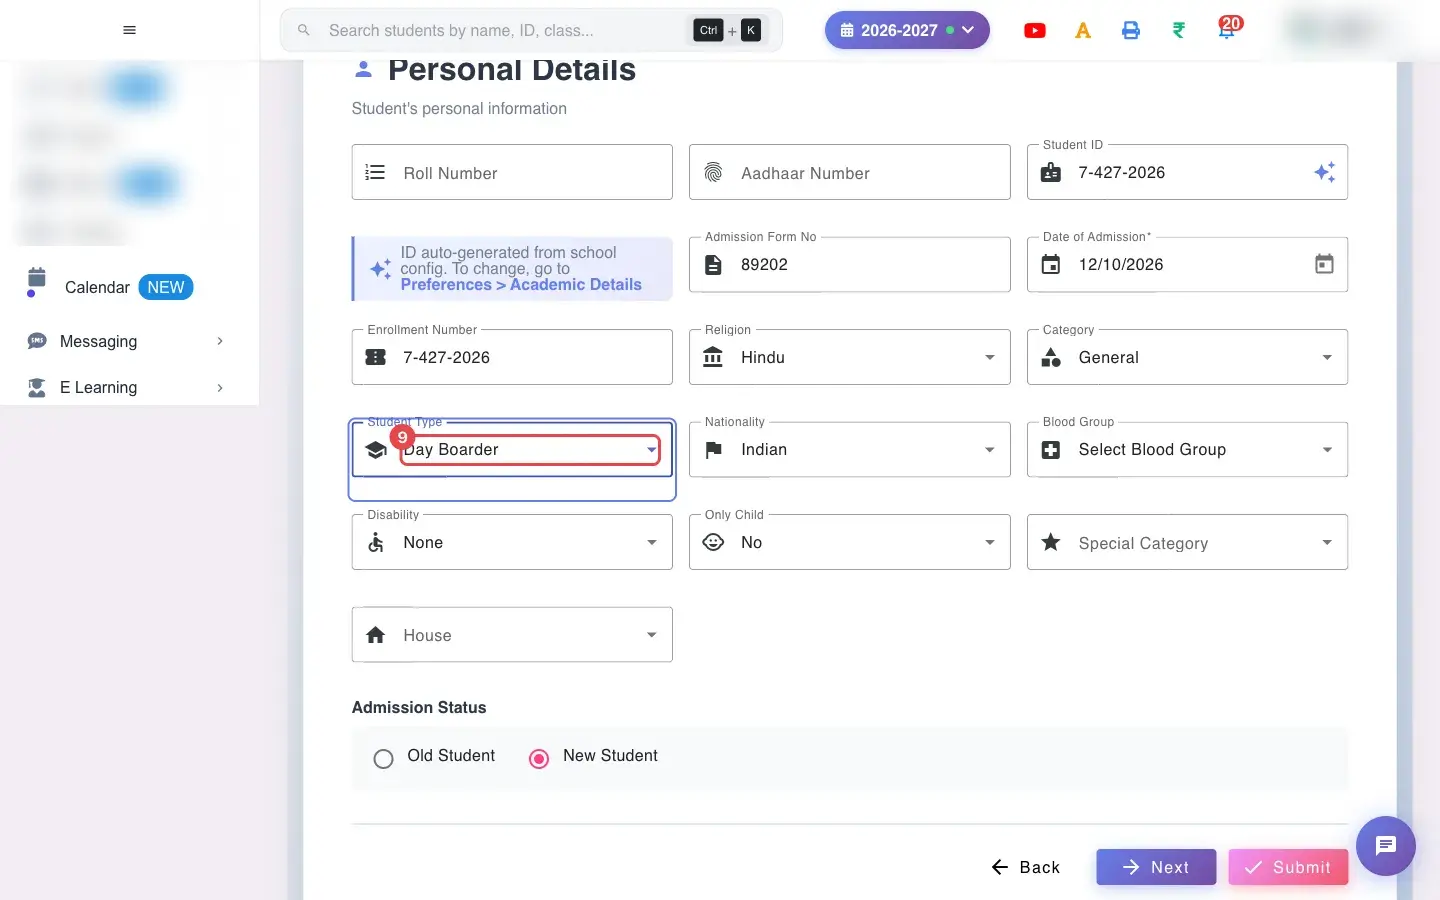
9. Choose Student Type (for example Day Boarder)
Section titled “9. Choose Student Type (for example Day Boarder)”Choose the Student Type, for example Day Scholar or Day Boarder.
 Open a bigger pictureतस्वीर बड़ी करें
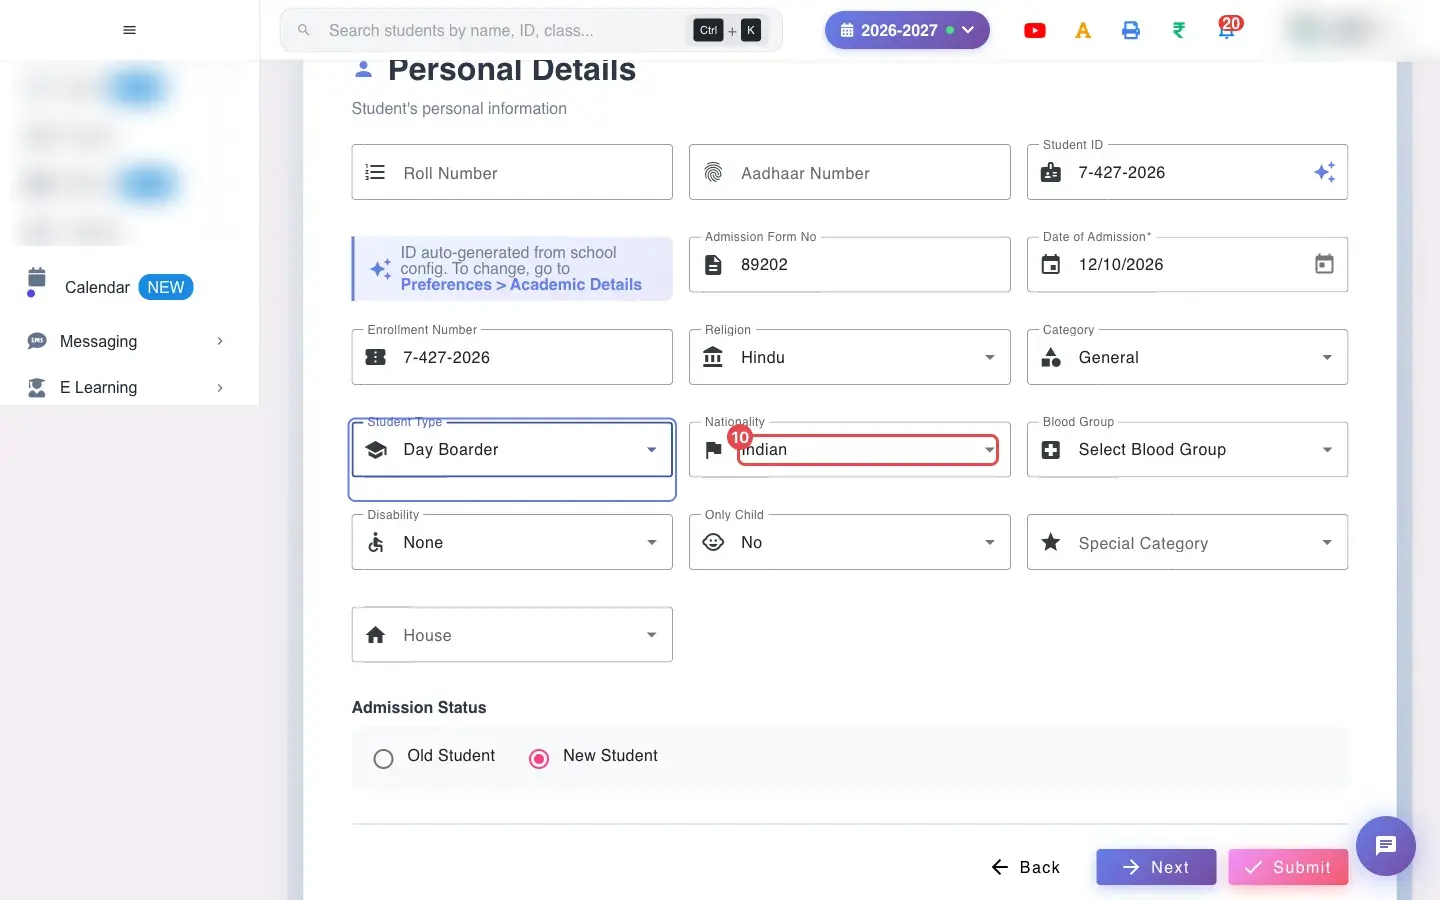
10. Choose Nationality (for example Indian)
Section titled “10. Choose Nationality (for example Indian)”Choose the Nationality.
 Open a bigger pictureतस्वीर बड़ी करें
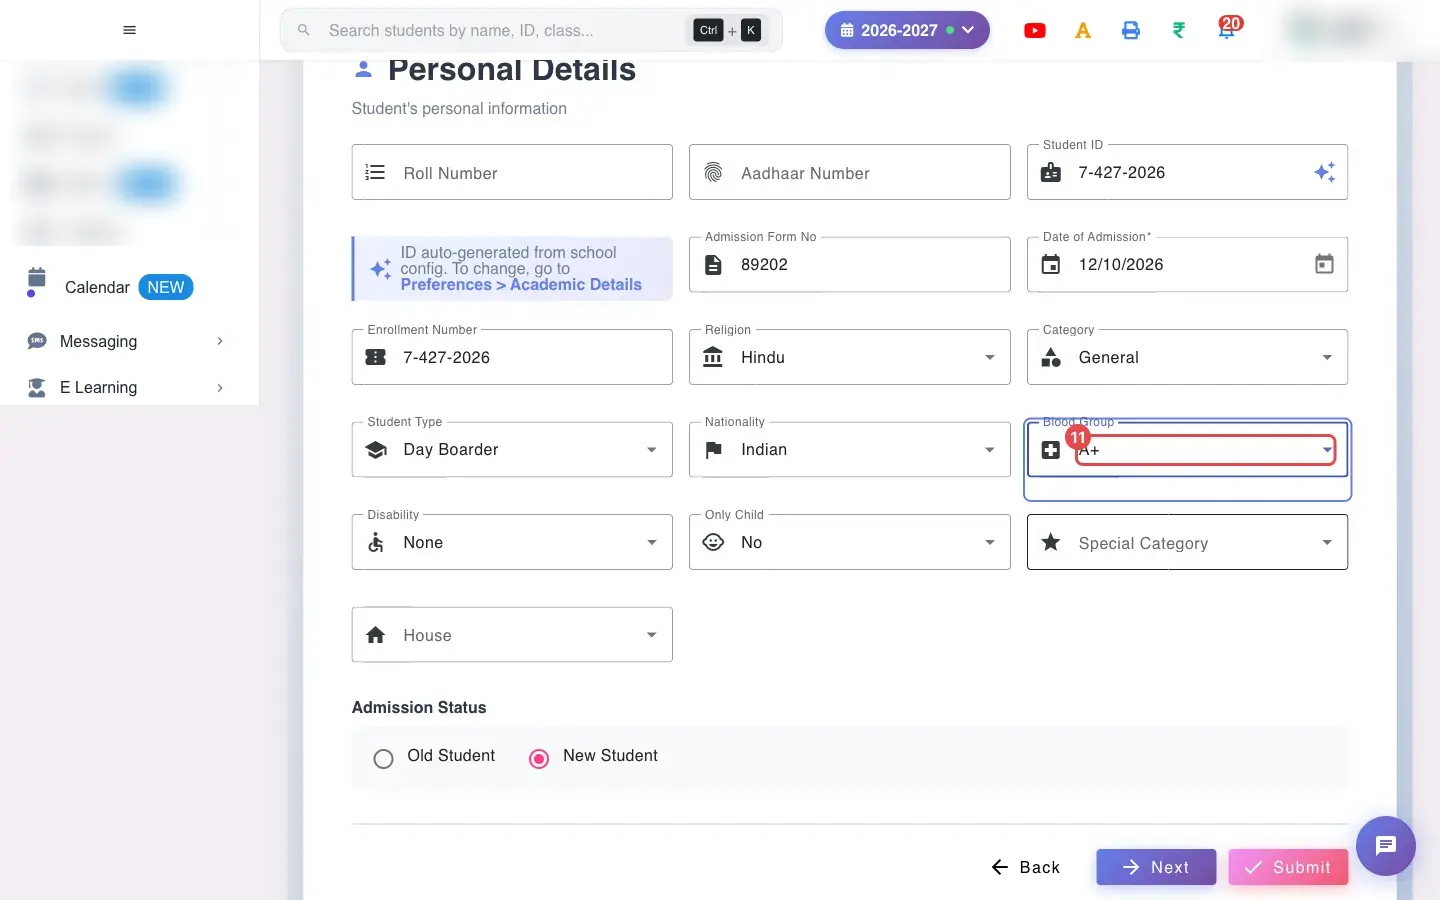
11. Choose Blood Group (for example A+)
Section titled “11. Choose Blood Group (for example A+)”Choose the Blood Group.
 Open a bigger pictureतस्वीर बड़ी करें
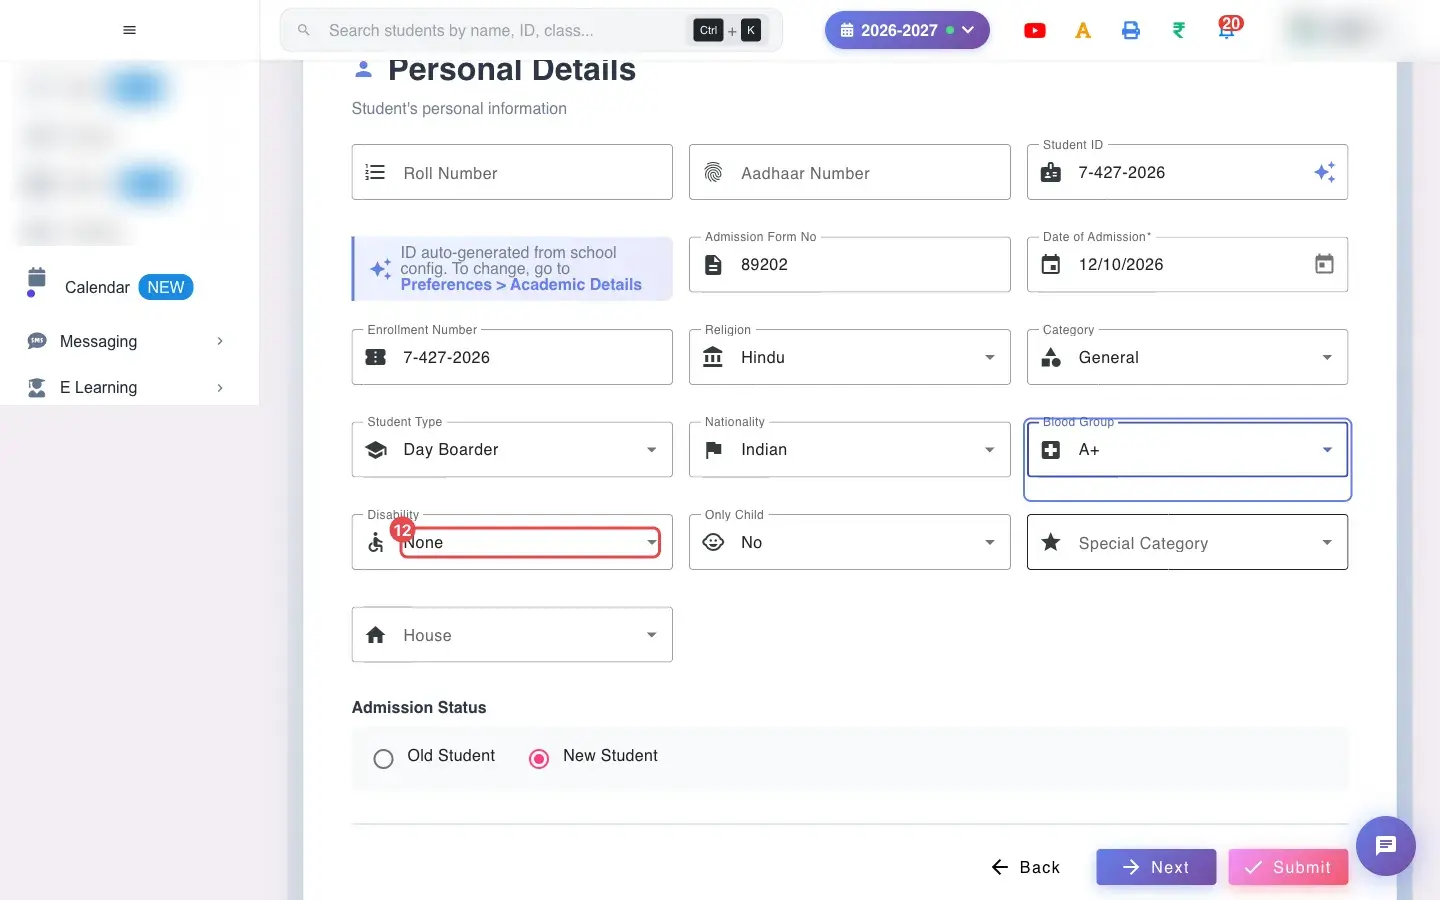
12. Choose Disability (for example None)
Section titled “12. Choose Disability (for example None)”Choose whether the student has a Disability.
 Open a bigger pictureतस्वीर बड़ी करें
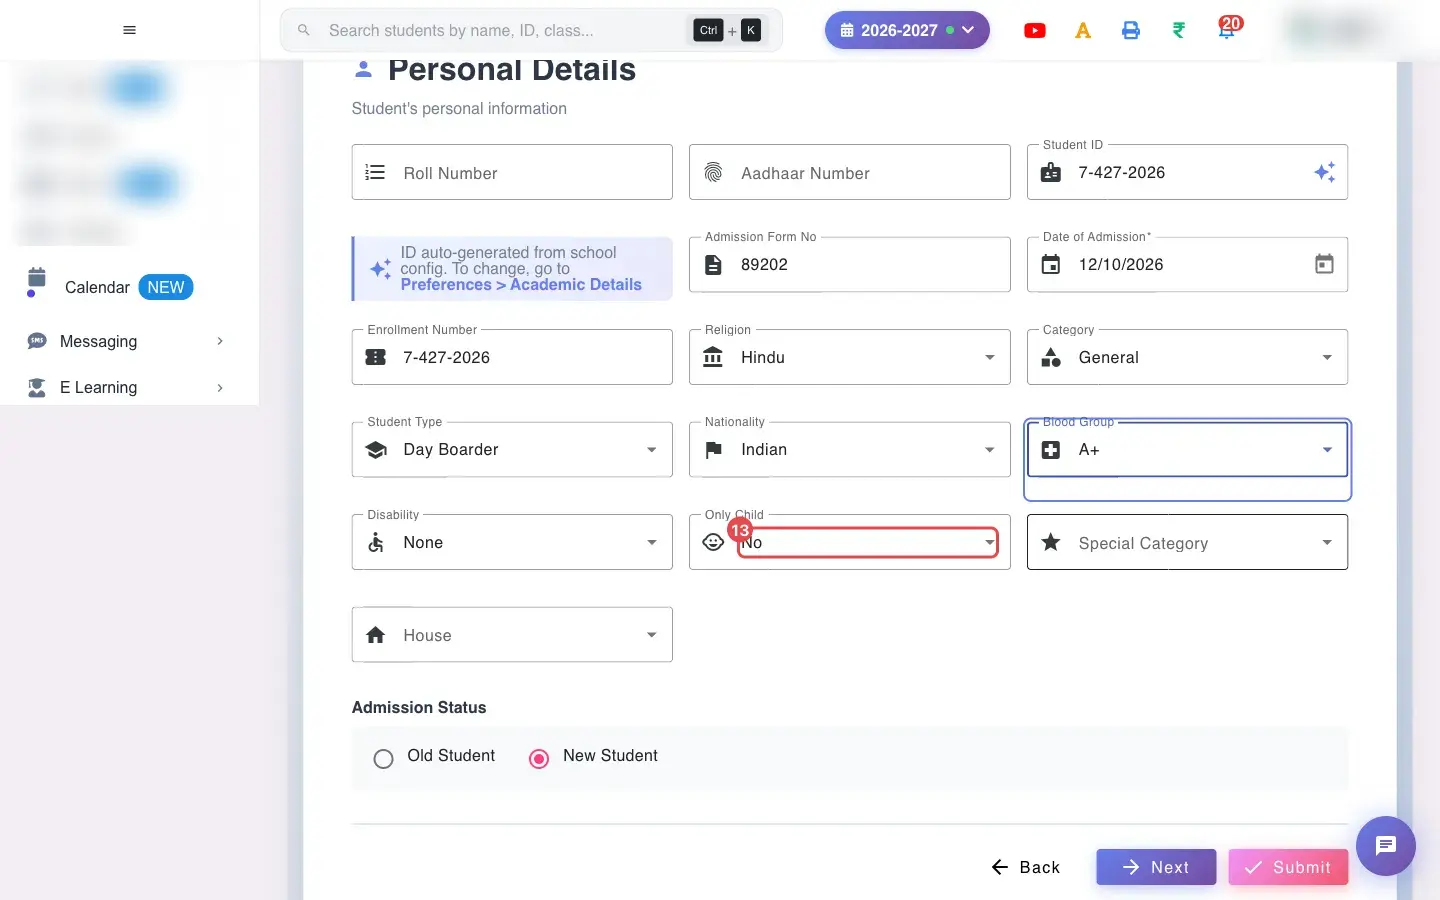
13. Choose Only Child (for example No)
Section titled “13. Choose Only Child (for example No)”Say whether the child is an Only Child.
 Open a bigger pictureतस्वीर बड़ी करें
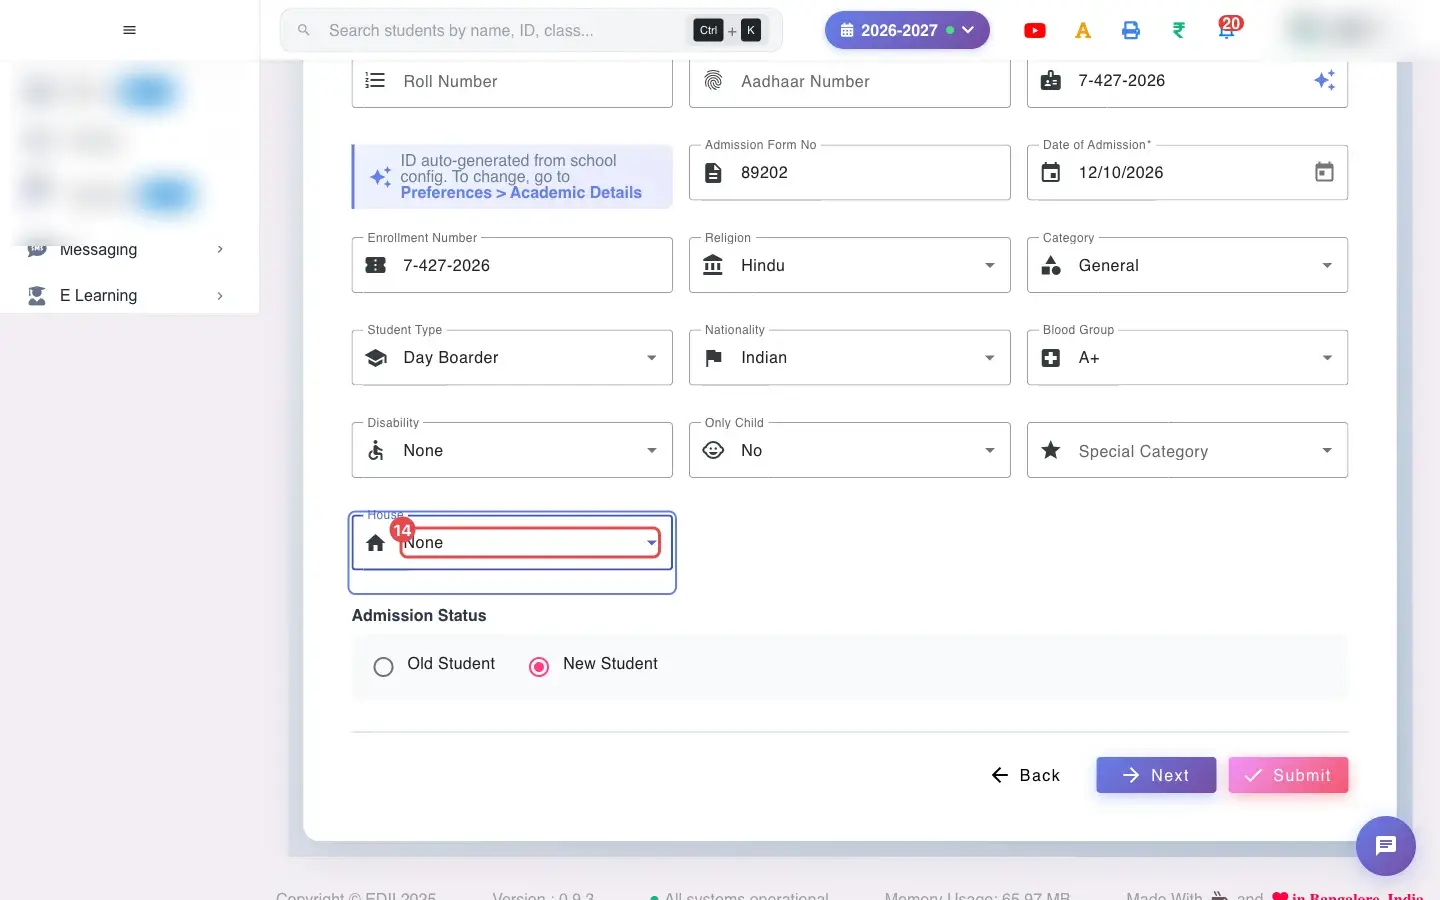
14. Choose House (for example None)
Section titled “14. Choose House (for example None)”Choose a House if your school uses houses.
 Open a bigger pictureतस्वीर बड़ी करें
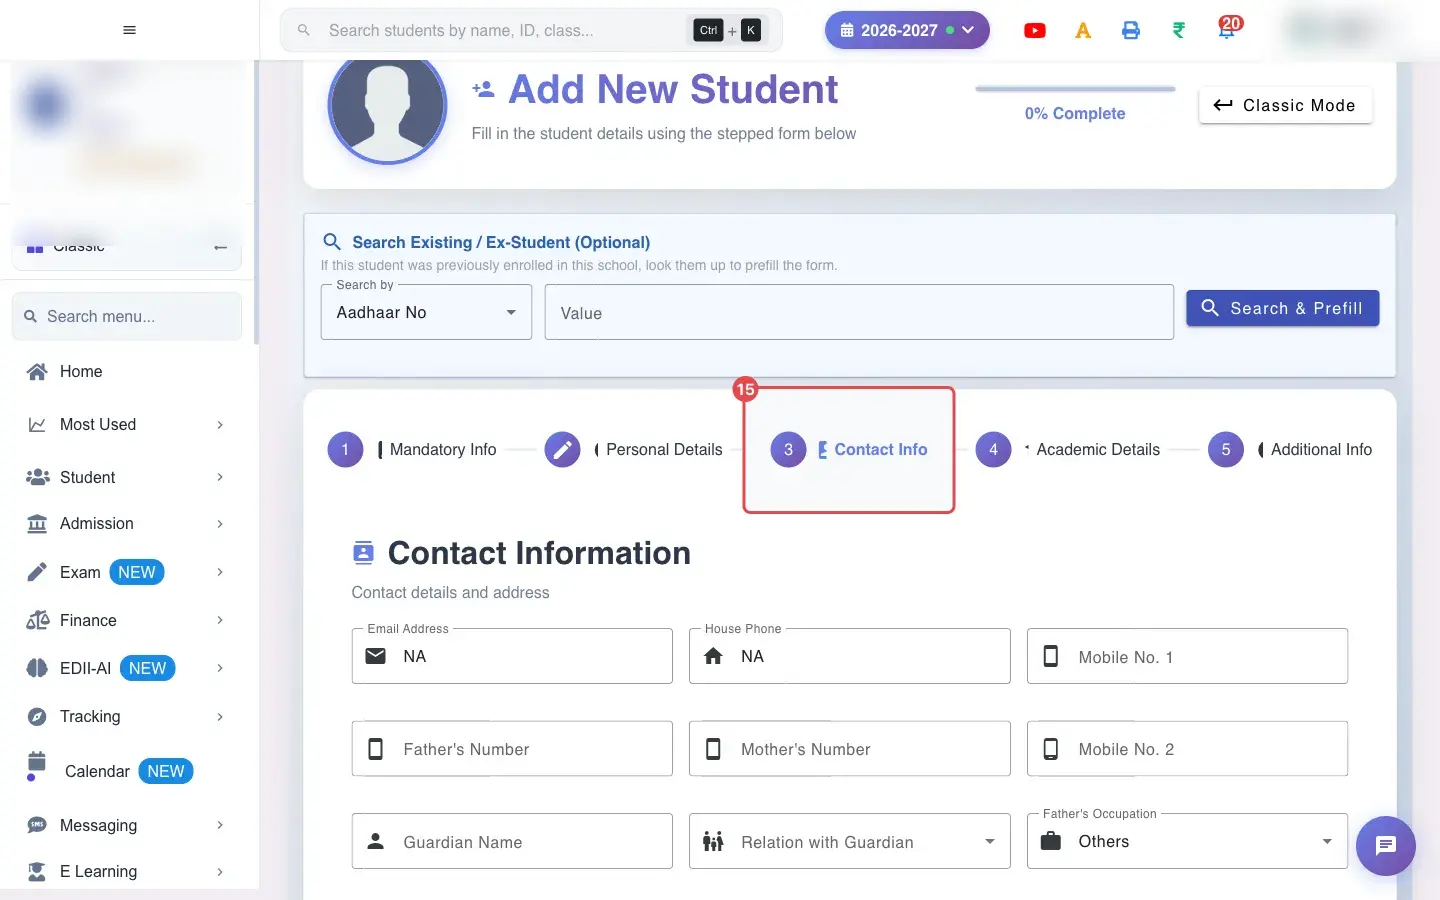
15. Open the 3 Contact Info tab
Section titled “15. Open the 3 Contact Info tab”Open the Contact Info tab.
 Open a bigger pictureतस्वीर बड़ी करें
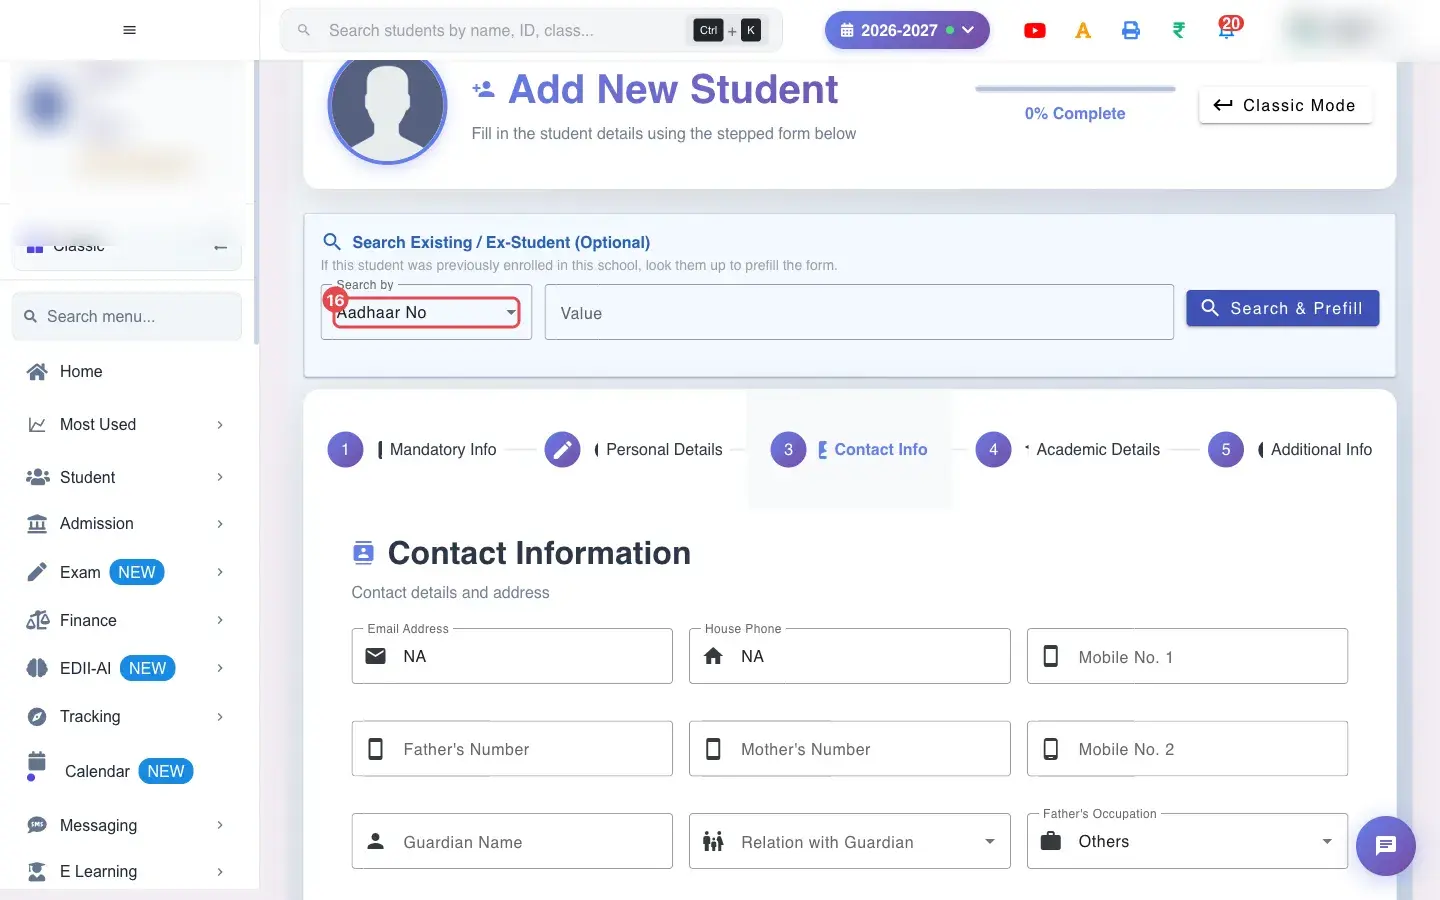
16. Choose Search by (for example Aadhaar No)
Section titled “16. Choose Search by (for example Aadhaar No)”The ex-student search stays available on this tab.
 Open a bigger pictureतस्वीर बड़ी करें
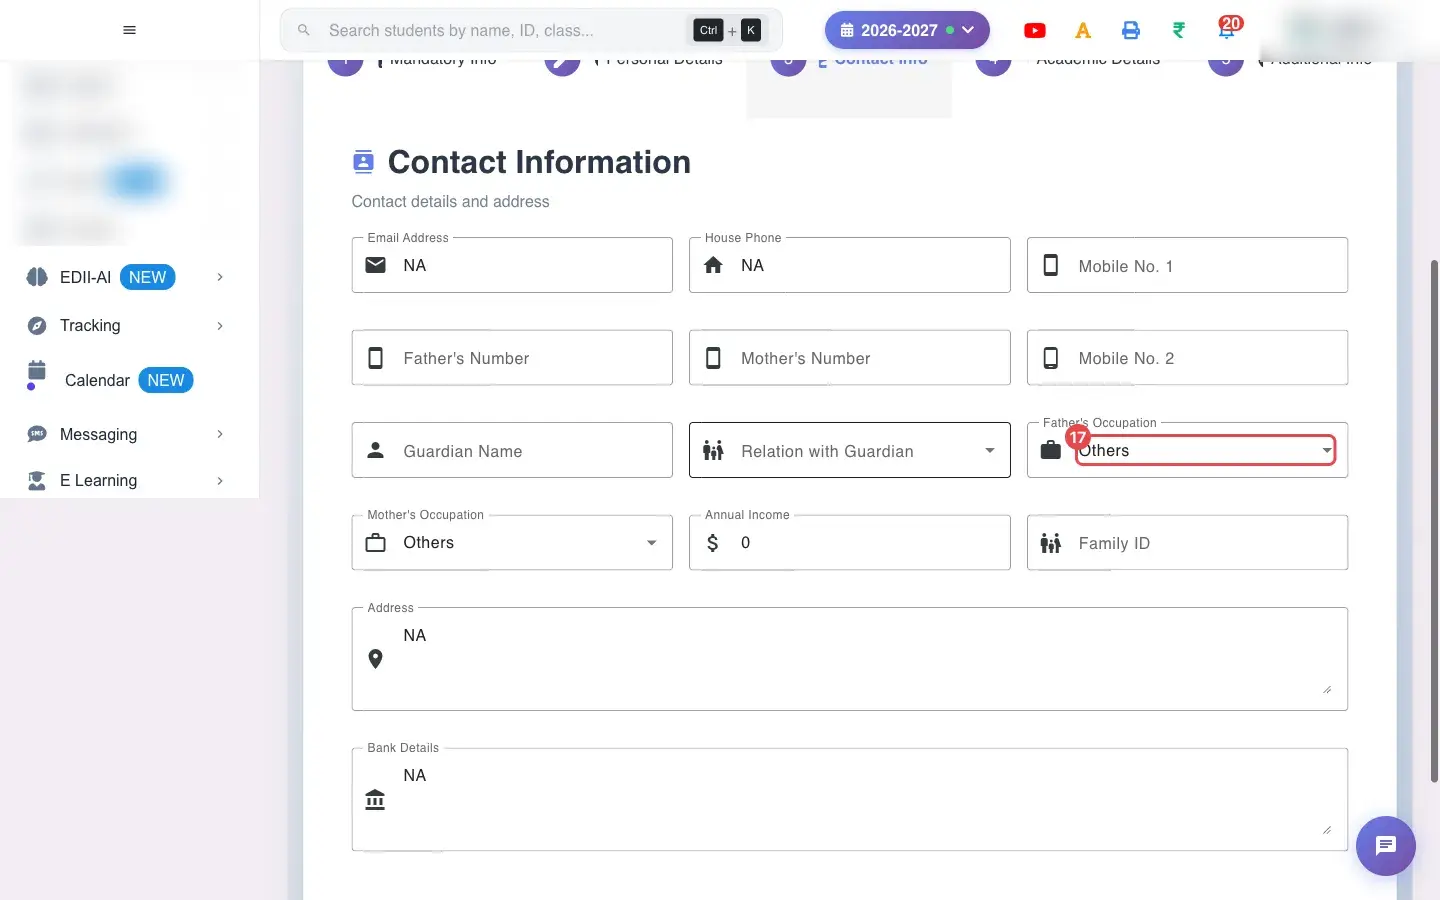
17. Choose Father’s Occupation (for example Others)
Section titled “17. Choose Father’s Occupation (for example Others)”Choose the Father’s Occupation.
 Open a bigger pictureतस्वीर बड़ी करें
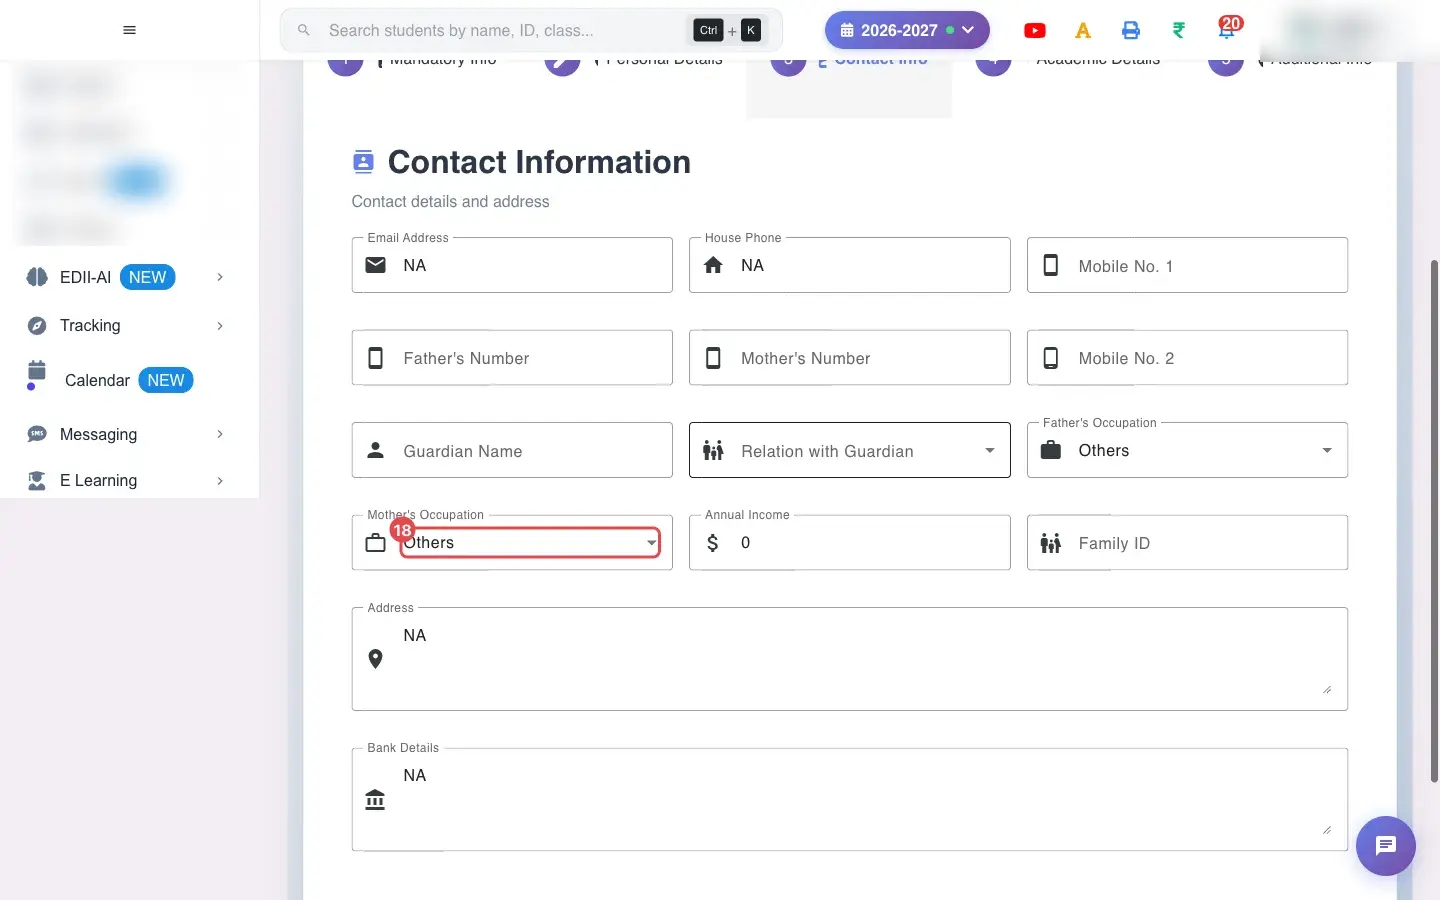
18. Choose Mother’s Occupation (for example Others)
Section titled “18. Choose Mother’s Occupation (for example Others)”Choose the Mother’s Occupation.
 Open a bigger pictureतस्वीर बड़ी करें
19. Tab 1: fill the mandatory details
Section titled “19. Tab 1: fill the mandatory details”The required fields are Student Name, Class, Section, Father’s Name, Mother’s Name, Gender, Date of Birth (DD-MM-YYYY) and Phone Number. Name on Aadhaar / Document is optional: tick Same as student name to copy it. Mother’s Number is optional.
A student must be at least 3 years old, or you see Date of Birth cannot be less than 3 years.
20. Tab 2: personal details
Section titled “20. Tab 2: personal details”Roll Number, Aadhaar Number, Student ID (Auto-generated ID), Admission Form No (Auto-generated form number), Date of Admission, Enrollment Number, Religion, Category, Student Type, Nationality, Blood Group, Disability, Only Child, Special Category (for example Sports Quota) and House (shown only when the school has houses).
21. Tab 3: contact information
Section titled “21. Tab 3: contact information”Email Address, House Phone, Mobile No. 1, Father’s Number, Mobile No. 2, Guardian Name, Relation with Guardian, Father’s Occupation, Mother’s Occupation, Annual Income, Family ID, Address and Bank Details.
22. Tab 4: academic details
Section titled “22. Tab 4: academic details”Previous Class, Previous School, PEN Number, State ID, Medium/Language, Stream, Old TC Provided?, Previous Year, Previous Board, Previous Roll No. and Previous Registration No. The PEN number is checked as you type: it must be more than 10 digits (PEN Number must be more than 10 digits) and must not already belong to another student.
23. Tab 5: additional information
Section titled “23. Tab 5: additional information”Mother Tongue, End Date of School, SMID, Apaar ID, FMID, Sch. No., Height (cm), Weight (kg), Father’s Education, Mother’s Education, Caste Name (Sub Caste), Father’s Aadhaar, Mother’s Aadhaar, GR Number, UID Number, Community, PRN, UDISE Code, Allergy, Comments, and, when the school collects fees at admission, Special Fees and Special Discount.
24. Add a photo
Section titled “24. Add a photo”Use the camera icon at the top to choose a photo. The file must be 10 MB or smaller, otherwise you see Max File Size is 10 MB.
25. Submit
Section titled “25. Submit”Select Submit (it appears on the last step). EDII first checks every mandatory field. If something is missing it jumps to the tab that has the problem and lists the fields: Please fill the mandatory fields: …. When everything is valid it checks for a duplicate student, then saves the student and shows a success window.
With data
Section titled “With data”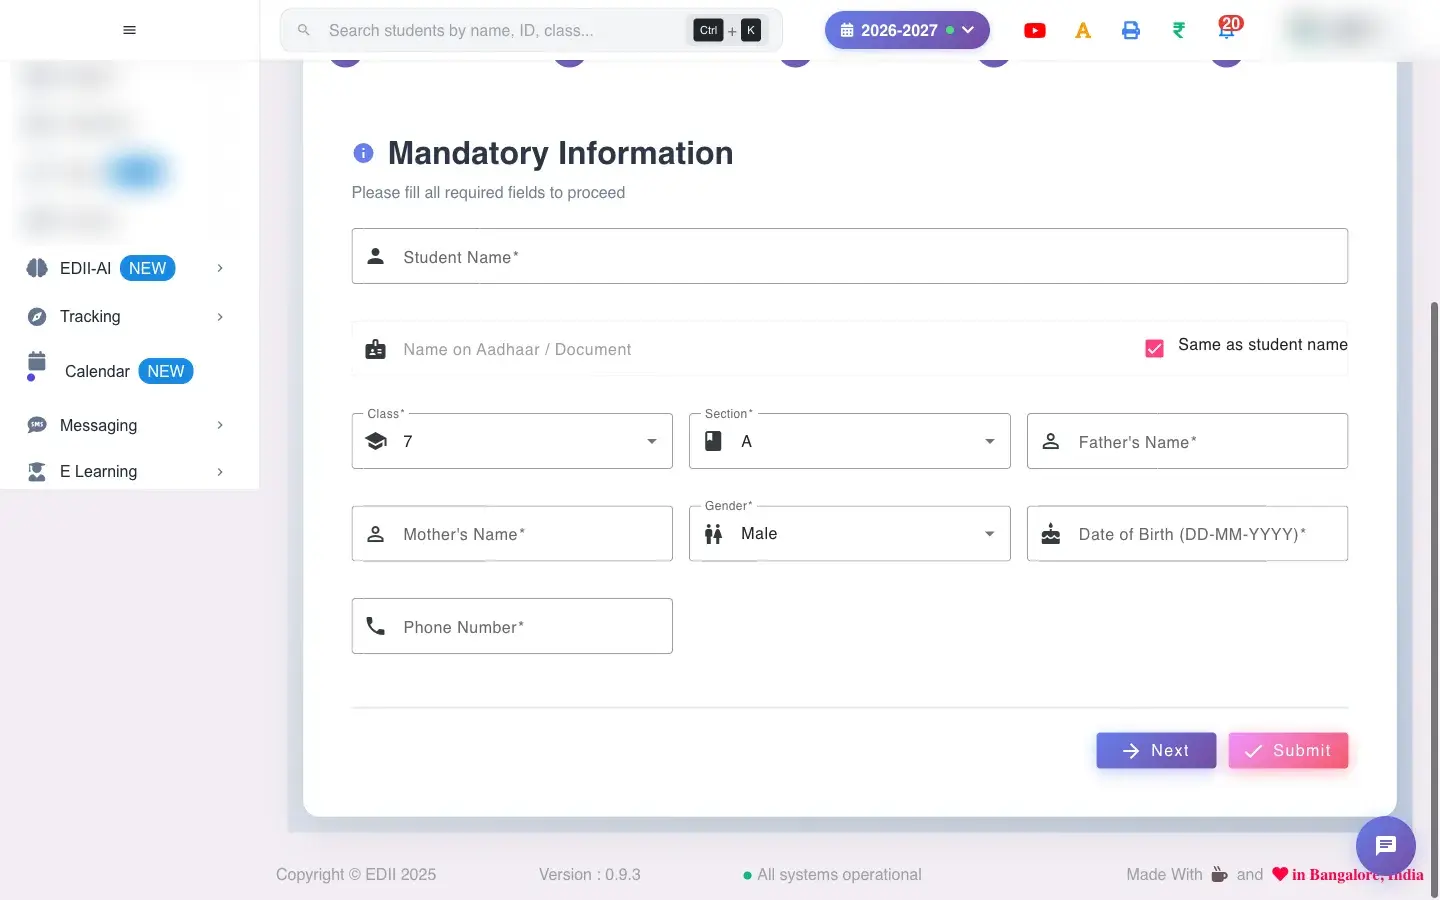 Open a bigger pictureतस्वीर बड़ी करें
Fields and filters
Section titled “Fields and filters”| Field | What it is | Notes |
|---|---|---|
| Student Name / Father’s Name / Mother’s Name | Names as on the admission form. | Required. |
| Class / Section / Gender | Where the student is admitted and gender. | Required. |
| Date of Birth | DD-MM-YYYY. | Required. At least 3 years old. |
| Phone Number | The parent’s main mobile number. | Required. Attendance and fee messages go here. |
| PEN Number | Permanent Education Number. | More than 10 digits; must be unique. |
| Student ID / Admission Form No / Enrollment Number | Identifiers. | ID and form number are generated; the enrollment number can be typed. |
| Photo | The student’s picture. | Up to 10 MB. |
Buttons
Section titled “Buttons”| Button | What it does | What happens next |
|---|---|---|
| Search & Prefill | Looks up a former student and fills the form. | Shows Form prefilled with ex-student details. Fresh ID, Enrollment, and Admission Form numbers have been generated. or Not found. |
| Next | Moves to the next tab. | Your entries are kept. |
| Submit | Validates and saves the student. | A success window appears; the student is added to the class. |
| Classic Mode | Opens the older single-page admission form. | Unsaved entries on this page are lost. |
| Enter New Category | Adds a new category to the list. | Category added successfully. |
After you save
Section titled “After you save”- The student is created in the chosen class and section for the current session, with a generated student ID and admission form number.
- Fees assigned to that class and section are linked to the student, together with any special fees or discounts you entered.
- The student appears in Student Search and the class lists immediately.
- The parent’s phone number becomes the number used for the student app login and school messages.
Good to know
Section titled “Good to know”- Mandatory: name, class, section, father’s name, mother’s name, gender, date of birth and phone number.
- A student must be at least 3 years old.
- A PEN number must be more than 10 digits and unique.
- A duplicate student (same details already in the school) is refused with a message.
- Photos are limited to 10 MB.
Messages you may see
Section titled “Messages you may see”| Message | What it means | What to do |
|---|---|---|
| Please fill the mandatory fields: … | One or more required fields are empty. | Fill the listed fields; EDII opens the tab that has the first missing one. |
| Date of Birth cannot be less than 3 years. | The student is too young. | Check the date of birth. |
| PEN Number must be more than 10 digits | The PEN is too short. | Enter the full PEN. |
| Max File Size is 10 MB | The photo is too big. | Choose a smaller photo. |
| Please enter a value to search / Please choose a field to search by | The ex-student search is incomplete. | Choose a field and type a value. |
| Form prefilled with ex-student details. Fresh ID, Enrollment, and Admission Form numbers have been generated. | A former student was found and copied. | Review and update the details, then submit. |
| Error generating admission number | The form number could not be created. | Try again or check Preferences. |
| Bad/Slow Internet Connection, Please check your internet connection | A request failed. | Check the internet and try again. |
- Search for the child first. Re-admissions then take seconds and keep their history clean.
- Fill only the mandatory tab for a quick admission and complete the rest later from Edit Student.
- Use the same phone number for siblings so parents see all children in one app.
Stuck? Try this
Section titled “Stuck? Try this”| Problem | Likely cause | What to do |
|---|---|---|
| Submit jumps back to an earlier tab | A required field there is empty. | Read the message, fill the field and submit again. |
| Student ID cannot be edited | It is generated from the school’s ID setting. | Change the ID format in Preferences › Academic Details. |
| House list is missing | The school has not created houses. | Create houses in Manage Houses. |
Did this page help?क्या इस पेज से मदद मिली?
Thanks! Glad it helped.धन्यवाद! अच्छा लगा कि काम बन गया।
Sorry about that. Ask in your own words, or write to us.माफ़ कीजिए। अपने शब्दों में पूछें, या हमें लिखें।